No-Churn Espresso Chocolate Chip Ice Cream
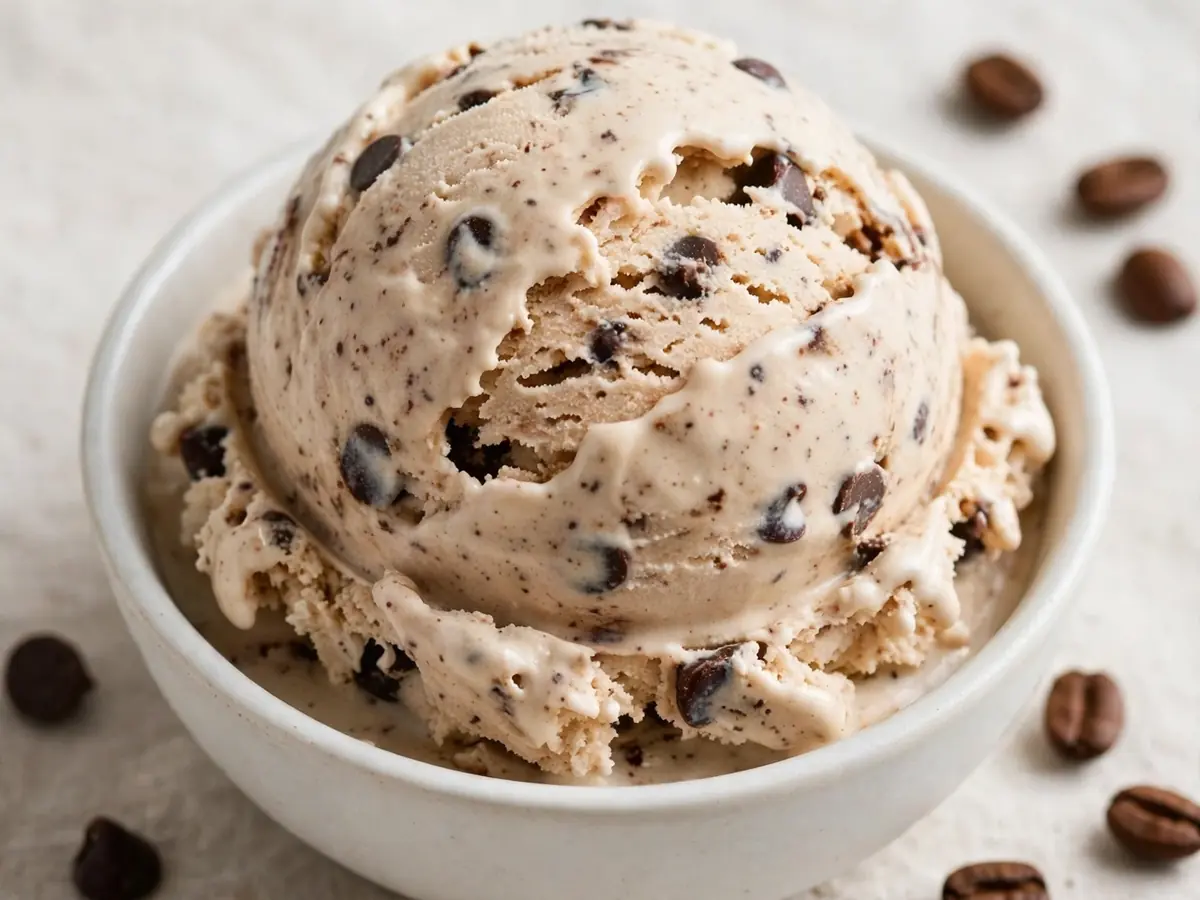
There’s a particular kind of satisfaction in making ice cream at home without an ice cream machine. No rock salt, no churning arm, no waiting for a bowl to pre-freeze. This no-churn espresso chocolate chip ice cream is the proof: a deeply coffee-flavored, barely sweet, generously speckled frozen dessert that you can assemble in about twenty minutes and then forget about until it’s firm. The method relies on two workhorses of the no-churn world — whipped cream and sweetened condensed milk — plus a small amount of care with the espresso so the coffee flavor stays bold rather than bitter. The chocolate chips are added at the end, folded in cold, so they stay as distinct shards rather than melting into the base.
What makes this version worth making rather than buying is control. You decide how strong the coffee is, how dark the chocolate, and whether the texture leans soft-serve or firm. It also happens to be an excellent way to use up a shot of espresso that would otherwise go to waste, and it needs no special equipment beyond a hand mixer and a loaf pan. Below you’ll find exact quantities, a full walkthrough, substitutions that actually work, and storage advice that keeps the texture pleasant for weeks rather than days.
Why No-Churn Works for Espresso Ice Cream
Traditional ice cream depends on churning to break up ice crystals as the base freezes. A no-churn base sidesteps that by trapping air in whipped cream and using sweetened condensed milk to keep the mixture soft and scoopable. The condensed milk lowers the freezing point slightly and contributes a smooth, almost custard-like body without eggs. Espresso fits this method especially well because coffee flavor is water-soluble and assertive; it does not need a custard base to carry it. In fact, a lighter dairy base lets the coffee come through more clearly.
The one real risk is dilution. Espresso and strong coffee both contain water, and water freezes into ice crystals. The fix is to keep the added liquid small — around 60 ml (¼ cup) for a standard batch — and to use a concentrated brew. A double shot of espresso, a strong moka pot brew, or a small amount of very concentrated instant coffee all work. What you should avoid is pouring in a full cup of leftover drip coffee, which will both water down the flavor and make the final texture icy.
Ingredients
This recipe makes about 1 liter (roughly 8 to 10 scoops), serving 8 people at approximately 125 ml per portion. All quantities are precise; weigh the condensed milk and cream if you can, since volume measures of cream vary with fat content and aeration.
- 480 ml (2 cups) heavy whipping cream, cold, at least 35% fat
- 397 g (one 14 oz can) sweetened condensed milk
- 60 ml (¼ cup) freshly brewed espresso or very strong coffee, cooled completely
- 1 teaspoon vanilla extract
- ¼ teaspoon fine sea salt
- 1 tablespoon unsweetened cocoa powder (optional, for depth of color and flavor)
- 100 g (about ⅔ cup) dark or semisweet chocolate chips, plus 2 tablespoons extra for the top
- Optional: 1 teaspoon instant espresso powder, dissolved into the liquid espresso, for a stronger coffee hit
Ingredient Notes
Use a chocolate chip with a decent cocoa percentage — 55% to 70% — because milk chocolate chips disappear against the coffee. Mini chips distribute more evenly and give a chip in nearly every bite; standard chips give bolder, crunchier shards. If you only have a chopped chocolate bar, chop it into pieces no larger than a pea so they don’t sink or create hard pockets.
The cocoa powder is optional but recommended. It does not make the ice cream chocolatey; it deepens the color to a proper espresso brown and rounds out the coffee’s edge. Sift it before adding, or it will clump when it hits the cold cream.
Equipment
- Electric hand mixer or stand mixer with whisk attachment
- Large mixing bowl, chilled if possible
- Medium bowl for the condensed milk mixture
- Rubber spatula
- 9 x 5 inch (23 x 13 cm) loaf pan or a similar 1-liter freezer-safe container
- Small whisk or fork
- Plastic wrap or a lid that fits the container
Chilling the mixing bowl and the whisk attachment for 10 to 15 minutes in the freezer noticeably speeds up whipping, especially in a warm kitchen. It is not mandatory, but it is the easiest upgrade to the method.
Preparation Instructions
- Brew and cool the espresso. Pull 60 ml (¼ cup) of espresso or brew an equivalent amount of very strong coffee. If using instant espresso powder for extra intensity, whisk 1 teaspoon into the hot liquid now so it dissolves fully. Transfer to a small bowl and cool completely — refrigerate for at least 20 minutes or set the bowl in an ice bath for 5 to 10 minutes. Warm liquid will deflate the whipped cream later, so do not skip this.
- Prepare the flavor base. In the medium bowl, whisk together the sweetened condensed milk, cooled espresso, vanilla extract, salt, and sifted cocoa powder (if using) until completely smooth and uniform in color. Scrape the bottom and sides of the bowl; condensed milk is thick and tends to hide unmixed pockets. Set aside at room temperature while you whip the cream.
- Whip the cream to soft-medium peaks. Pour the cold heavy cream into the chilled large bowl. Beat on medium speed for 1 minute, then increase to medium-high. Stop when the cream holds a soft peak that flops over gently at the tip — about 3 to 4 minutes with a hand mixer, less with a stand mixer. Do not take it to stiff peaks; over-whipped cream turns grainy and folds poorly, which produces a dense, buttery final texture.
- Lighten the base. Add about one-third of the whipped cream to the condensed milk mixture. Fold gently with the spatula, using a down-and-up motion and rotating the bowl, until mostly combined. This step loosens the heavy base so it will fold into the remaining cream without knocking out all the air.
- Fold in the rest. Scrape the lightened base into the bowl with the remaining whipped cream. Fold gently but thoroughly, scraping the bottom and sides, for about 30 to 45 seconds. Stop as soon as you see no large streaks of white or brown. A few faint marbled streaks are fine — they will even out in the freezer and over-folding is worse than slight unevenness.
- Add the chocolate chips. Sprinkle 100 g (about ⅔ cup) of the chocolate chips over the surface and fold them in with just three or four strokes. Work quickly; the mixture is cold and the chips should stay whole.
- Fill the pan. Pour or spoon the mixture into the loaf pan. Level the top with the spatula. Scatter the remaining 2 tablespoons of chocolate chips over the surface and press them in very lightly with the back of a spoon so they adhere.
- Cover and freeze. Press a piece of plastic wrap directly onto the surface of the ice cream, then cover the pan with a lid or a second layer of wrap. Freeze flat for at least 6 hours, ideally 8 to 12, until firm enough to scoop cleanly. For the best texture, freeze for 8 hours before serving.
- Serve. Let the pan sit at room temperature for 5 to 8 minutes before scooping. Run the scoop under hot water, dry it, and scoop in long strokes. Serve immediately; this ice cream softens quickly.
Timing at a Glance
Active preparation takes 15 to 20 minutes, plus 20 minutes of cooling time for the espresso. Freezing requires a minimum of 6 hours and preferably 8 to 12. Total time from start to first scoop is therefore about 7 hours at minimum, or overnight for the best result.
Tips for the Best Texture and Flavor
Keep everything cold. Cold cream whips faster and holds air better. Cold espresso prevents deflation. Cold bowls and beaters help in warm weather. If your kitchen is above 25°C (77°F), chill the bowl and beaters and work quickly once the cream is whipped.
Respect the fold. The difference between a light, creamy no-churn ice cream and a dense brick is how much air survives the folding stage. Use a spatula, not a whisk, and use a gentle scoop-and-turn motion rather than stirring. Fold until just combined.
Do not overdo the liquid. If you want more coffee flavor, add instant espresso powder or a coffee extract rather than more brewed coffee. Extra water is the most common cause of icy no-churn ice cream.
Chill the loaf pan. Putting the empty pan in the freezer for 15 minutes before filling it starts the freezing process immediately and produces smaller ice crystals at the edges.
Temper before scooping. No-churn ice cream freezes harder than commercial ice cream because it lacks stabilizers. Five to eight minutes on the counter transforms it from un scoopable to perfectly soft.
Toast the chips, if you like. Spreading the chocolate chips on a tray and warming them in a low oven for 5 minutes, then cooling them completely, gives a subtle roasted note that pairs well with espresso. Cool fully before folding or they will melt into the base.
Practical Substitutions
For the espresso: Use 60 ml (¼ cup) of strong moka pot coffee, cold brew concentrate, or 2 teaspoons of instant espresso powder dissolved in 60 ml of hot water and cooled. Do not substitute regular instant coffee at the same quantity — it is weaker and the flavor will be thin. Decaf espresso works identically.
For the heavy cream: Heavy whipping cream at 35% fat or higher is essential; light cream and half-and-half will not whip. There is no reliable no-churn substitute for the whipped cream itself. Coconut cream can be whipped for a dairy-free version, but the result is denser and should be served within a week.
For the sweetened condensed milk: A dairy-free condensed coconut milk works in the same quantity, though it adds a coconut note that competes with the espresso. There is no good substitute for the sweetness and body it provides, so avoid swapping it for evaporated milk, which is unsweetened and will not perform the same way.
For the chocolate chips: Chopped dark chocolate, chocolate chunks, or cacao nibs all work. Cacao nibs give a crunchier, less sweet result. White chocolate chips are too sweet against the espresso for most palates but can be used at half the quantity.
For the vanilla: Omit if unavailable; the espresso carries the flavor. A quarter teaspoon of almond extract in its place adds an interesting amaretto-like note.
Storage Guidance
Store the ice cream in the freezer, covered with plastic wrap pressed to the surface and a lid on top, for up to 2 months. The pressed wrap is the single most important detail: it prevents ice crystals from forming on the surface and stops the ice cream from absorbing freezer odors, which coffee-based desserts pick up readily.
For the best quality, eat within 3 to 4 weeks. After that, texture begins to coarsen and the coffee flavor fades slightly. If the surface does develop ice crystals, scrape them off with a spoon before serving; the ice cream beneath is usually unaffected.
Do not refreeze ice cream that has fully melted. If it softens during serving, press wrap back onto the surface and return it to the freezer promptly. Small amounts of melt at the edges are normal and will refreeze acceptably if returned to the freezer quickly.
For longer storage, portion the ice cream into smaller airtight containers rather than keeping one large pan that gets repeatedly opened. Smaller containers freeze faster, thaw less during serving, and stay fresher.
FAQ
Frequently Asked Questions
Can I make this no-churn espresso chocolate chip ice cream without an electric mixer?
Yes, but it takes effort and time. Whisk the cold cream by hand with a balloon whisk in a large, chilled bowl, using a steady side-to-side motion and rotating the bowl. Expect 8 to 12 minutes of continuous whisking to reach soft-medium peaks, longer in a warm kitchen. A whisk with many thin wires is far more efficient than a balloon whisk with few wires. The rest of the method is unchanged. If your arm tires, switch to a fork for 30 seconds and then return to the whisk; the change in tool sometimes speeds up the process.
Why did my ice cream turn out icy or grainy?
There are three usual culprits. First, too much liquid: more than about 60 ml of espresso or coffee adds water that freezes into crystals. Second, under-whipped cream: if the cream never reached soft peaks, there is not enough trapped air to keep the texture light. Third, over-folding: stirring instead of folding deflates the cream and produces a dense, sometimes grainy result. A fourth, less common cause is a very slow freeze — placing the pan in a warm part of the freezer or in a freezer that is opened frequently allows larger crystals to form. Freeze the pan flat, at the back of the freezer, undisturbed for the first 6 hours.
How strong should the espresso be, and can I use decaf?
Use a concentrated brew: a double shot of espresso, a moka pot brew, cold brew concentrate, or 2 teaspoons of instant espresso powder dissolved in 60 ml of water. The flavor should taste quite strong and slightly bitter on its own, because freezing mutes both sweetness and aroma. Decaf espresso works exactly the same way and is a good choice for an after-dinner dessert. Avoid using a full cup of standard drip coffee; it is too dilute and too watery for this quantity of base.
Can I add other mix-ins, and when should I add them?
Yes. Fold in up to 100 g total of firm mix-ins at the end, alongside the chocolate chips. Good options include toasted chopped hazelnuts or almonds, crushed chocolate cookies, small pieces of brownie, or chopped candied orange peel. Keep pieces small — no larger than a pea — so they distribute evenly and do not create hard frozen pockets. Soft or wet mix-ins such as caramel sauce, fruit compotes, or chocolate syrup should be swirled in at the very end with two or three strokes only, or they will bleed into the base and make it soggy. Add any swirl after the chips are folded in, not before.
How long does it keep, and can I make it ahead for a party?
Covered tightly with plastic wrap pressed to the surface and a lid, it keeps well for up to 2 months in the freezer, though the best texture and flavor are within the first 3 to 4 weeks. For a party, make it 2 to 3 days ahead — this is actually ideal, since the flavor melds and the texture firms fully. On the day, move the pan from the freezer to the refrigerator 15 minutes before serving if you want a softer scoop, or leave it on the counter for 5 to 8 minutes. Scoop into chilled bowls to slow melting.
Can I double the recipe?
Yes, but use two containers rather than one deep pan. Doubling the volume in a single loaf pan means the center freezes much more slowly, which produces a coarser texture and can leave the middle soft for hours. Make two separate batches in two bowls, or double the quantities and divide the finished mixture between two 1-liter containers. Freeze both flat and side by side, leaving a little space between them for air circulation. The freezing time will be roughly the same as a single batch.