Crispy Smashed Chickpea Salad Sandwiches
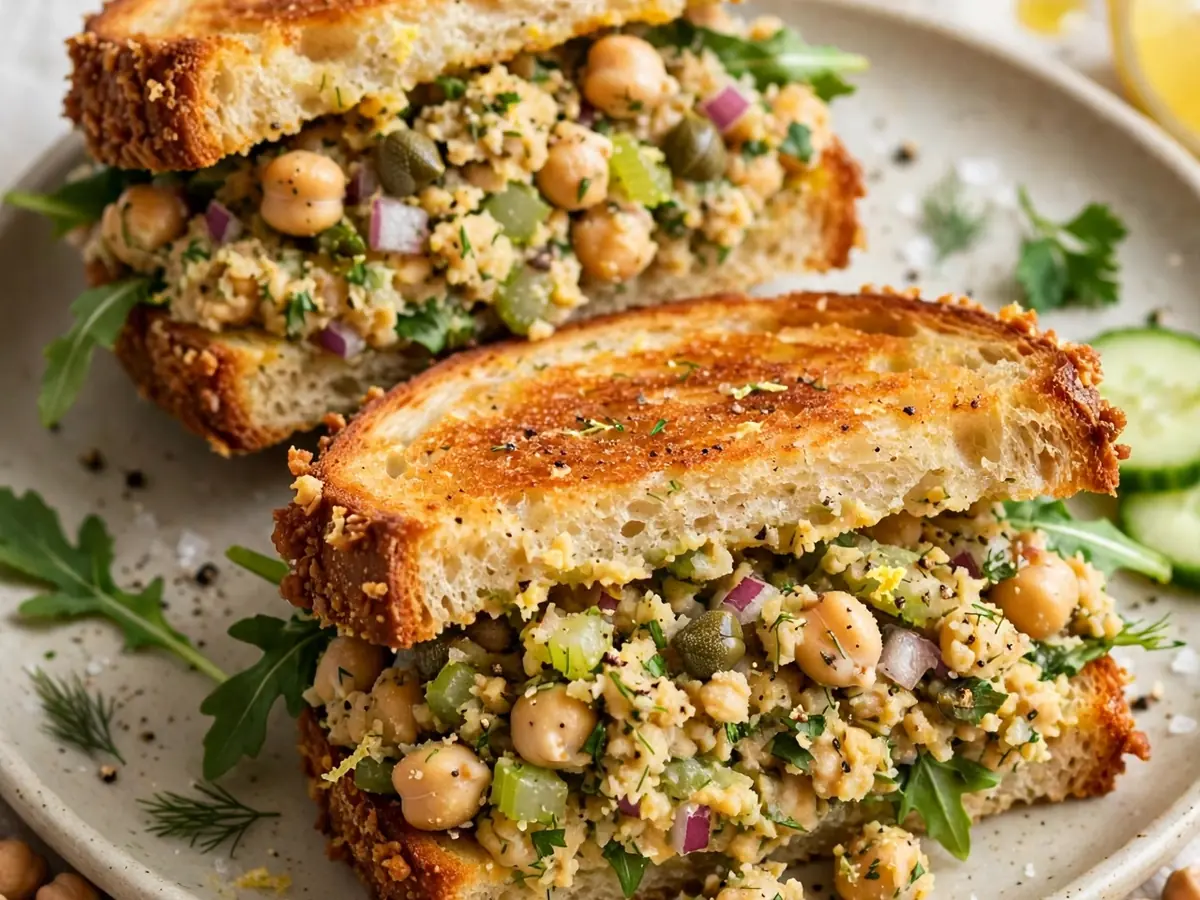
Some sandwiches are built for quiet afternoons and paper-thin cucumber slices. This one is built for appetite. Crispy smashed chickpea salad sandwiches take the familiar, comforting idea of a chickpea salad filling and give it a decisive upgrade: the chickpeas are partially smashed, seasoned boldly, and pan-crisped until their edges turn golden and crackly. Piled onto toasted bread with a cool, crunchy slaw and a creamy, tangy dressing, the result is a sandwich that eats like a proper meal — hearty enough for dinner, portable enough for a lunchbox, and flexible enough to absorb whatever herbs, pickles, or spices you have on hand.
The method is deliberately simple. You do not need a food processor, a stand mixer, or any special equipment beyond a skillet and a fork. What you do need is a little patience with the skillet: the chickpeas crisp best when they are spread in a single layer, left mostly undisturbed, and given a few extra minutes to develop color. That contrast — crispy exterior, creamy interior — is what separates this sandwich from every ordinary mashed chickpea spread. The cool, acidic slaw and the mustard-forward dressing keep the whole thing from feeling heavy, and sturdy bread holds everything together without turning soggy.
This recipe makes four generous sandwiches and scales up or down easily. It is also forgiving: the crispy chickpeas can be cooked ahead, the dressing can be mixed in advance, and the slaw can be prepped a few hours before assembly. Whether you are feeding a household on a busy weeknight or packing lunches for the next day, the components are designed to travel well. If you enjoy chickpeas in cooler, crunchier formats, our fresh chickpea cucumber salad is a natural companion recipe, and the Cookingenious blog has more everyday ideas built around pantry staples.
Why Crispy Smashed Chickpeas Work in a Sandwich
A standard chickpea salad sandwich relies on mashed chickpeas bound with mayonnaise. It is pleasant, but the texture is uniform — soft on soft on soft. Smashing only about two-thirds of the chickpeas and leaving the rest whole or halved creates a filling with built-in variation. Then the skillet does the rest: the smashed surfaces and loose chickpea skins make direct contact with hot oil and turn crisp and deeply savory, while the larger pieces stay tender.
Two details make the crisping reliable. First, the chickpeas must be thoroughly dried. Surface moisture steams the chickpeas instead of frying them, so a few minutes on a clean kitchen towel matters more than any seasoning. Second, the pan must be hot before the chickpeas go in, and the chickpeas should be pressed into a relatively even layer. You are not deep-frying; you are using a modest amount of oil to create a crust. A cast-iron or heavy nonstick skillet gives the most consistent results.
The seasoning goes in two stages. A portion of the spices is added to the chickpeas while they crisp, so the ground spices toast in the oil and bloom. The rest is folded in off the heat along with lemon juice, mustard, and a creamy binder. This layered approach means the filling tastes seasoned throughout rather than only on the surface.
Ingredients
For the crispy smashed chickpeas:
- 2 cans (15 ounces / 425 g each) chickpeas, drained and rinsed, about 3 cups cooked chickpeas
- 3 tablespoons olive oil, divided
- 1 teaspoon smoked paprika
- 1/2 teaspoon ground cumin
- 1/2 teaspoon garlic powder
- 1/2 teaspoon fine sea salt, plus more to taste
- 1/4 teaspoon freshly ground black pepper
For the creamy dressing:
- 1/3 cup plain Greek yogurt (or vegan mayonnaise)
- 3 tablespoons mayonnaise
- 1 tablespoon Dijon mustard
- 1 tablespoon fresh lemon juice
- 1 teaspoon maple syrup or honey
- 2 tablespoons finely chopped fresh dill, plus extra for serving
- 1 tablespoon finely chopped capers or diced dill pickle
- 1/4 teaspoon fine sea salt
For the crunchy slaw:
- 2 cups thinly shredded green cabbage (about 1/4 small head)
- 1 medium carrot, coarsely grated (about 1/2 cup)
- 1/4 small red onion, very thinly sliced
- 1 tablespoon fresh lemon juice
- 1/4 teaspoon fine sea salt
For assembly:
- 8 slices sturdy sandwich bread, such as sourdough, whole wheat, or ciabatta
- 2 tablespoons softened butter or olive oil, for toasting
- 1 ripe avocado, sliced (optional)
- Handful of fresh arugula or lettuce leaves (optional)
Yield: 4 sandwiches. Active time: about 25 minutes. Total time: about 35 minutes.
Equipment
- Colander and clean kitchen towels or paper towels
- Large heavy skillet, preferably cast iron or a good nonstick pan
- Mixing bowls (two medium, one small)
- Fork or potato masher
- Wooden spoon or spatula
- Box grater
- Sharp knife and cutting board
- Serrated knife for slicing bread
Step-by-Step Preparation
Step 1: Dry the chickpeas thoroughly
Drain and rinse the chickpeas in a colander, then shake off as much water as possible. Spread them in a single layer on a clean kitchen towel or a double layer of paper towels. Pat dry firmly and let them sit for 5 to 10 minutes while you prepare the other components. Remove any loose skins that come away easily; leaving some is fine, but too many loose skins will burn in the pan.
Step 2: Make the dressing
In a small bowl, whisk together the Greek yogurt, mayonnaise, Dijon mustard, lemon juice, maple syrup, chopped dill, capers, and 1/4 teaspoon salt until smooth. Taste and adjust with a pinch more salt or a squeeze of lemon if needed. Set aside. The dressing should be thick enough to cling to the chickpeas but loose enough to fold through easily; if it seems stiff, add water one teaspoon at a time.
Step 3: Toss the slaw
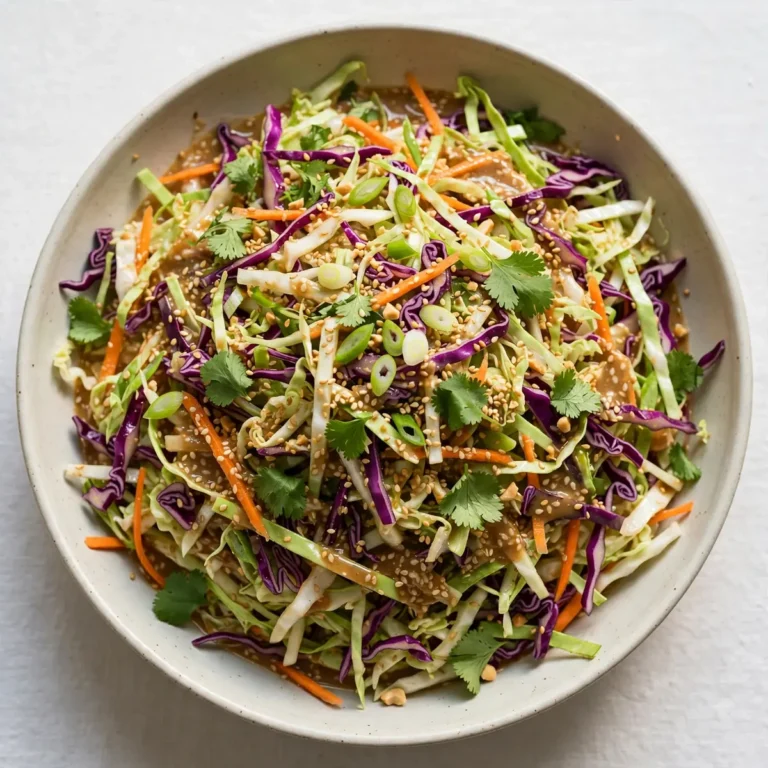
In a medium bowl, combine the shredded cabbage, grated carrot, and thinly sliced red onion. Add the lemon juice and 1/4 teaspoon salt, then toss well with clean hands or tongs, pressing lightly so the cabbage begins to soften. Set aside at room temperature. The slaw should stay crisp but lose its raw edge by the time you assemble the sandwiches.
Step 4: Smash the chickpeas
Transfer the dried chickpeas to a medium bowl. Using a fork or potato masher, crush about two-thirds of them, leaving roughly one-third whole or merely halved. Stop while the mixture still looks chunky and varied — a uniform paste will not crisp well. Stir in 1/2 teaspoon smoked paprika, 1/4 teaspoon cumin, 1/4 teaspoon garlic powder, 1/2 teaspoon salt, and the black pepper until evenly distributed.
Step 5: Crisp the chickpeas
Heat 2 tablespoons of the olive oil in a large heavy skillet over medium-high heat until it shimmers. Add the smashed chickpeas and press them into an even layer with the back of a spatula. Let them cook undisturbed for 4 to 5 minutes, until the underside is deeply golden in patches. Stir, press down again, and cook for another 3 to 4 minutes. Add the remaining 1 tablespoon olive oil along with the remaining 1/2 teaspoon smoked paprika and 1/4 teaspoon cumin, stir, and cook for 1 to 2 minutes more, until the chickpeas are crisp at the edges and smell toasted. Total cooking time is roughly 9 to 11 minutes.
Step 6: Finish the filling
Scrape the hot chickpeas into a mixing bowl and let them cool for 3 to 4 minutes — just enough to stop steaming but still warm. Fold in the dressing, starting with about three-quarters of it and adding more until the filling holds together without being wet. Taste and adjust with salt, lemon juice, or extra dill. The filling should be creamy but not loose; excess dressing will make the bread soggy.
Step 7: Toast the bread
Wipe the skillet clean, return it to medium heat, and add a thin film of butter or olive oil. Toast the bread slices in batches for 1 to 2 minutes per side, until golden and crisp at the edges. Toasting is not optional here — it creates a moisture barrier that keeps the sandwich structurally sound.
Step 8: Assemble the sandwiches
Lay four toasted slices on a work surface. Spread each with a spoonful of the remaining dressing, then pile on a generous portion of the crispy chickpea filling, pressing it gently so it adheres. Top with a handful of the slaw, a few avocado slices if using, and a small handful of arugula or lettuce. Close with the remaining toasted slices, press down lightly, and cut in half on a diagonal. Serve immediately.
Tips for the Best Results
- Dry chickpeas are crisp chickpeas. If the chickpeas are still wet when they hit the pan, they will steam and turn mushy. Pat them dry twice if needed.
- Do not over-smash. A chunky, uneven mixture gives you both crispy bits and creamy pockets. A fully smooth mash turns gluey.
- Season in layers. Toasting part of the spices with the chickpeas and folding the rest in later builds a deeper flavor than adding everything at once.
- Keep the slaw cold and the chickpeas warm. The temperature contrast is part of what makes the sandwich feel fresh rather than heavy.
- Control the moisture. Drain the slaw briefly if it releases a lot of liquid, and go easy on the dressing. A dry-ish filling is better than a soggy sandwich.
- Toast aggressively. Golden, crisp bread is the difference between a sandwich that holds together and one that falls apart in your hands.
Practical Substitutions
- Chickpeas: Use 3 cups of home-cooked chickpeas, drained and dried well. Canned cannellini or butter beans work as a softer, creamier substitute, though they crisp less readily.
- Creamy binder: Replace the Greek yogurt and mayonnaise with all vegan mayonnaise, or use sour cream in place of the yogurt. For a lighter version, use half yogurt and half mashed avocado.
- Mustard: Whole-grain mustard can replace Dijon for a coarser texture and milder heat.
- Herbs: Swap dill for parsley, cilantro, or basil. Use 1 teaspoon dried dill if fresh is unavailable, adding it to the dressing.
- Cabbage: Shredded iceberg, romaine, or fennel can stand in for green cabbage. Keep the carrot and onion for sweetness and bite.
- Bread: Pita pockets, focaccia squares, or sturdy rolls all work. Avoid soft, thin sandwich bread, which will tear under the filling.
- Make it spicy: Add 1/4 teaspoon cayenne or a finely chopped chipotle pepper to the chickpeas while they crisp, or stir a teaspoon of hot sauce into the dressing.
Make-Ahead and Storage Guidance
The components can be prepared separately and assembled when needed. The crispy chickpeas are best within 2 hours of cooking, but they can be refrigerated in an airtight container for up to 3 days; reheat them in a dry skillet over medium heat for 3 to 4 minutes to revive some crispness. The dressing keeps refrigerated in a sealed jar for up to 5 days. The slaw is best used within 24 hours, though it will stay acceptable for 2 days if kept cold and drained before use.
Assembled sandwiches do not store well because the bread softens. If you need packed lunches, store the filling, slaw, and bread separately and assemble on site, or pack the filling in a small container and the toasted bread alongside. Leftover filling alone keeps refrigerated for up to 3 days; stir in a spoonful of fresh dressing and a squeeze of lemon before serving. Do not freeze the finished filling, as the yogurt and mayonnaise will separate and the chickpea texture will suffer.
Frequently Asked Questions
Can I make this sandwich without canned chickpeas?
Yes. Cook 1 cup of dried chickpeas until tender, which yields roughly 3 cups, then drain and dry them thoroughly. Home-cooked chickpeas often crisp even better than canned because you control the firmness — cook them just until tender rather than very soft, and salt the cooking water well.
Why do my smashed chickpeas turn out soggy instead of crispy?
Moisture is almost always the culprit. Chickpeas must be patted completely dry before they go into the pan, and the pan must be fully heated before adding them. Crowding the skillet also traps steam, so cook in batches if your pan is small, and resist stirring constantly — let the chickpeas sit in contact with the hot surface to build a crust.
Is this recipe vegan, and how do I make it fully plant-based?
As written, it contains dairy yogurt and mayonnaise. To make it vegan, use plant-based yogurt and vegan mayonnaise in the dressing, and toast the bread in olive oil instead of butter. Check that your bread is vegan, since some sandwich loaves contain milk or honey.
How far in advance can I assemble these sandwiches for a party or picnic?
Assemble no more than 1 to 2 hours ahead for best texture. For buffets or picnics, set out the toasted bread, warm chickpea filling, and chilled slaw separately and let guests build their own. If you must assemble ahead, spread a thin layer of mustard or dressing on both slices of bread first to slow moisture absorption.
What can I do with leftover crispy chickpea filling?
Treat it as a versatile component rather than a sandwich-only filling. Spoon it over a green salad, fold it into a grain bowl with quinoa or farro, use it as a topping for baked potatoes, or spread it on crackers as a hearty snack. Refresh it with a squeeze of lemon and a sprinkle of fresh herbs before serving.
Can I use a different bean if I do not have chickpeas?
Cannellini beans, butter beans, and white beans are the closest substitutes, though they are softer and will crisp less dramatically. If using them, reduce the smashing and increase the skillet time slightly to drive off moisture. Lentils are not recommended here because they lack the sturdy texture needed for the crispy contrast.