Instant Pot Garlic Mashed Potatoes For Busy Nights
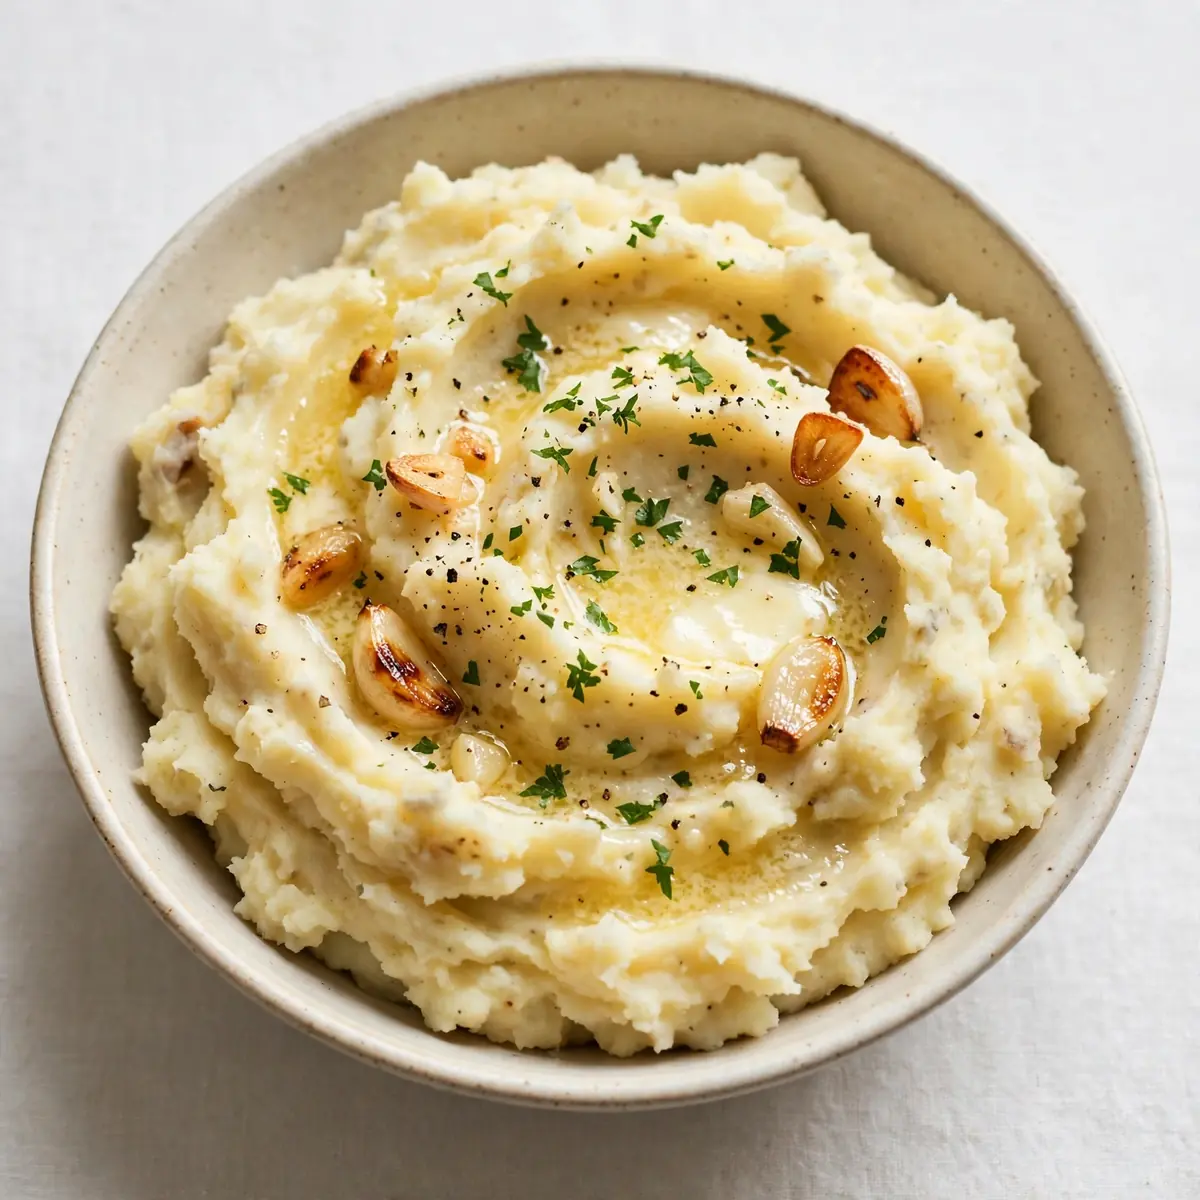
Getting a hot, homemade dinner on the table after a long day feels like a small victory — and these Instant Pot Garlic Mashed Potatoes make that victory a lot easier to reach. By pressure-cooking the potatoes whole with a handful of garlic cloves, we skip the big pot of boiling water, the draining, and most of the washing up. The result is a silky, deeply savoury bowl of mash that tastes like you spent an hour on it, when really the Instant Pot did the heavy lifting while you got on with everything else.
Recipe Overview
- Prep time: 10 minutes
- Cook time: 12 minutes (plus 10 minutes natural release)
- Total time: About 35 minutes from cupboard to table
- Servings: 6 generous portions
- Difficulty: Easy — no draining, no guessing
- Equipment: 6-quart (5.7-litre) Instant Pot or similar electric pressure cooker
Why You’ll Love This Instant Pot Garlic Mashed Potatoes
- One pot, start to finish. The potatoes, garlic, and liquid all go into the same insert. You mash directly in the pot, which means no colander, no second saucepan, and no stack of dishes waiting for you at nine o’clock at night.
- Hands-off cooking. Once the lid is locked, you have twelve minutes to set the table, help with homework, or simply sit down. The pot does not need stirring, watching, or adjusting.
- Genuinely garlicky, not vaguely garlicky. Whole cloves steam alongside the potatoes and turn soft and sweet. When you mash them in, the flavour runs through every single bite rather than sitting on the surface.
- Make-ahead friendly. You can pressure-cook the potatoes in the morning, keep them in the fridge, and finish the mashing just before dinner. They also reheat beautifully the next day.
- Foolproof texture. Because the potatoes steam rather than boil, they absorb less water, so you need less butter and cream to get them smooth. That is the trick I wish someone had told me years ago.

Ingredients You’ll Need
- 1.5 kg floury potatoes (Maris Piper, King Edward, or Russet), peeled and cut into 4 cm chunks
- 8 garlic cloves, peeled and left whole
- 240 ml chicken stock or vegetable stock
- 1 teaspoon fine sea salt, plus more to taste
- 120 ml whole milk, warmed
- 60 ml double cream, warmed
- 80 g unsalted butter, cut into cubes, at room temperature
- 60 g full-fat cream cheese, at room temperature
- ½ teaspoon freshly ground black pepper
- ¼ teaspoon ground white pepper (optional, for a smoother finish)
- 2 tablespoons finely chopped fresh chives or flat-leaf parsley, to finish
- Extra melted butter, for drizzling
Tip: Warm your milk and cream before they go anywhere near the potatoes. Cold liquid shocks the starch and gives you gluey mash — a mistake I made for years before working out why my potatoes always turned out heavy.
How to Make Instant Pot Garlic Mashed Potatoes
- Prepare the potatoes. Peel the potatoes and cut them into roughly 4 cm chunks so they cook evenly. As you work, drop them straight into the Instant Pot insert. You should hear a soft thud as each piece lands — that is fine, no water is needed underneath yet.
- Add garlic and stock. Scatter the whole garlic cloves over the potatoes, then pour in the stock. It will only come about a third of the way up the potatoes, which is exactly right. Season with the teaspoon of salt and give everything a gentle stir so the cloves settle between the chunks.
- Pressure cook. Lock the lid and set the valve to sealing. Select High Pressure and set the timer for 12 minutes. The pot will take roughly 8 to 10 minutes to come up to pressure; you will hear a faint hum and see a thin wisp of steam before the float valve pops up.
- Let the pressure release naturally. When the timer sounds, switch the pot off and leave it alone for 10 minutes. Do not touch the valve. After 10 minutes, carefully turn the valve to venting to release any remaining steam. Open the lid away from your face — the rush of steam smells richly of roasted garlic and warm stock.
- Check the potatoes. Pierce a chunk with a fork. It should slide in with almost no resistance and the potato should crumble slightly at the edges. If there is any firmness at all, lock the lid and cook for 2 more minutes on High Pressure.
- Mash while hot. Tip out any excess liquid, leaving about 2 tablespoons behind. Add the butter and cream cheese first and mash with a potato masher until the butter melts into the potatoes — about 1 minute. The mixture will look glossy and slightly loose at this stage.
- Add the warm dairy. Pour in the warmed milk and cream in three additions, mashing gently between each. Stop as soon as the texture is smooth and fluffy. Overworking is what turns mash sticky, so resist the urge to keep going.
- Season and finish. Stir through the black pepper and white pepper if using, then taste and adjust the salt. Fold in the chopped chives, drizzle with a little melted butter, and serve straight away while the steam is still rising.
Tips From My Kitchen
- Cut the potatoes to a uniform size. Uneven chunks mean some pieces turn to mush while others stay firm. Aim for every piece to be roughly the same 4 cm cube so the 12-minute cook time works reliably every single time.
- Use a floury potato, not a waxy one. Maris Piper, King Edward, and Russet break down into a light, fluffy mash. Waxy varieties like Charlotte hold their shape too well and give you a lumpy, gluey result no matter how hard you mash.
- Warm the dairy before it goes in. This is the single change that improved my mash the most. Cold milk and cream seize up the starch and create a dense, pasty texture. Thirty seconds in the microwave is all it takes.
- Butter first, liquid second. Coating the hot potatoes in fat before adding any liquid helps keep the starch granules separate, which is what gives you that silky, non-gluey finish. It sounds fussy; it is not.
- Mash by hand, not with a blender. A food processor or immersion blender whips the starch into a paste within seconds. A simple potato masher or a ricer gives you control and a far better texture.
- Make it ahead without losing quality. Cook the potatoes up to the end of step 4 in the morning, leave them in the sealed pot at room temperature for up to 4 hours, then reheat on Sauté for 2 minutes and finish the mash. For longer storage, refrigerate the drained potatoes for up to 2 days and reheat with a splash of stock.
- Hold them warm for a crowd. Set the finished mash over a bowl of hot water, cover tightly, and it will stay serveable for about 30 minutes. Give it a quick stir before dishing up.
Common Mistakes to Avoid
- Overcrowding the pot: Filling the insert past the maximum fill line stops the pot reaching pressure properly and can leave the potatoes half-cooked at the centre. Stick to 1.5 kg of potatoes in a 6-quart pot, and if you are scaling up, cook in two batches rather than cramming everything in.
- Wrong temperature: Using cold milk, cold butter, or cold cream is the most common reason mash turns out heavy. Everything going into the potatoes should be at room temperature or gently warmed — no exceptions. Equally, do not let the potatoes cool down before mashing; work with them while they are steaming hot.
- Skipping the rest time: A quick release after pressure cooking sends starchy water spraying through the valve and leaves the potatoes unevenly cooked. The 10-minute natural release lets the heat distribute evenly through every chunk and keeps the pot clean, so please do not rush this stage.
Delicious Variations to Try
- Spicy Version: Add 1 teaspoon of smoked paprika and ½ teaspoon of chilli flakes to the butter as it melts, then finish with a spoonful of finely chopped jalapeños. The warmth builds gently rather than hitting you all at once — a nice match for something like these Honey Garlic Chicken Wings.
- Vegetarian/Vegan Option: Use vegetable stock instead of chicken stock, swap the butter for a good plant-based block butter, and replace the cream cheese with 3 tablespoons of unsweetened oat cream. Use oat or soy milk rather than almond, which can taste thin.
- Different Protein: These potatoes sit beautifully beside a Beef Stroganoff or a tray of Beef Enchiladas. For a meat-free pairing, a bowl of Vegetable Biryani works surprisingly well with the garlicky notes.
What to Serve With Instant Pot Garlic Mashed Potatoes
- Roast chicken thighs with lemon and thyme
- Pan-seared salmon fillets with a squeeze of lemon
- Meatloaf with a tomato glaze
- Braised beef short ribs
- Grilled halloumi with roasted peppers
- Steamed green beans or buttered peas
- A simple green salad with a sharp vinaigrette
Frequently Asked Questions
Instant Pot Garlic Mashed Potatoes
Ingredients
Method
- Prepare the potatoes. Peel the potatoes and cut them into roughly 4 cm chunks so they cook evenly. As you work, drop them straight into the Instant Pot insert. You should hear a soft thud as each piece lands — that is fine, no water is needed underneath yet.
- Add garlic and stock. Scatter the whole garlic cloves over the potatoes, then pour in the stock. It will only come about a third of the way up the potatoes, which is exactly right. Season with the teaspoon of salt and give everything a gentle stir so the cloves settle between the chunks.
- Pressure cook. Lock the lid and set the valve to sealing. Select High Pressure and set the timer for 12 minutes. The pot will take roughly 8 to 10 minutes to come up to pressure; you will hear a faint hum and see a thin wisp of steam before the float valve pops up.
- Let the pressure release naturally. When the timer sounds, switch the pot off and leave it alone for 10 minutes. Do not touch the valve. After 10 minutes, carefully turn the valve to venting to release any remaining steam. Open the lid away from your face — the rush of steam smells richly of roasted garlic and warm stock.
- Check the potatoes. Pierce a chunk with a fork. It should slide in with almost no resistance and the potato should crumble slightly at the edges. If there is any firmness at all, lock the lid and cook for 2 more minutes on High Pressure.
- Mash while hot. Tip out any excess liquid, leaving about 2 tablespoons behind. Add the butter and cream cheese first and mash with a potato masher until the butter melts into the potatoes — about 1 minute. The mixture will look glossy and slightly loose at this stage.
- Add the warm dairy. Pour in the warmed milk and cream in three additions, mashing gently between each. Stop as soon as the texture is smooth and fluffy. Overworking is what turns mash sticky, so resist the urge to keep going.
- Season and finish. Stir through the black pepper and white pepper if using, then taste and adjust the salt. Fold in the chopped chives, drizzle with a little melted butter, and serve straight away while the steam is still rising.
Notes
These Instant Pot Garlic Mashed Potatoes have quietly become the dish I lean on when the evening is running away from me — twelve minutes under pressure, a short rest, and a bowl of something genuinely good on the table. If you give them a go, I would love to hear how they turned out. Did you add a spicy twist, keep them vegan, or serve them alongside something unexpected? Leave a comment below and tell me what landed on your plate.