Make-Ahead Freezer Breakfast Sandwiches for Busy Mornings
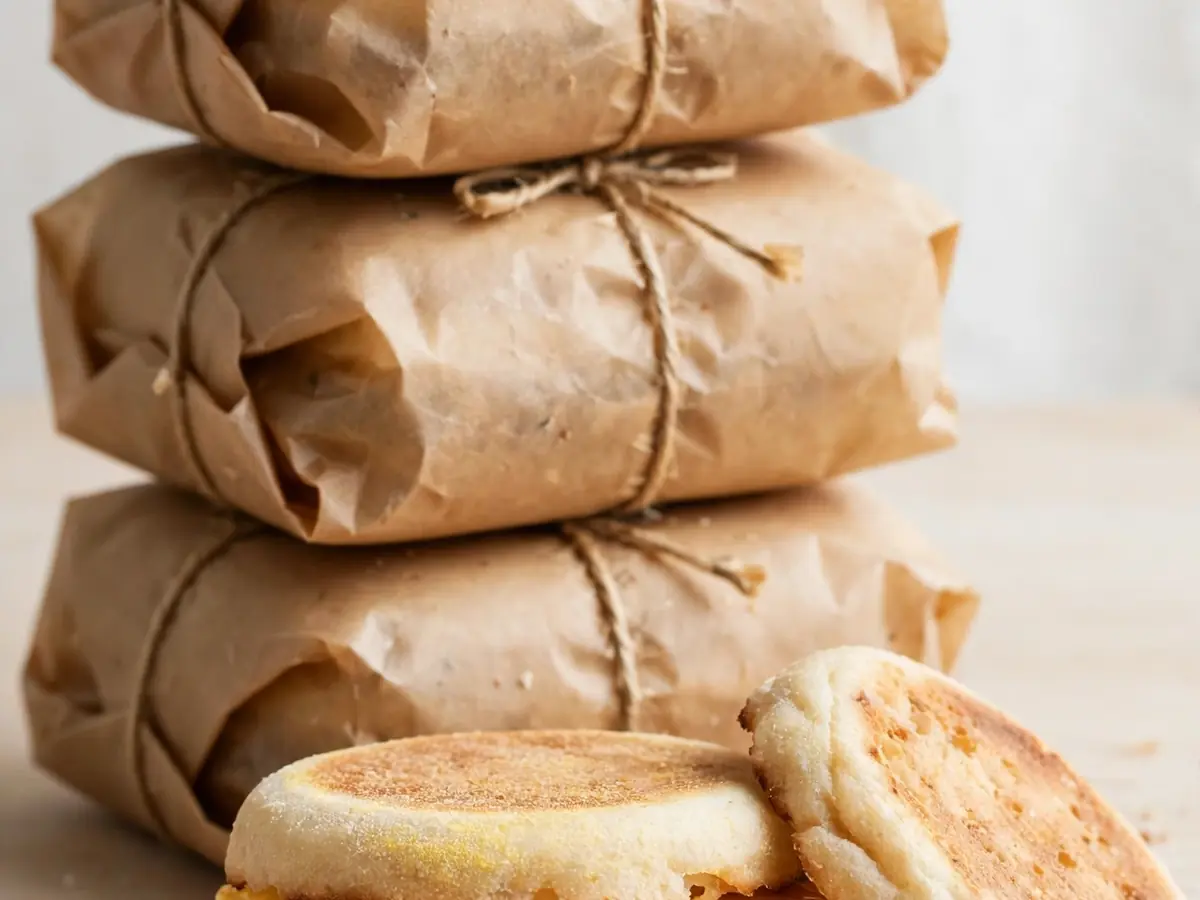
Mornings have a way of shrinking. The alarm goes off, the coffee maker gurgles, someone can’t find a shoe, and suddenly the idea of cooking a hot breakfast feels like a luxury from another lifetime. That’s exactly where make-ahead freezer breakfast sandwiches earn their place in a busy kitchen. Built in a batch on a quiet afternoon, wrapped individually, and stashed in the freezer, they turn a chaotic morning into a two-minute event: unwrap, reheat, eat, and get out the door.
This guide covers everything you need to build a reliable stash of freezer breakfast sandwiches at home — precise quantities for a standard batch, the equipment that actually matters, step-by-step instructions, cooking times, substitution options, and honest storage guidance. The core recipe below makes 12 substantial sandwiches, and it’s designed to be flexible so you can adapt it to what your household actually likes to eat.
Why Freezer Breakfast Sandwiches Work So Well
A breakfast sandwich is one of the few foods that freezes and reheats without serious quality loss, provided you handle a few details correctly. The bread, the filling, and the cooking method all interact with moisture and temperature in predictable ways, and once you understand those interactions, you can batch-cook with confidence.
The main enemies of a good frozen breakfast sandwich are sogginess and rubbery eggs. Sogginess comes from moisture migrating out of hot fillings into the bread before freezing. Rubbery eggs come from overcooking, both on the stove and again in the microwave. Both problems are solvable: cool fillings completely before assembly, and cook eggs slightly under your normal doneness so the reheat finishes the job rather than punishing it.
The payoff is real. A batch of 12 sandwiches takes roughly 45 to 60 minutes of active and passive time combined, and it replaces a dozen rushed, expensive, or skipped breakfasts. For anyone who has ever eaten a sad granola bar in the car, that trade is obvious.
Equipment You’ll Need
Nothing here is specialty gear, but a few items make the process faster and more consistent:
- A large rimmed baking sheet (roughly 18 by 13 inches) for baking the eggs
- Parchment paper or a silicone baking mat
- A 9 by 13 inch baking pan or a similar oven-safe dish if you prefer thicker egg portions
- A large skillet (12 inches) for sausage or bacon, or a sheet pan if baking bacon
- A round biscuit cutter or drinking glass (about 3 to 3.5 inches across) to cut egg rounds
- A wire cooling rack
- Plastic wrap or reusable beeswax wraps
- Freezer-safe zip-top bags or a vacuum sealer
- A permanent marker for labeling
- A microwave-safe plate or a toaster oven for reheating
The Core Recipe: 12 Classic Freezer Breakfast Sandwiches
Yield: 12 sandwiches
Active time: about 40 minutes
Total time: about 1 hour 15 minutes including cooling
Ingredients
- 12 English muffins, split (or 12 round rolls, biscuits, or bagels)
- 12 large eggs
- 1/2 cup whole milk or half-and-half
- 1 teaspoon fine salt
- 1/2 teaspoon black pepper
- 1 tablespoon unsalted butter, plus more for greasing
- 12 cooked breakfast sausage patties, about 2 ounces each (or 12 slices cooked bacon, or 12 thin slices ham)
- 12 slices (about 8 ounces total) cheddar, Swiss, provolone, or pepper Jack cheese
Preparation Instructions
- Preheat and prep. Heat the oven to 325°F (165°C). Line the rimmed baking sheet with parchment paper and grease it lightly with butter. If you’re using a 9 by 13 inch pan instead, grease the pan well.
- Mix the egg base. In a large bowl, whisk the eggs, milk, salt, and pepper until completely uniform with no streaks of white. Whisk vigorously for about 30 seconds; this incorporates air and produces a more tender baked egg.
- Bake the eggs. Pour the egg mixture onto the prepared sheet and spread it evenly. Bake for 14 to 17 minutes, until the center is just set and no longer jiggles when you nudge the pan. Do not let it brown or puff dramatically — that signals overcooking. Remove from the oven and set the pan on a wire rack to cool for at least 15 minutes.
- Cook the meat. While the eggs bake, cook the sausage patties in a large skillet over medium heat for 4 to 5 minutes per side, until browned and cooked through (160°F internal temperature). If using bacon, bake it on a separate sheet pan at 400°F (205°C) for 18 to 22 minutes, turning once, then drain on paper towels. Set all meat aside to cool.
- Toast the bread lightly. Split the English muffins and toast them just until dry and barely golden — not dark. This step creates a moisture barrier and is the single most effective defense against soggy sandwiches. Let them cool completely.
- Cut the egg rounds. Invert the cooled sheet of baked egg onto a cutting board. Using a 3 to 3.5 inch round cutter, press straight down and cut 12 rounds, re-pressing scraps together if needed to use every bit. The rounds should be slightly wider than your muffins so they don’t slide out.
- Assemble in a cool state. Place the bottom half of each muffin on a clean surface. Top with one egg round, one piece of meat, and one slice of cheese. Cap with the top half. Work quickly but keep everything at room temperature or cooler — warm fillings will steam the bread.
- Wrap individually. Tear off a sheet of plastic wrap about 12 inches long. Place a sandwich in the center, fold the long edges over, press out as much air as possible, then roll tightly and tuck the ends under. Label each wrap with the contents and date.
- Freeze flat. Place the wrapped sandwiches in a single layer on a baking sheet and freeze for 1 to 2 hours, until firm. This prevents them from squashing each other. Then transfer to a freezer-safe zip-top bag, press out the air, seal, and return to the freezer. They’ll keep for up to 2 months at 0°F (-18°C).
Reheating
Microwave (fastest): Unwrap the sandwich completely and place it on a microwave-safe plate. Microwave on 50 percent power for 90 seconds, flip, then microwave on high for 30 to 45 seconds, until hot throughout. Let it rest 30 seconds before eating. Full-power microwaving from frozen is what makes eggs rubbery; the two-stage method solves this.
Oven or toaster oven (best texture): Heat the oven to 350°F (175°C). Wrap the frozen sandwich loosely in foil and bake for 25 to 30 minutes, until heated through. For a crisper exterior, unwrap for the final 5 minutes.
Air fryer: Set to 340°F (170°C) and heat for 8 to 11 minutes from frozen, flipping once halfway.
Variations to Keep the Batch Interesting
One batch of 12 identical sandwiches can get dull by week three. Consider splitting your batch into two or three flavor profiles. The base method stays the same; only the fillings change.
- Southwest: Add 1/2 teaspoon chili powder and 1/4 teaspoon cumin to the egg mixture. Use pepper Jack cheese, cooked chorizo or black bean patties, and a spoonful of salsa drained well on paper towels before assembly.
- Everything bagel style: Use bagels instead of English muffins and sprinkle 2 tablespoons of everything bagel seasoning over the egg mixture before baking. Pair with cream cheese spread thinly on the toasted bagel and smoked salmon or ham.
- Vegetarian: Skip the meat and add 1 cup of sautéed spinach (squeezed very dry), 1/2 cup of roasted red peppers, and 1/2 cup of crumbled feta folded into the egg mixture before baking.
- Italian: Swap cheddar for provolone, use cooked Italian sausage, and add 1/4 cup of finely chopped sun-dried tomatoes to the eggs.
Practical Substitutions
Bread: English muffins, bagels, ciabatta rolls, croissants (freeze well but reheat more delicately), sandwich thins, or sturdy gluten-free rolls. Avoid very soft white sandwich bread, which turns gummy.
Eggs: The baked-egg method is the most reliable for round portions. If you prefer fried eggs, cook them over medium in a nonstick pan, cool completely, and freeze the same way — but expect a slightly firmer yolk after reheating. Egg whites work: use 2 cups of liquid egg whites in place of the 12 eggs and milk, and bake for 12 to 15 minutes.
Milk: Any milk works, including oat or soy. The milk is for tenderness, not structure, so the swap is forgiving.
Cheese: Sliced cheese melts more evenly than shredded. If using shredded, use about 1/4 cup per sandwich and pack it tightly so it doesn’t scatter.
Meat: Cooked turkey sausage, plant-based patties, sliced roast turkey, or no meat at all. If going meatless, add an extra slice of cheese or a thin layer of hummus for richness.
Storage and Food Safety Guidance
Freeze assembled sandwiches within 2 hours of cooking the fillings, and never refreeze a sandwich that has already been thawed. Store at 0°F (-18°C) or colder for best quality and use within 2 months; beyond that, quality declines even though safety is maintained.
For refrigerator storage, assembled sandwiches keep for up to 3 days in an airtight container. Reheat to steaming hot throughout, or to an internal temperature of 165°F (74°C). Discard any sandwich that smells off or shows ice crystals with freezer burn across the surface — freezer burn isn’t dangerous, but it ruins texture.
Label everything with contents and date. A strip of masking tape and a marker takes five seconds and saves you from mystery sandwiches in March.
Tips for Better Results
- Cool everything completely. Warm fillings create condensation inside the wrap, which becomes sogginess in the microwave.
- Toast the bread. Even 60 seconds in a toaster makes a measurable difference to the final texture.
- Drain wet ingredients aggressively. Salsa, spinach, and roasted peppers all need to be squeezed or patted dry before they go anywhere near a freezer sandwich.
- Don’t overfill. A sandwich that’s too thick won’t heat evenly from frozen. Keep fillings to about 1 inch total thickness.
- Freeze flat first. The flash-freeze step keeps sandwiches neat and prevents them from fusing into a block.
- Reheat at reduced power. The 50 percent power stage is not optional if you want tender eggs.
- Make a double batch. The labor is nearly identical, and 24 sandwiches covers about a month of weekday breakfasts for two people.
Frequently Asked Questions
Freezer Breakfast Sandwich FAQ
Can I freeze breakfast sandwiches with cream cheese or avocado?
Cream cheese freezes acceptably when spread thinly and sealed inside the sandwich, though it may become slightly grainy after thawing. Avocado does not freeze well — it turns watery and browns — so add it fresh after reheating instead. If you want a creamy element, hummus or a thin layer of cream cheese is the more reliable choice.
How long do make-ahead freezer breakfast sandwiches last?
Wrapped tightly and stored at 0°F (-18°C) or colder, they maintain good quality for up to 2 months. They remain safe beyond that, but the bread may dry out and the eggs may pick up freezer flavors. Always label with the assembly date and rotate your stash so older sandwiches get eaten first.
Why do my reheated egg sandwiches turn out rubbery or soggy?
Rubbery eggs come from overcooking — either baking the egg sheet until it’s fully firm or reheating at full microwave power from frozen. Bake until just set and use the two-stage, reduced-power reheat method. Sogginess almost always traces back to assembling with warm fillings, skipping the toasting step, or including wet ingredients like salsa or spinach without draining them thoroughly.
Can I reheat these sandwiches without a microwave?
Yes. A toaster oven or conventional oven at 350°F (175°C) works well: wrap the frozen sandwich loosely in foil and bake for 25 to 30 minutes, unwrapping for the last 5 minutes for a crisper exterior. An air fryer at 340°F (170°C) for 8 to 11 minutes, flipped once, also produces excellent results. Both methods take longer than the microwave but give noticeably better texture, especially for the bread.
Can I assemble the sandwiches the night before and freeze them the next day?
Yes, with one adjustment: refrigerate the assembled, wrapped sandwiches overnight rather than leaving them at room temperature, then transfer them to the freezer the following day. Because they’ll be chilled rather than freshly made, skip the flat-freezing step and place them directly into a freezer bag. Use them within 2 months as usual.
What’s the best way to scale this recipe for a larger household?
The recipe scales linearly. For 24 sandwiches, use two rimmed baking sheets for the eggs (12 eggs and 1/2 cup milk per sheet) rather than one deep pan, since a thicker egg layer takes longer to set and tends to cook unevenly. Cook the meat in batches and keep finished patties warm in a 200°F (95°C) oven while you work. Assembly and wrapping go fastest as a two-person job.
Building a freezer stash of breakfast sandwiches is one of those small kitchen systems that quietly improves the whole week. Start with the core dozen, split them across two flavor profiles, and adjust the fillings on your next batch based on what disappeared fastest. Once the routine is in place, a hot, satisfying breakfast on a rushed morning stops being a question of time and becomes a question of which sandwich you feel like.