Traditional Steamed Idli Recipe For A Healthy Indian Breakfast
There’s something truly magical about a well-made idli. These fluffy, soft, and utterly wholesome steamed rice cakes are a staple in South Indian cuisine, and for very good reason. They’re light on the stomach, incredibly nourishing, and a fantastic way to start your day. I’ve spent years perfecting this recipe, and I’m so excited to share my secrets for making the most authentic and delicious idli right in your own kitchen.
I remember the first time I tried idli during a trip to Kerala, much like the memorable experience of discovering Diner-Style & Eggless dishes. The delicate texture and subtly tangy flavour, served with a vibrant coconut chutney and a warming sambar, left such an impression on me. From that moment, I was determined to recreate that experience at home. It took a fair bit of experimenting, a few flat batches, and a lot of patience, but I finally cracked the code to consistently light and airy idli, much like the delicate process of creating The Ultimate Fluffy Pancake Guide: Soufflé.
This Traditional Steamed Idli Recipe for a Healthy Indian Breakfast isn’t just about nutrition; it’s about comfort, tradition, and bringing a taste of India to your breakfast table, much like our High-Protein Overnight Oats: 3 Easy Meal Prep Flavors offer a different kind of wholesome morning start, or another delicious option like Healthy Vegetarian Indian Breakfast Recipes: Poha or Upma & Dosa .cookingenious.com/high-protein-overnight-oats-3-easy-meal-prep-flavors/”>High-Protein Overnight Oats: 3 Easy Meal Prep Flavors offer a different kind of wholesome morning start.cookingenious.com/healthy-vegetarian-indian-breakfast-recipes-poha/”>Healthy Vegetarian Indian Breakfast Recipes: Poha.cookingenious.com/high-protein-overnight-oats-3-easy-meal-prep-flavors/”>High-Protein Overnight Oats: 3 Easy Meal Prep Flavors offer a different kind of wholesome morning start. My kids absolutely devour this every time I make it, and even my husband, who’s usually picky, asked for seconds the last time I served them up! It’s become a firm family favourite, and I’m confident it will become one of yours too.
Recipe Overview
- Prep Time: 20 minutes (plus 8-12 hours soaking and 8-12 hours fermentation)
- Cook Time: 10-15 minutes
- Total Time: Approximately 20-24 hours (mostly hands-off)
- Servings: 4-6 people (makes about 20-24 idlis)
- Difficulty: Medium
Why You’ll Love This Traditional Steamed Idli Recipe for a Healthy Indian Breakfast
- Nutritionally Rich: Idlis are made from fermented rice and lentils, making them easily digestible and a good source of protein and carbohydrates for sustained energy.
- Incredibly Light and Fluffy: Our detailed fermentation process ensures a beautifully aerated batter, resulting in idlis that are delightfully soft and spongy.
- Naturally Gluten-Free: Made primarily from rice and urad dal, this recipe is naturally suitable for those following a gluten-free diet.
- Versatile Serving Options: While traditionally served with sambar and chutney, idlis are a fantastic base for various toppings and accompaniments, from simple ghee to spicy lentil stews.
- Authentic Flavour Profile: This recipe captures the true essence of traditional South Indian idli, delivering that subtle tang and earthy aroma you’d expect from a classic.
Ingredients You’ll Need
- 300g idli rice (parboiled rice) or regular short-grain rice
- 100g whole white urad dal (split black gram without skin)
- 1 teaspoon fenugreek seeds (methi seeds)
- 1/2 teaspoon salt (or to taste)
- Water for soaking and grinding
- A little oil or ghee for greasing idli moulds
Tip: Using good quality idli rice makes a noticeable difference in the texture. It’s parboiled, which helps in achieving that characteristic softness and fluffiness.
Equipment You’ll Need
- Large mixing bowls (at least two)
- Grinder (wet grinder is ideal, but a powerful blender will work)
- Idli steamer or pressure cooker with an idli stand
- Spatula or ladle
- Measuring cups and spoons
How to Make Traditional Steamed Idli Recipe for a Healthy Indian Breakfast
- Soak the Rice and Lentils: In one large bowl, combine the idli rice and fenugreek seeds. Rinse them thoroughly under cold running water until the water runs clear. In another separate bowl, rinse the urad dal until the water is clear. Cover both the rice and dal with plenty of fresh, filtered water and let them soak for 8-10 hours, or overnight. You’ll notice the grains will swell significantly, looking plumper and softer.
- Grind the Dal: Drain the soaked urad dal completely. Transfer the dal to your wet grinder or powerful blender. Add about 100-150ml of chilled water, a little at a time, to help with grinding. Grind until you achieve a very smooth, light, and fluffy batter. It should be thick and aerated, almost like whipped cream, and will have a pale, off-white colour. This process might take 20-30 minutes in a wet grinder, or about 5-7 minutes in a high-speed blender, stopping to scrape down the sides.
- Grind the Rice: Drain the soaked rice and fenugreek seeds. Add them to the same grinder (no need to wash it out) with about 150-200ml of chilled water. Grind until the rice batter is relatively smooth, but still has a slightly coarse, grainy texture – think fine semolina. This gives idlis their characteristic structure. It should be a creamy white colour.
- Combine and Ferment the Batter: Transfer both the ground dal and rice batters to one very large mixing bowl. Add the salt. Using your clean hand, gently mix the batters together. Mixing with your hand helps incorporate air and introduces beneficial microbes, which aids fermentation. Mix for about 2-3 minutes until well combined. The mixture should feel smooth and slightly gritty. Cover the bowl loosely with a lid or clean cloth, allowing air to circulate. Place the bowl in a warm spot in your kitchen (ideally around 25-30°C or 77-86°F) to ferment for 8-12 hours, or until the batter has doubled in volume and a pleasant, slightly sour aroma develops. You’ll see tiny bubbles on the surface, indicating active fermentation.
- Prepare for Steaming: Once fermented, gently stir the batter with a ladle. Do not overmix, as this will deflate the air bubbles. The batter should be thick, airy, and flow like a rich cream. Lightly grease your idli moulds with a little oil or ghee. Heat water in your idli steamer or pressure cooker (without the whistle) until it’s simmering steadily.
- Steam the Idlis: Pour the idli batter into each mould, filling them about three-quarters full. Carefully place the idli stand into the preheated steamer. Close the lid and steam for 10-15 minutes over medium-high heat. You’ll hear the water bubbling and steaming vigorously. To check for doneness, gently open the lid – the idlis should look puffed up and glossy white. Insert a skewer or toothpick into the centre of an idli; it should come out clean.
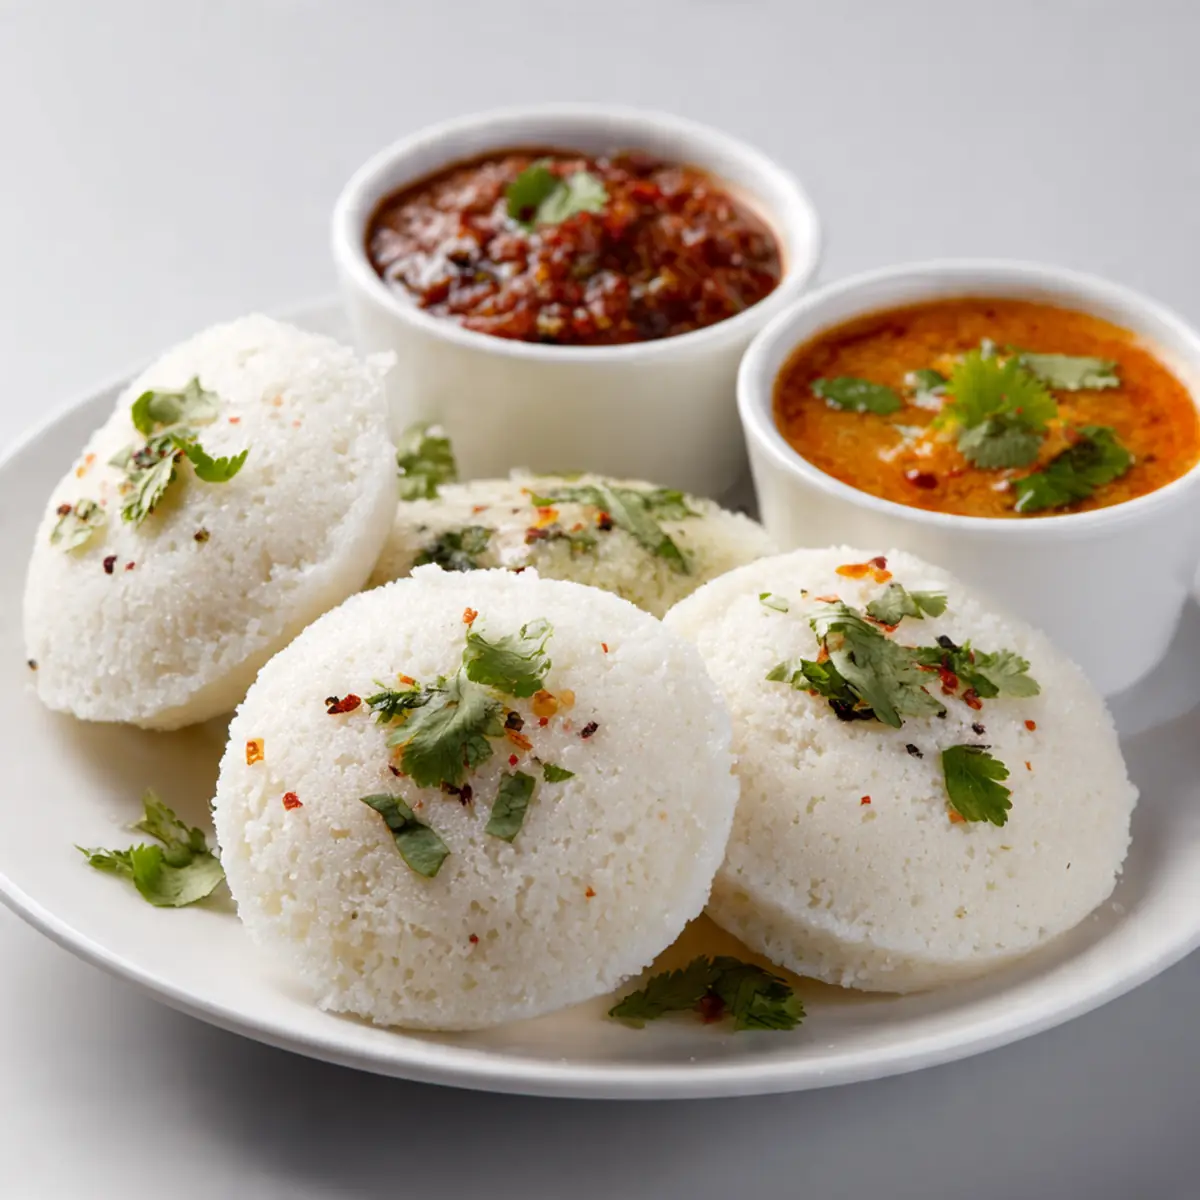
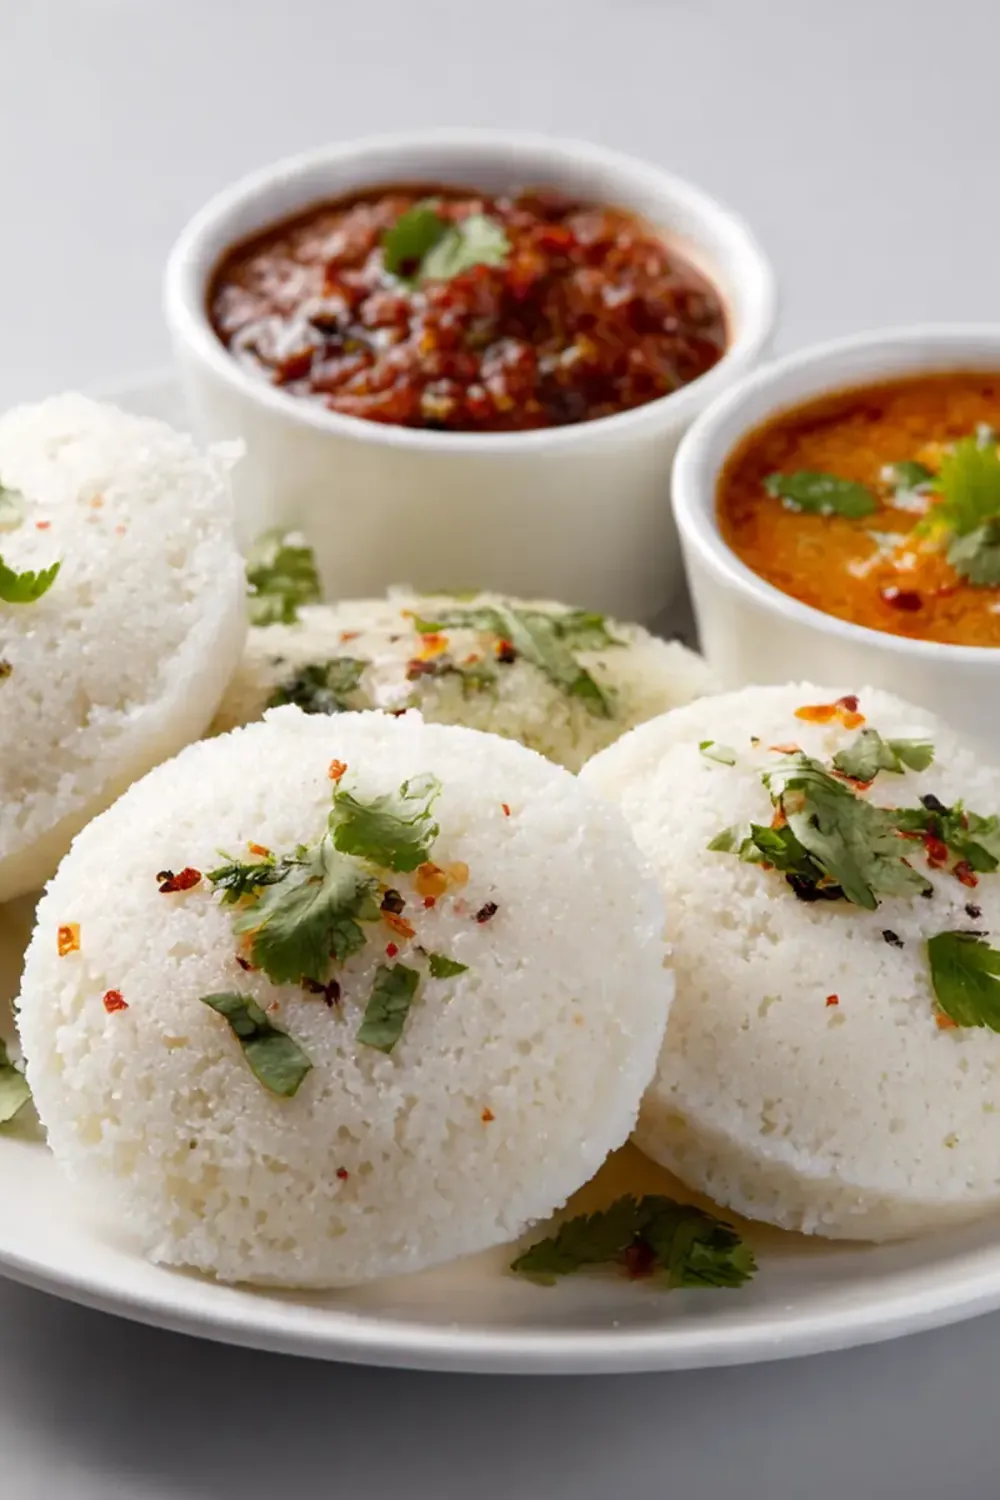
- Rest and Serve: Once cooked, turn off the heat and let the idlis rest in the steamer for 2-3 minutes. This allows them to firm up slightly. Carefully remove the idli stand. Using a wet spoon or knife, gently scoop out each idli from its mould. They should release easily, appearing beautifully round, soft, and warm to the touch. Serve immediately.
Tips From My Kitchen
- Use Chilled Water for Grinding: When grinding the dal and rice, always use chilled water. This is crucial because the friction from grinding generates heat, which can hinder the fermentation process. Keeping the batter cool initially helps ensure a slow, steady, and effective fermentation, leading to a fluffier idli.
- Proper Fermentation Environment: The warmth of your kitchen is key to successful fermentation. If your kitchen is cold, you can place the bowl in a slightly warm (but turned off) oven with the light on, or near a radiator. A well-fermented batter will be visibly aerated, have a slightly sour aroma, and nearly double in volume. This is where the magic happens for light and airy idlis.
- Don’t Overmix the Batter After Fermentation: Once your idli batter has beautifully fermented, resist the urge to stir it vigorously. Overmixing will deflate all the precious air bubbles that have formed, resulting in dense, flat idlis instead of the desired spongy texture. A gentle stir is all that’s needed to combine any settled solids.
- Grease Moulds Well for Easy Release: Lightly greasing your idli moulds with oil or ghee ensures that the idlis don’t stick and can be easily scooped out once cooked. This prevents them from tearing and helps maintain their perfect round shape. It’s a small step that makes a big difference to the final presentation.
- Resting Time After Steaming: Allowing the idlis to rest in the steamer for a couple of minutes after cooking, before removing them from the moulds, is vital. This brief resting period allows the steam to dissipate and the idlis to firm up slightly, making them much easier to remove without breaking. This small pause ensures perfectly shaped idlis every time. For another fantastic recipe that benefits from careful timing, you might enjoy our Green Goddess Chicken Recipe Herby, which also relies on precise cooking to achieve its tender finish.
Common Mistakes to Avoid
- Overcrowding the pan: When steaming, ensure there is enough space between the idli plates for the steam to circulate freely. Overcrowding can lead to uneven cooking, where some idlis might be undercooked and dense, while others are perfectly done. Steam in batches if necessary to allow each idli to puff up beautifully.
- Wrong temperature: Both during fermentation and steaming, temperature plays a critical role. If your fermentation spot is too cold, the batter won’t rise. If the steaming water isn’t hot enough, the idlis won’t cook properly and will be heavy. Aim for a consistently warm environment for fermentation and a steady, rolling boil for steaming.
- Skipping the rest time: After steaming, it’s tempting to immediately remove the idlis, but skipping the 2-3 minute rest period can lead to them sticking to the moulds or tearing when you try to scoop them out. Resting allows the idlis to firm up and detach easily, ensuring they retain their lovely shape and soft texture.
Delicious Variations to Try
- Spicy Version: For those who love a bit of heat, you can finely chop and add a green chilli and a small piece of grated ginger to the batter just before steaming. You could also temper a tablespoon of mustard seeds, curry leaves, and a pinch of asafoetida in a little oil, and stir this aromatic mixture into the batter for a savoury, spicy kick.
- Vegetarian/Vegan Option: This recipe is naturally vegetarian and vegan! Just ensure you use oil for greasing the idli moulds instead of ghee if you’re strictly vegan. The primary ingredients, rice and urad dal, are plant-based and wholesome.
- Different Protein: While idli is excellent as is, if you’re looking to boost the protein content, you could serve it alongside a lentil-based sambar that has added vegetables, or a chickpea curry. For a non-traditional but delicious twist, a side of scrambled tofu seasoned with Indian spices would complement the idlis wonderfully, offering a substantial protein boost to your healthy Indian breakfast.
What to Serve With Traditional Steamed Idli Recipe for a Healthy Indian Breakfast
- Classic Coconut Chutney
- Hearty Vegetable Sambar
- Spicy Tomato Chutney
- A dollop of Ghee
- Filter Coffee for a complete South Indian breakfast experience
Frequently Asked Questions
Traditional Steamed Idli Recipe for a Healthy Indian Breakfast
Ingredients
Method
-
Soak the Rice and Lentils: In one large bowl, combine the idli rice and fenugreek seeds. Rinse them thoroughly under cold running water until the water runs clear. In another separate bowl, rinse the urad dal until the water is clear. Cover both the rice and dal with plenty of fresh, filtered water and let them soak for 8-10 hours, or overnight. You’ll notice the grains will swell significantly, looking plumper and softer.
-
Grind the Dal: Drain the soaked urad dal completely. Transfer the dal to your wet grinder or powerful blender. Add about 100-150ml of chilled water, a little at a time, to help with grinding. Grind until you achieve a very smooth, light, and fluffy batter. It should be thick and aerated, almost like whipped cream, and will have a pale, off-white colour. This process might take 20-30 minutes in a wet grinder, or about 5-7 minutes in a high-speed blender, stopping to scrape down the sides.
-
Grind the Rice: Drain the soaked rice and fenugreek seeds. Add them to the same grinder (no need to wash it out) with about 150-200ml of chilled water. Grind until the rice batter is relatively smooth, but still has a slightly coarse, grainy texture – think fine semolina. This gives idlis their characteristic structure. It should be a creamy white colour.
-
Combine and Ferment the Batter: Transfer both the ground dal and rice batters to one very large mixing bowl. Add the salt. Using your clean hand, gently mix the batters together. Mixing with your hand helps incorporate air and introduces beneficial microbes, which aids fermentation. Mix for about 2-3 minutes until well combined. The mixture should feel smooth and slightly gritty. Cover the bowl loosely with a lid or clean cloth, allowing air to circulate. Place the bowl in a warm spot in your kitchen (ideally around 25-30°C or 77-86°F) to ferment for 8-12 hours, or until the batter has doubled in volume and a pleasant, slightly sour aroma develops. You’ll see tiny bubbles on the surface, indicating active fermentation.
-
Prepare for Steaming: Once fermented, gently stir the batter with a ladle. Do not overmix, as this will deflate the air bubbles. The batter should be thick, airy, and flow like a rich cream. Lightly grease your idli moulds with a little oil or ghee. Heat water in your idli steamer or pressure cooker (without the whistle) until it’s simmering steadily.
-
Steam the Idlis: Pour the idli batter into each mould, filling them about three-quarters full. Carefully place the idli stand into the preheated steamer. Close the lid and steam for 10-15 minutes over medium-high heat. You’ll hear the water bubbling and steaming vigorously. To check for doneness, gently open the lid – the idlis should look puffed up and glossy white. Insert a skewer or toothpick into the centre of an idli; it should come out clean.
-
Rest and Serve: Once cooked, turn off the heat and let the idlis rest in the steamer for 2-3 minutes. This allows them to firm up slightly. Carefully remove the idli stand. Using a wet spoon or knife, gently scoop out each idli from its mould. They should release easily, appearing beautifully round, soft, and warm to the touch. Serve immediately.
Notes
There you have it – my tried and tested Traditional Steamed Idli Recipe for a Healthy Indian Breakfast. I hope you enjoy making these wholesome, fluffy delights as much as my family and I do. Don’t be shy about experimenting with the accompaniments; the beauty of idli is its versatility. I’d love to hear how your idlis turn out and what you serve them with in the comments below!