Classic Marble Cake Recipe
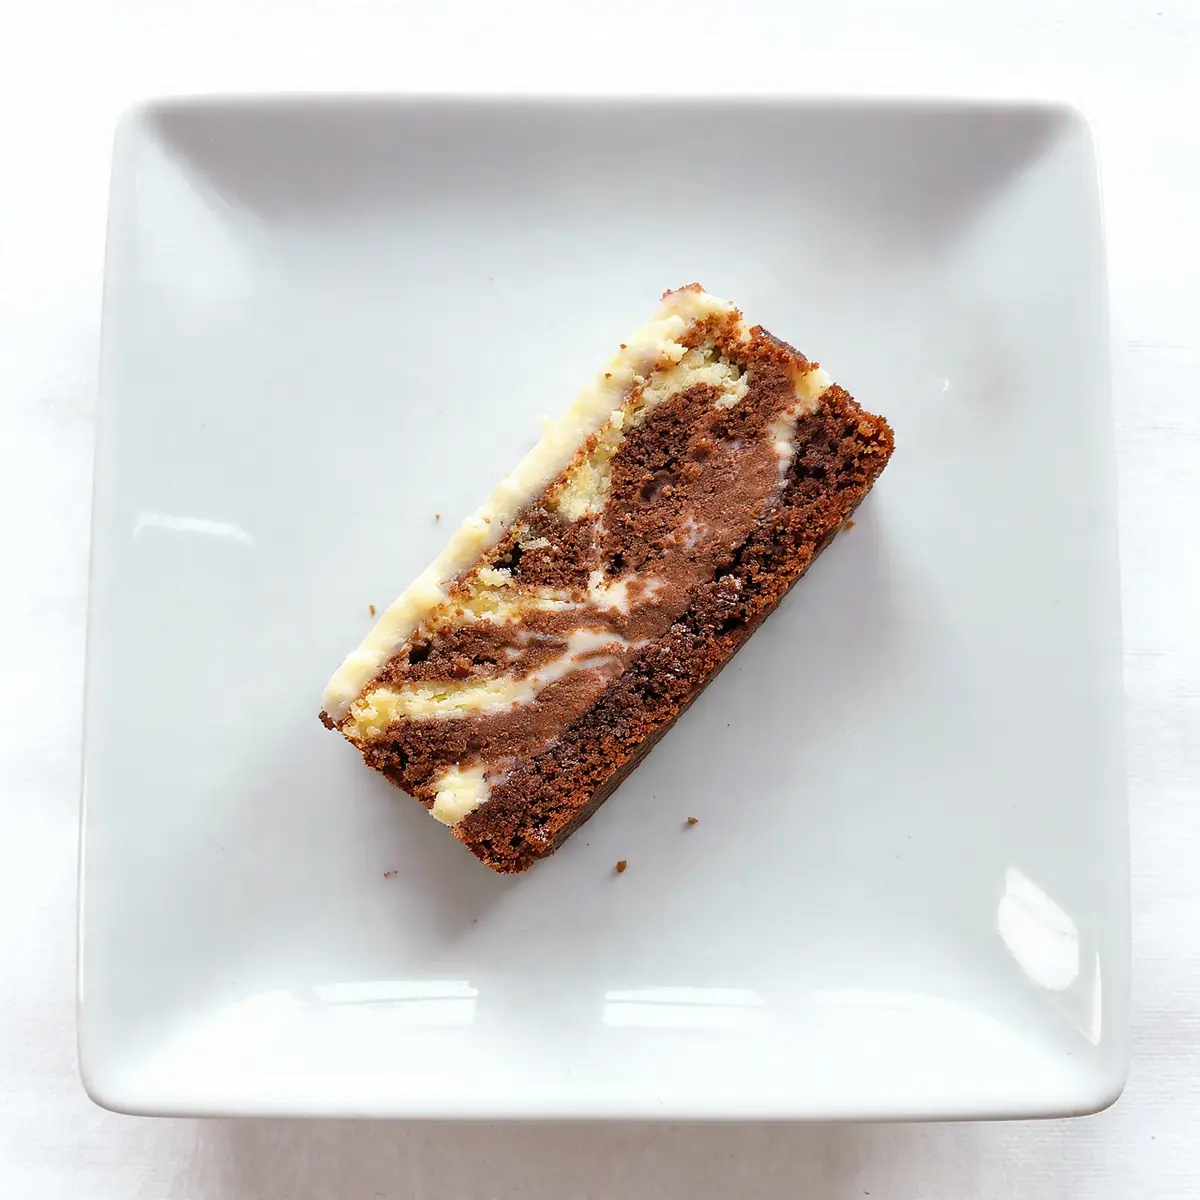
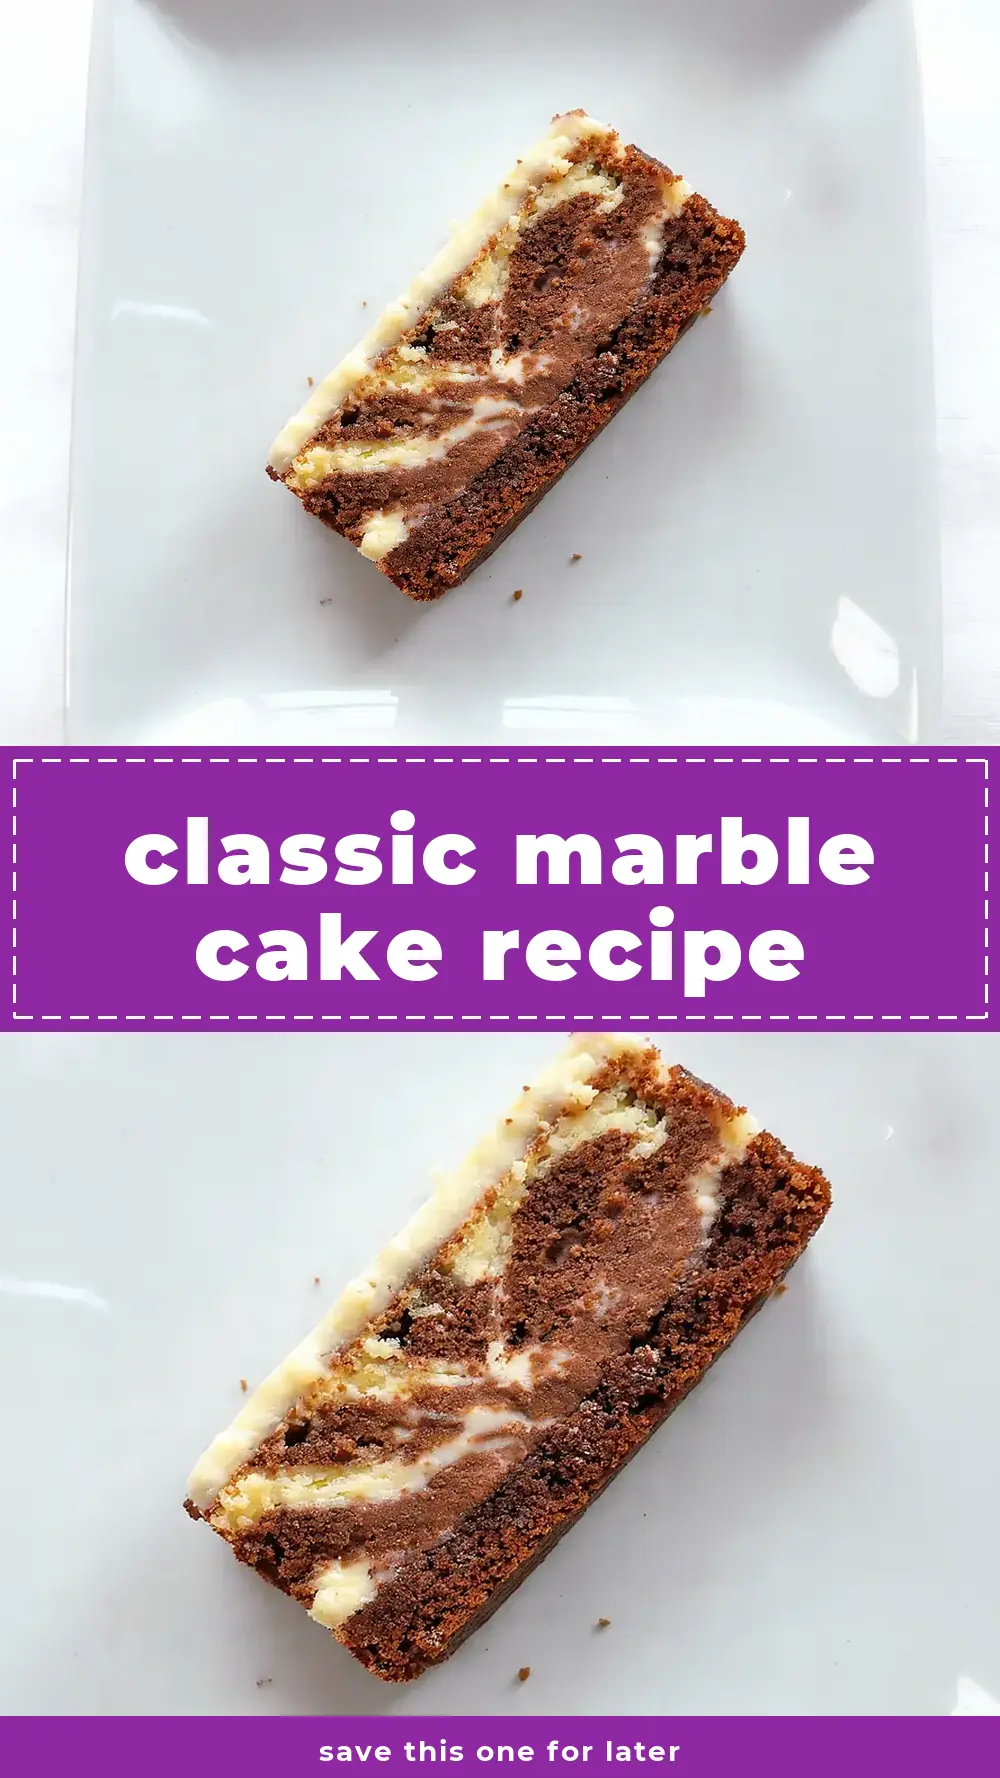
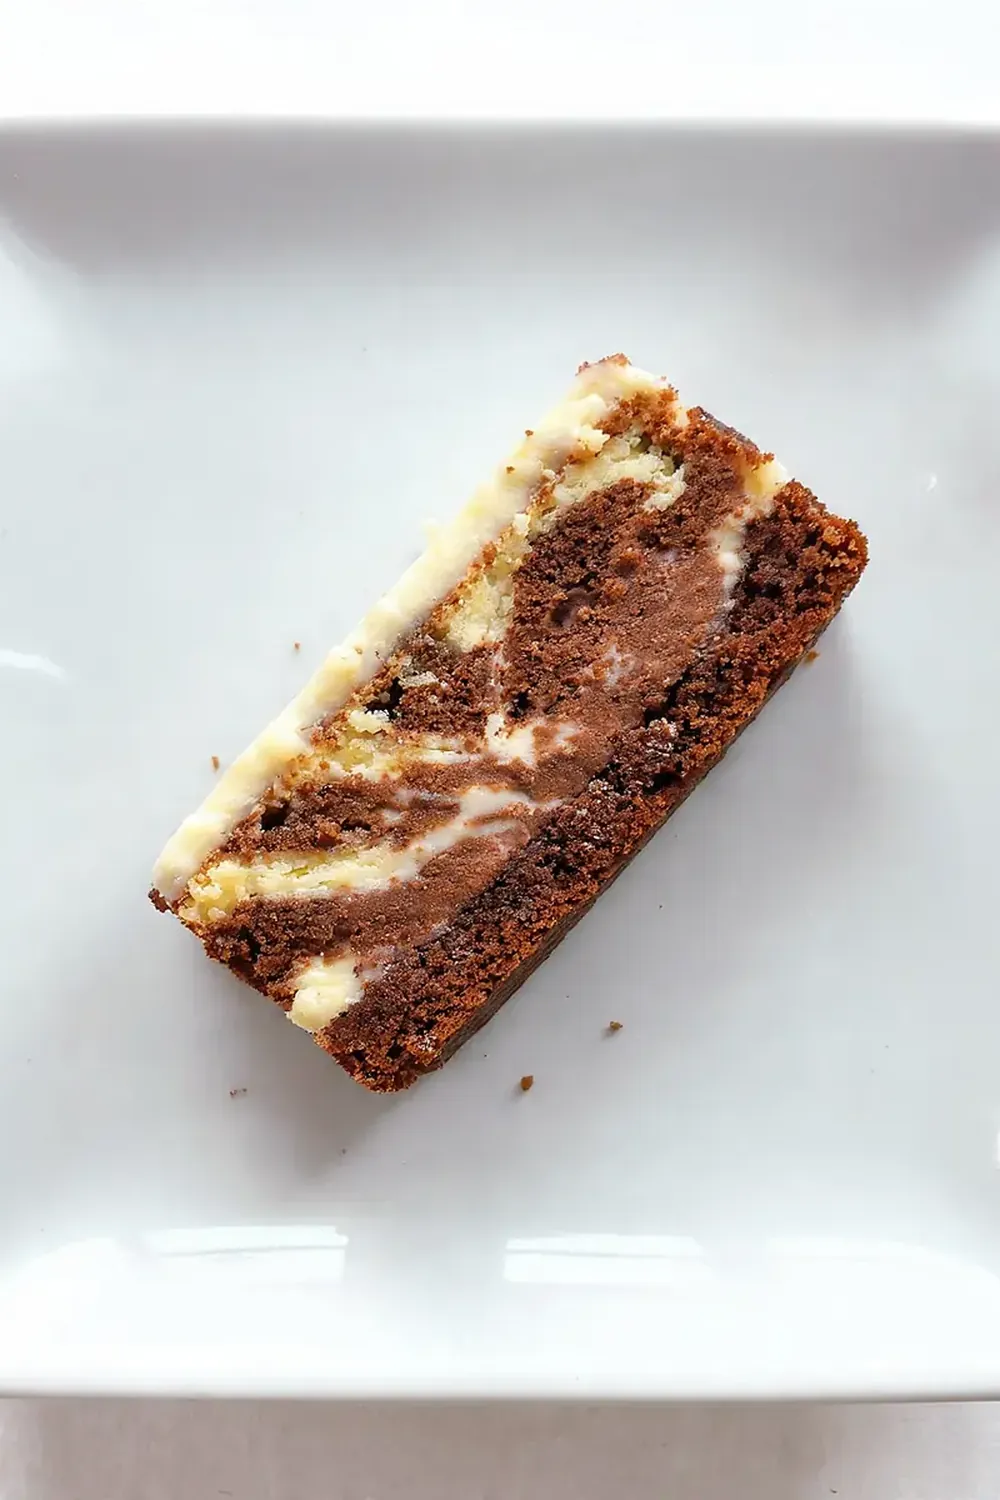
I still remember the first time I brought this marble cake to the table. The swirls were distinct, the crumb was impossibly tender, and a hush fell over the dining room. That was the moment I realised a classic recipe, executed with care, can command the same respect as a Michelin-starred dessert. This isn’t a rushed afternoon bake; this is the centrepiece of a memorable meal.
Recipe Overview
- Prep Time: 25 minutes
- Cook Time: 50-55 minutes
- Total Time: 1 hour 20 minutes (including cooling)
- Servings: 10-12 generous slices
- Difficulty: Medium
Why You’ll Love This Quick Stuffed Peppers Recipe
- Restaurant-Quality Presentation: The dramatic, deliberate swirl pattern creates a visual showpiece that looks far more complex than it is to achieve.
- Unbeatably Moist Crumb: The use of buttermilk and room-temperature butter ensures a velvety texture that stays tender for days.
- Balanced Flavour Profile: The rich vanilla base and deep, bittersweet cocoa swirl complement each other without one overpowering the other.
- Make-Ahead Friendly: This cake tastes even better the day after baking, making it the perfect stress-free dessert for entertaining.
- Customisable Elegance: Simple finishing touches, from a dusting of icing sugar to a glossy chocolate ganache, allow you to tailor the look to any occasion.
Ingredients You’ll Need
- 300g plain flour
- 2 ½ teaspoons baking powder
- ½ teaspoon fine sea salt
- 225g unsalted butter, at room temperature
- 300g caster sugar
- 4 large eggs, at room temperature
- 2 teaspoons vanilla extract
- 240ml buttermilk, at room temperature
- 40g Dutch-processed cocoa powder
- 60ml hot water
- 1 tablespoon milk (for the cocoa paste)
Tip: For the most impressive result, use a high-quality Dutch-processed cocoa powder. It gives a deeper colour and a smoother, more sophisticated chocolate flavour that makes the cake feel truly luxurious.
How to Make Classic Marble Cake Recipe
- Prepare your pan and preheat: Set your oven to 160°C (140°C fan). Grease and flour a 23cm Bundt tin or a 23cm x 13cm loaf tin. The smell of the warming oven will be the first cue that baking is imminent.
- Whisk the dry ingredients: In a medium bowl, whisk together the flour, baking powder, and salt. The mixture should look pale and feel light and airy, with no lumps.
- Cream the butter and sugar: In a large bowl, beat the butter and caster sugar with an electric mixer on medium-high speed for 4-5 minutes. The mixture will become pale, almost white, and fluffy; when you rub a bit between your fingers, you should feel no graininess from the sugar.
- Add the eggs and vanilla: Beat in the eggs one at a time, ensuring each is fully incorporated before adding the next. The batter will become smooth and glossy, and the vanilla aroma will fill your kitchen. Stir in the vanilla extract.
- Alternate flour and buttermilk: With the mixer on low, add the flour mixture in three additions, alternating with the buttermilk in two additions. Begin and end with the flour. Mix only until just combined; you should see no streaks of flour, and the batter will be thick, silky, and pale.
- Create the chocolate batter: In a small bowl, whisk the cocoa powder with the hot water and milk until you have a smooth, fudgy paste. It will smell intensely of dark chocolate. Fold one-third of the vanilla batter into the cocoa paste until completely combined. The chocolate batter will be darker and slightly thicker than the vanilla.
- Layer and swirl: Spoon half of the remaining vanilla batter into the prepared tin, spreading it evenly. Spoon all of the chocolate batter on top, then finish with the remaining vanilla batter. Use a butter knife or skewer to create a figure-eight pattern through the batters, running from the bottom to the top. Do not over-swirl; you want distinct ribbons of colour, not a muddy grey.
- Bake to perfection: Bake for 50-55 minutes. At the 45-minute mark, the kitchen will smell like a patisserie. The cake is ready when a skewer inserted into the centre comes out clean or with a few moist crumbs attached. The top should be a deep golden brown and spring back lightly when touched.
- Cool with patience: Place the tin on a wire rack and let the cake cool in the tin for 15 minutes. The cake will release a gentle steam. After 15 minutes, invert it onto the rack and let it cool completely. The crust will be slightly crisp, and the interior will be tender.
Tips From My Kitchen
- Temperature is everything: Your butter, eggs, and buttermilk must be at room temperature. Cold ingredients will cause the batter to curdle, resulting in a dense, uneven crumb. I take everything out of the fridge at least an hour before I start baking.
- Don’t overmix the batter: Once you add the flour, mix only until it disappears. Overdeveloping the gluten will make the cake tough. The batter should look smooth but not stretchy.
- Be deliberate with your swirl: To achieve a clean, restaurant-style marble pattern, use a gentle hand. Only make two or three passes with your knife. I make this at least once a week, and I’ve learned that less is always more when it comes to swirling.
- Use a kitchen scale: Baking by weight is far more accurate than using cups. It ensures the perfect ratio of dry to wet ingredients every time, which is crucial for a tender crumb. Friends always ask me for this recipe after trying it at dinner parties, and I always tell them the scale is my secret weapon.
- Test for doneness early: Ovens vary wildly. Start checking your cake at 45 minutes, even if the recipe says 55. A skewer test is the most reliable cue, but look for that springy top and the scent of toasted butter, too.
Common Mistakes to Avoid
- Overcrowding the pan: This cake needs room to rise. If you use a pan that is too small, the batter will overflow, and the structure will collapse. Stick to the recommended 23cm tin size for the best height and a perfect dome.
- Wrong temperature: Baking at too high a temperature will brown the outside before the centre is cooked, leaving you with a raw middle. Baking too low will produce a dry, pale cake. 160°C (140°C fan) is the sweet spot for even baking.
- Skipping the rest time: Letting the cake cool in the tin for 15 minutes is non-negotiable. This allows the structure to set, preventing it from crumbling when you turn it out. Rushing this step will result in a broken cake.
Delicious Variations to Try
- Spicy Version: Add 1 teaspoon of ground cinnamon and ½ teaspoon of cayenne pepper to the cocoa powder mixture. The gentle heat will play beautifully against the sweet vanilla base.
- Vegan Option: Substitute the butter with a high-quality block margarine, use flax eggs (1 tablespoon ground flaxseed + 3 tablespoons water per egg), and replace the buttermilk with 240ml of oat milk mixed with 1 tablespoon of apple cider vinegar.
- Different Protein: For a savoury-sweet twist, fold 100g of finely chopped toasted walnuts or pecans into the vanilla batter before layering. The nutty crunch adds a wonderful textural contrast.
What to Serve With Classic Marble Cake Recipe
- A dollop of lightly sweetened clotted cream or crème fraîche to cut the richness.
- Fresh berries, such as raspberries or sliced strawberries, for a bright, acidic counterpoint.
- A cup of strong, black coffee or an espresso martini (sans alcohol, a strong coffee with a dash of vanilla syrup works wonderfully).
- A drizzle of warm chocolate ganache (simply melt 100g of dark chocolate with 100ml of double cream) for an extra layer of decadence.
Frequently Asked Questions
Classic Marble Cake Recipe
Ingredients
Method
-
Prepare your pan and preheat: Set your oven to 160°C (140°C fan). Grease and flour a 23cm Bundt tin or a 23cm x 13cm loaf tin. The smell of the warming oven will be the first cue that baking is imminent.
-
Whisk the dry ingredients: In a medium bowl, whisk together the flour, baking powder, and salt. The mixture should look pale and feel light and airy, with no lumps.
-
Cream the butter and sugar: In a large bowl, beat the butter and caster sugar with an electric mixer on medium-high speed for 4-5 minutes. The mixture will become pale, almost white, and fluffy; when you rub a bit between your fingers, you should feel no graininess from the sugar.
-
Add the eggs and vanilla: Beat in the eggs one at a time, ensuring each is fully incorporated before adding the next. The batter will become smooth and glossy, and the vanilla aroma will fill your kitchen. Stir in the vanilla extract.
-
Alternate flour and buttermilk: With the mixer on low, add the flour mixture in three additions, alternating with the buttermilk in two additions. Begin and end with the flour. Mix only until just combined; you should see no streaks of flour, and the batter will be thick, silky, and pale.
-
Create the chocolate batter: In a small bowl, whisk the cocoa powder with the hot water and milk until you have a smooth, fudgy paste. It will smell intensely of dark chocolate. Fold one-third of the vanilla batter into the cocoa paste until completely combined. The chocolate batter will be darker and slightly thicker than the vanilla.
-
Layer and swirl: Spoon half of the remaining vanilla batter into the prepared tin, spreading it evenly. Spoon all of the chocolate batter on top, then finish with the remaining vanilla batter. Use a butter knife or skewer to create a figure-eight pattern through the batters, running from the bottom to the top. Do not over-swirl; you want distinct ribbons of colour, not a muddy grey.
-
Bake to perfection: Bake for 50-55 minutes. At the 45-minute mark, the kitchen will smell like a patisserie. The cake is ready when a skewer inserted into the centre comes out clean or with a few moist crumbs attached. The top should be a deep golden brown and spring back lightly when touched.
-
Cool with patience: Place the tin on a wire rack and let the cake cool in the tin for 15 minutes. The cake will release a gentle steam. After 15 minutes, invert it onto the rack and let it cool completely. The crust will be slightly crisp, and the interior will be tender.
Notes
I’d love to hear how you present this at your next gathering. Did you dust it with icing sugar, or did you go for a glossy ganache? Drop a comment below and share your own restaurant-worthy touches.