Homemade Cevapcici Recipe
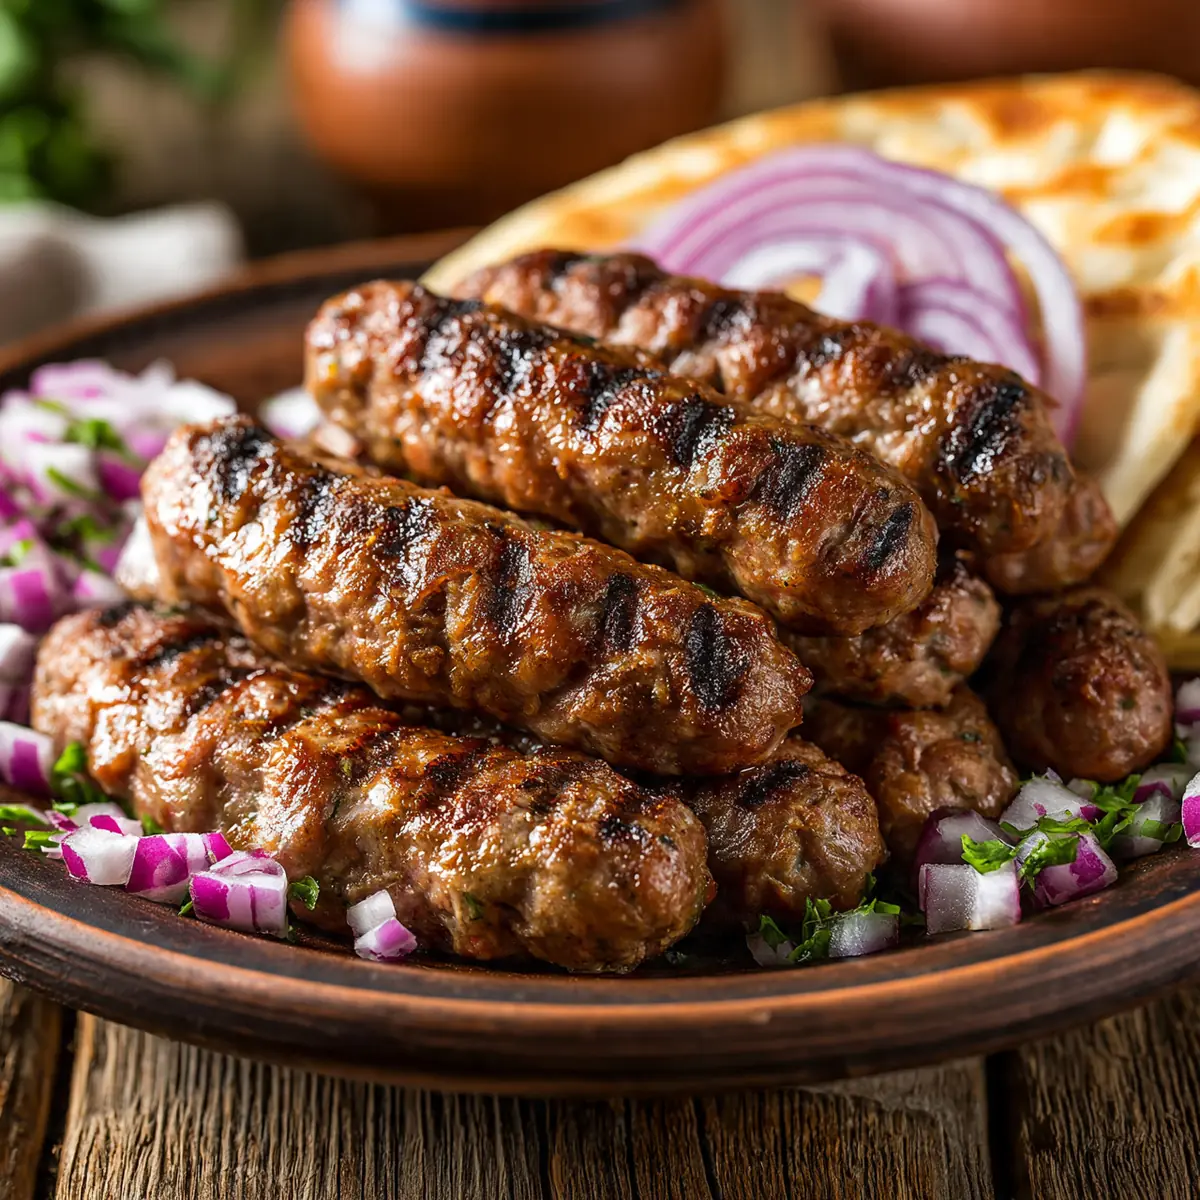
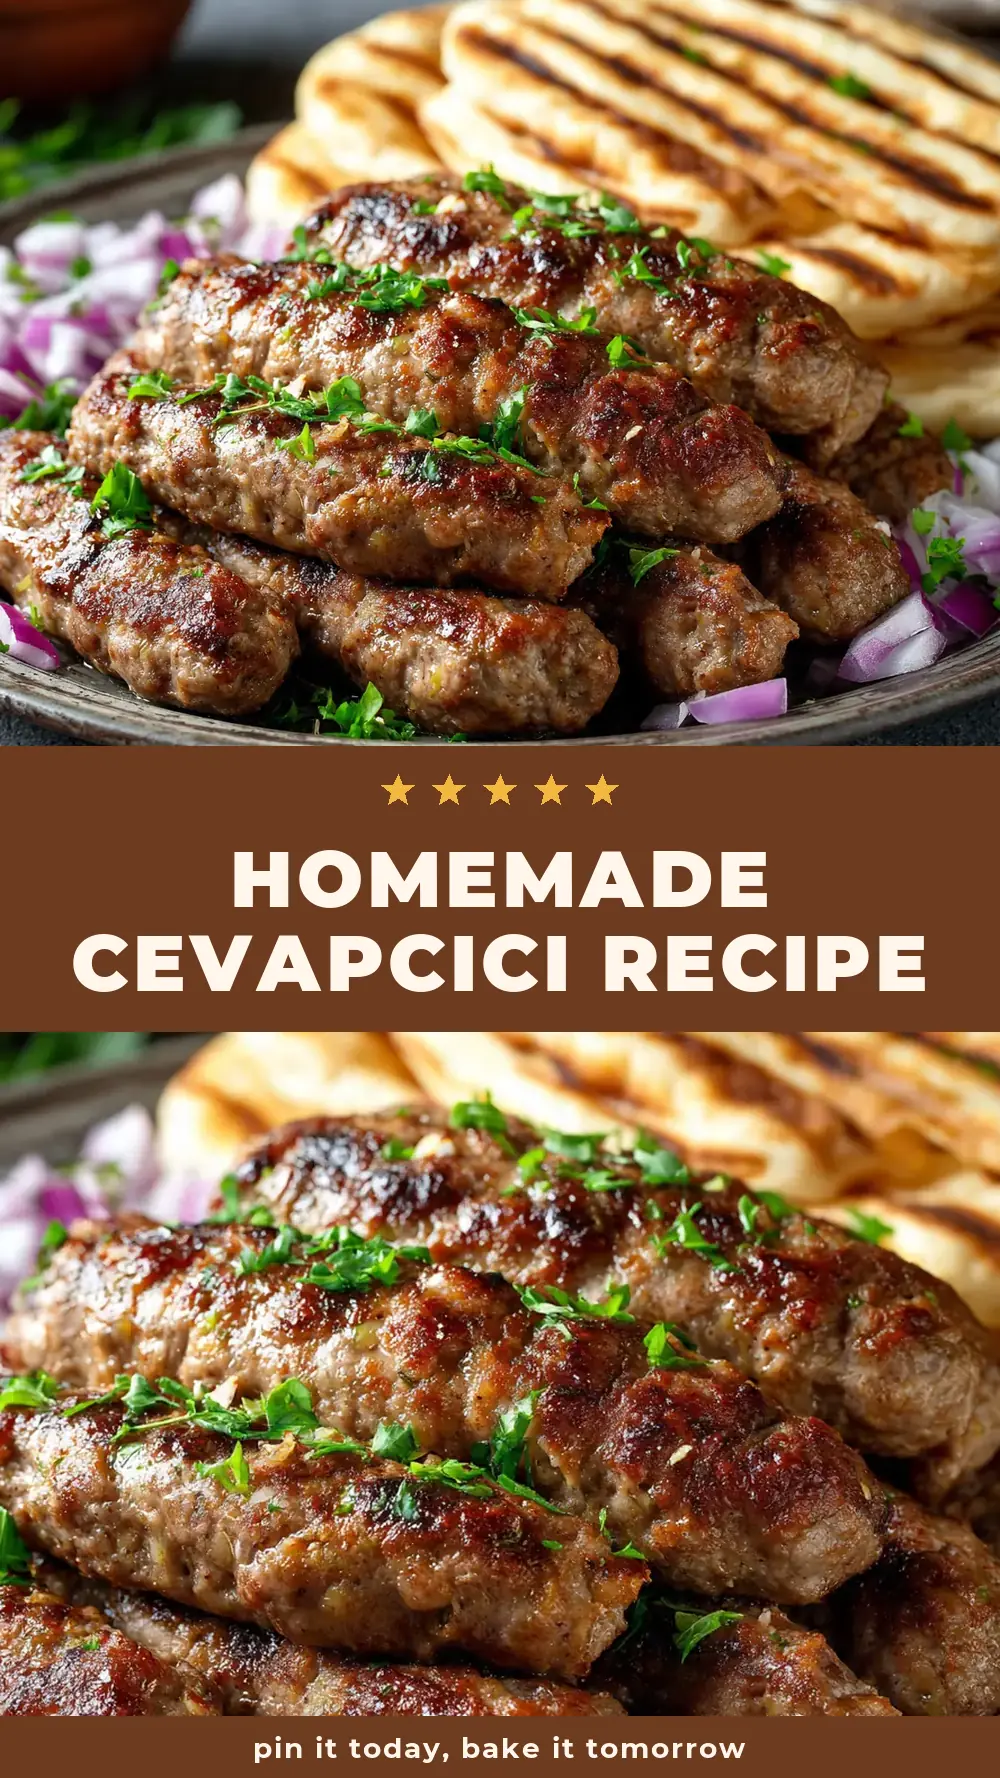
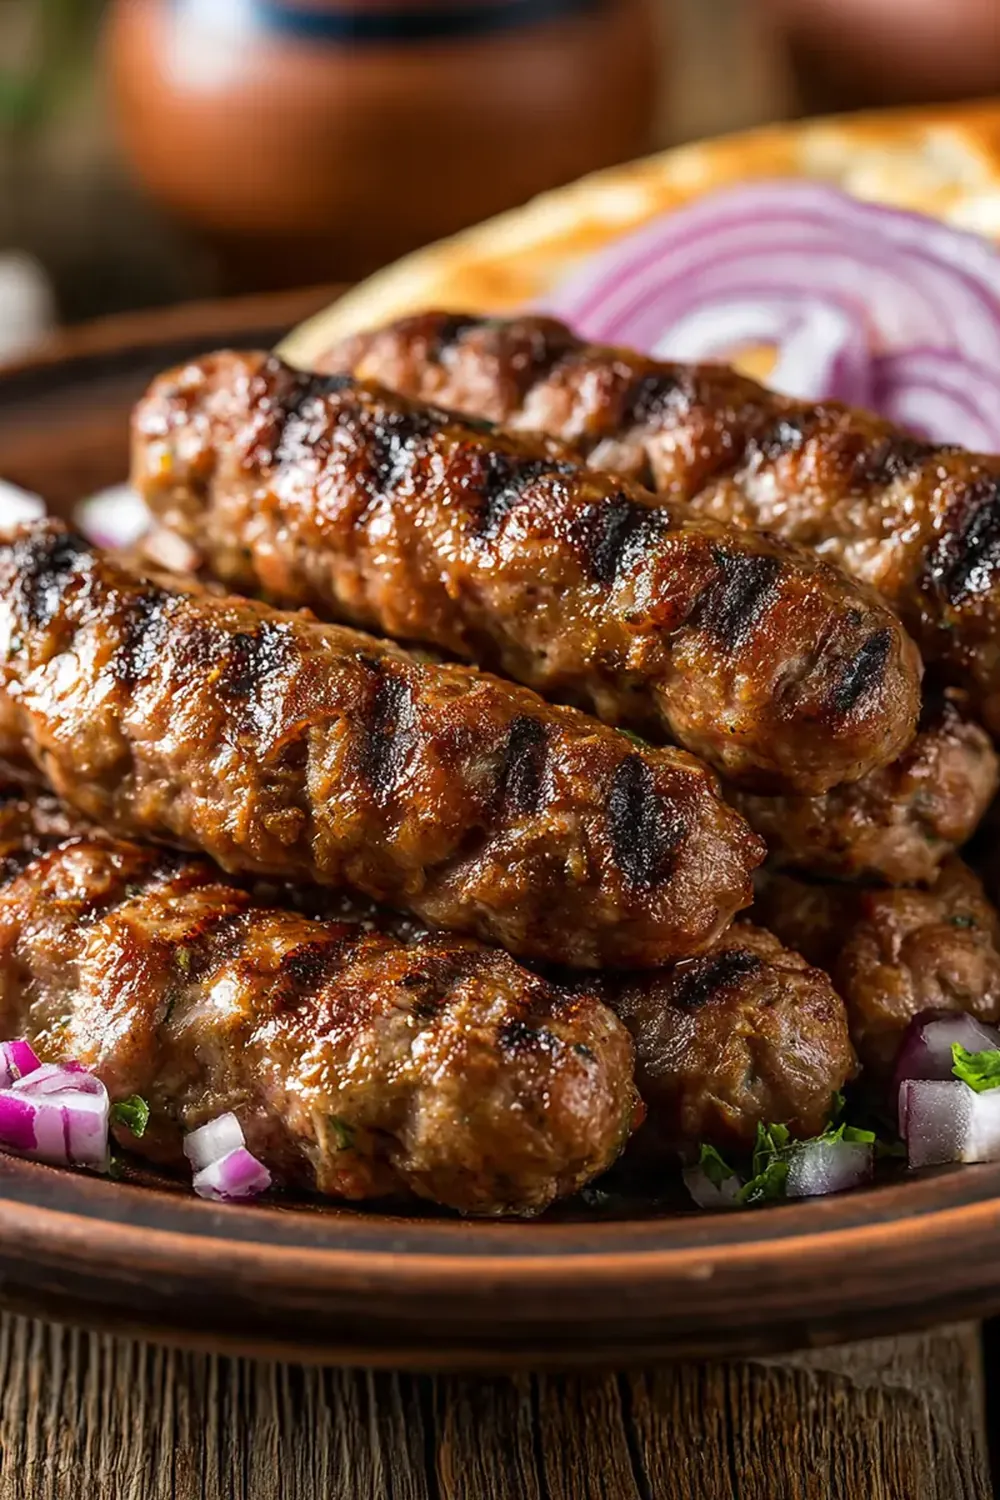
There’s a certain magic in serving a plate of homemade cevapcici that makes your guests believe you’ve smuggled a chef into the kitchen. I still remember the first time I arranged these little spiced sausages on a long wooden board, nestled next to a dollop of creamy ajvar and a shower of chopped parsley. The room went quiet for a moment, and then came the chorus of “Where did you learn to make these?” Friends always ask me for this recipe after trying it at dinner parties, and the secret is not just in the meat, but in the love you put into the presentation. Let’s get straight to it—this is your guide to making cevapcici that look and taste like they belong in a high-end bistro.
Recipe Overview
- Prep Time: 20 minutes (plus 30 minutes chilling)
- Cook Time: 10 minutes
- Total Time: 1 hour
- Servings: 4-6 (makes about 24 cevapcici)
- Difficulty: Intermediate
Why You’ll Love This Homemade Cevapcici Recipe
- Restaurant-quality plating at home: With a few thoughtful touches, these cevapcici become the centrepiece of a stunning dinner spread that will impress even the most discerning guests.
- Deep, savoury flavour without fuss: The combination of minced meats, garlic, and paprika creates a rich taste that tastes like it’s been simmering for hours, yet it comes together in under an hour.
- Perfect for grilling or pan-frying: Whether you fire up the barbecue or use a skillet, these little rolls hold their shape beautifully and develop a gorgeous caramelised crust.
- Family-friendly and kid-approved: My kids absolutely devour this every time I make it, especially when I let them help shape the rolls—it’s a fun hands-on activity before dinner, much like shaping a Classic Vegetable Casserole Recipe.cookingenious.com/quick-cherry-cake-recipe/”>Quick Cherry Cake Recipe.cookingenious.com/easy-stuffed-zucchini-recipe/”>Easy Stuffed Zucchini Recipe.cookingenious.com/classic-antipasti-recipe/”>Classic Antipasti Recipe .cookingenious.com/crispy-konigsberg-meatballs-recipe/”>Crispy Königsberg Meatballs Recipe .cookingenious.com/creamy-apple-crumble-cake-recipe/”>Creamy Apple Crumble Cake Recipe .cookingenious.com/easy-potato-soup-recipe/”>Easy Potato Soup Recipe .cookingenious.com/ultimate-vegetable-lasagna-recipe/”>Ultimate Vegetable Lasagna Recipe .cookingenious.com/hearty-chicken-alfredo-recipe/”>Hearty Chicken Alfredo Recipe .cookingenious.com/traditional-currywurst-sacookingenious.com/delicious-chia-pudding-recipe/”>Delicious Chia Pudding Recipe.cookingenious.com/crispy-konigsberg-meatballs-recipe/”>Crispy Königsberg Meatballs Recipe.cookingenious.com/creamy-apple-crumble-cake-recipe/”>Creamy Apple Crumble Cake Recipe.cookingenious.com/easy-potato-soup-recipe/”>Easy Potato Soup Recipe.cookingenious.com/ultimate-vegetable-lasagna-recipe/”>Ultimate Vegetable Lasagna Recipe.cookingenious.com/hearty-chicken-alfredo-recipe/”>Hearty Chicken Alfredo Recipe.cookingenious.com/traditional-currywurst-sauce-recipe/”>Traditional Currywurst Sauce Recipe .cookingenious.com/best-omelette-recipe/”>Best Omelette Recipe .cookingenious.com/hearty-fried-noodles-recipe/”>Hearty Fried Noodles Recipe .cookingenious.com/creamy-melon-feta-salad-rcoocookingenious.com/homemade-meatloaf-recipe/”>Homemade Meatloaf Recipe .cookingenious.com/best-omelette-recipe/”>Best Omelette Recipe .cookingenious.com/hearty-fried-noodles-recipe/”>Hearty Fried Noodles Recipe .cookingenious.com/creamy-melon-feta-salad-rcookingenious.com/quick-mac-and-cheese-recipe/”>Quick Mac And Cheese Recipe .cookingenious.com/best-omelette-recipe/”>Best Omelette Recipe.cookingenious.com/hearty-fried-noodles-recipe/”>Hearty Fried Noodles Recipe .cookingenious.com/creamy-melon-feta-salad-recipe/”>Creamy Melon Feta Salad Recipe .cookingenious.com/classic-braided-yeast-bread-recipe/”>Classic Braided Yeast Bread Recipe . Easily cucookingenious.com/homemade-pasta-bake-recipe/”>Homemade Pasta Bake Recipe.cookingenious.com/creamy-melon-feta-salad-recipe/”>Creamy Melon Feta Salad Recipe.cookingenious.com/classic-braided-yeast-bread-recipe/”>Classic Braided Yeast Bread Recipe.
- Easily customisable for any diet: From spicy versions to plant-based alternatives, this recipe bends to your needs without losing its soul, much like this Ultimate Fried Potatoes Recipe.cookingenious.com/hearty-goulash-soup-recipe/”>Hearty Goulash Soup Recipe.
Ingredients You’ll Need
- 500g minced beef (20% fat)
- 250g minced lamb
- 1 medium onion, finely grated
- 4 cloves garlic, minced
- 2 teaspoons sweet paprika
- 1 teaspoon smoked paprika
- 1 teaspoon salt
- ½ teaspoon black pepper
- ½ teaspoon baking soda
- 2 tablespoons flat-leaf parsley, finely chopped
- 1 tablespoon sunflower oil (for the pan)
- Ice water (about 3-4 tablespoons, as needed)
Tip: For the best texture, ask your butcher to mince the beef and lamb together with a medium grind. This ensures the fat is evenly distributed, which keeps the cevapcici moist during cooking.
How to Make Homemade Cevapcici Recipe
- Prepare the meat mixture: In a large bowl, combine the minced beef, minced lamb, grated onion, minced garlic, sweet paprika, smoked paprika, salt, black pepper, baking soda, and chopped parsley. Use your hands to mix thoroughly—you’ll feel the texture become slightly sticky and cohesive as the baking soda activates. The mixture should smell deeply savoury and aromatic, with the paprika lending a warm reddish hue.
- Add ice water for moisture: Sprinkle in 2 tablespoons of ice water and continue mixing. The mixture will feel firmer at first, then loosen slightly as the water incorporates. Add another tablespoon if needed, until the blend feels soft but not wet. The sound of the meat squelching softly against the bowl is your cue that it’s hydrated enough.
- Chill the mixture: Cover the bowl with cling film and refrigerate for 30 minutes. During this time, the flavours meld and the baking soda helps tenderise the meat. When you take it out, the mixture will feel firmer and slightly more compact—perfect for shaping.
- Shape the cevapcici: Wet your hands with cold water to prevent sticking. Pinch off a portion of the mixture about the size of a walnut, and roll it between your palms into a cylinder about 5-6cm long. Place each piece on a tray lined with baking paper. You should have around 24 uniform rolls. Their surface should be smooth and slightly glossy, with no cracks.
- Heat the pan: Place a large frying pan or skillet over medium-high heat and add the sunflower oil. Wait until the oil shimmers and you see faint wisps of smoke rising—this means it’s hot enough to sear. The sizzle when you test a small piece of meat should be immediate and lively.
- Sear the cevapcici: Carefully place the rolls in the pan, leaving a little space between each. Cook for 4-5 minutes without moving them. Listen for a steady, even sizzle—if it’s too loud, the heat is too high; if it’s quiet, turn it up slightly. After 4 minutes, the bottoms should be a deep golden brown with a crisp crust. Flip each piece gently using tongs.
- Cook the other side: Cook for another 4-5 minutes, rotating the pan halfway through for even browning. The cevapcici should feel firm to the touch and have a rich, dark brown colour all around. A meat thermometer inserted into the centre should read 71°C for beef and lamb. The smell in the kitchen will be intoxicating—smoky, garlicky, and utterly inviting.
- Rest before serving: Transfer the cooked cevapcici to a warm plate and let them rest for 5 minutes. This allows the juices to redistribute, ensuring each bite is tender. You’ll notice the surface becoming slightly matte as they cool, which is a sign they’re ready for plating.
Tips From My Kitchen
- Use the right fat ratio: Fat is your friend here—it keeps the cevapcici moist and flavourful. I aim for 20% fat in the beef and 15-20% in the lamb. Too lean, and they’ll be dry and crumbly; too fatty, and they’ll shrink excessively. The fat renders during cooking, creating a natural basting effect that gives that gorgeous crust.
- Chill the mixture thoroughly: The 30-minute chill is non-negotiable. It firms up the fats, making the mixture much easier to shape without sticking. More importantly, it allows the baking soda to work its magic on the proteins, resulting in a tender, almost velvety texture. I’ve skipped this step in a rush before, and the cevapcici fell apart in the pan—lesson learned.
- Wet hands for shaping: Keep a small bowl of cold water nearby while you roll. Dipping your fingers between each piece prevents the meat from sticking to your palms and ensures a smooth, even surface. This small habit makes a huge difference in presentation—your guests will notice the uniform, professional look.
- Don’t overcrowd the pan: Work in batches if necessary. When the pan is too full, the temperature drops and the meat steams instead of searing. You want that immediate sizzle that creates a caramelised crust. I usually cook 8-10 pieces at a time in a 30cm skillet, leaving a finger’s width of space between each.
- Add a final touch of butter: In the last minute of cooking, drop a small knob of butter into the pan and tilt it to coat the cevapcici. This adds a subtle richness and a beautiful sheen that makes them look glossy and appetising on the plate. It’s a trick I picked up from a chef friend, and it elevates the dish instantly.
Equipment You’ll Need
- Large frying pan or skillet (preferably cast iron for even heat)
- Sharp knife and cutting board
- Mixing bowls (one large, one small for water)
- Wooden spoon or spatula
- Tongs for flipping
- Baking paper and tray for shaping
- Meat thermometer (optional, but recommended)
Common Mistakes to Avoid
- Overcrowding the pan: When you cram too many cevapcici into the pan, the temperature plummets and the meat releases its juices instead of searing. This leads to a grey, soggy exterior rather than that coveted golden crust. Always cook in batches, and let the pan reheat between rounds.
- Wrong temperature: Cooking over low heat will cause the cevapcici to dry out before they brown, while heat that’s too high will burn the outside before the inside is cooked. Medium-high is the sweet spot—the oil should shimmer but not smoke aggressively. If you see black specks forming, lower the heat immediately.
- Skipping the rest time: It’s tempting to serve straight from the pan, but resting is crucial. Without it, the juices run out onto the plate, leaving the meat dry and the presentation messy. Five minutes of patience yields a far superior result—firm, juicy, and picture-perfect.
Delicious Variations to Try
- Spicy Version: Add 1-2 finely chopped fresh red chillies or 1 teaspoon of chilli flakes to the meat mixture. For an extra kick, incorporate a teaspoon of harissa paste. The heat balances beautifully with the creamy ajvar you’ll serve alongside.
- Vegetarian/Vegan Option: Replace the meat with 500g of plant-based mince (look for one with a high protein content) and add 2 tablespoons of cooked quinoa for binding. You’ll also need 1 tablespoon of flaxseed meal mixed with 3 tablespoons of water as an egg substitute. The texture will be slightly softer, but the flavour is still robust.
- Different Protein: Swap the lamb for minced turkey or chicken for a lighter version. If using poultry, add 2 tablespoons of olive oil to the mixture to compensate for the lower fat content. The cooking time remains the same, but watch the internal temperature—poultry needs to reach 74°C.
What to Serve With Homemade Cevapcici Recipe
- Ajvar (roasted red pepper and aubergine spread) – the sweet, smoky notes are a classic pairing.
- Lepinja (flatbread) or crusty bread to soak up the juices.
- Fresh salad with tomato, cucumber, and red onion, dressed with olive oil and lemon.
- Sour cream or Greek yoghurt mixed with a pinch of salt and minced dill.
- Grilled onions and bell peppers for a colourful, rustic side.
For a complete meal, consider serving these alongside a bowl of Lamb Kofta Recipe Grilled Spiced for a Mediterranean-inspired feast, or start with Lettuce Wraps Recipe Fresh Appetizer to keep the appetites whetted.
Frequently Asked Questions
Homemade Cevapcici Recipe
Ingredients
Method
-
Prepare the meat mixture: In a large bowl, combine the minced beef, minced lamb, grated onion, minced garlic, sweet paprika, smoked paprika, salt, black pepper, baking soda, and chopped parsley. Use your hands to mix thoroughly—you’ll feel the texture become slightly sticky and cohesive as the baking soda activates. The mixture should smell deeply savoury and aromatic, with the paprika lending a warm reddish hue.
-
Add ice water for moisture: Sprinkle in 2 tablespoons of ice water and continue mixing. The mixture will feel firmer at first, then loosen slightly as the water incorporates. Add another tablespoon if needed, until the blend feels soft but not wet. The sound of the meat squelching softly against the bowl is your cue that it’s hydrated enough.
-
Chill the mixture: Cover the bowl with cling film and refrigerate for 30 minutes. During this time, the flavours meld and the baking soda helps tenderise the meat. When you take it out, the mixture will feel firmer and slightly more compact—perfect for shaping.
-
Shape the cevapcici: Wet your hands with cold water to prevent sticking. Pinch off a portion of the mixture about the size of a walnut, and roll it between your palms into a cylinder about 5-6cm long. Place each piece on a tray lined with baking paper. You should have around 24 uniform rolls. Their surface should be smooth and slightly glossy, with no cracks.
-
Heat the pan: Place a large frying pan or skillet over medium-high heat and add the sunflower oil. Wait until the oil shimmers and you see faint wisps of smoke rising—this means it’s hot enough to sear. The sizzle when you test a small piece of meat should be immediate and lively.
-
Sear the cevapcici: Carefully place the rolls in the pan, leaving a little space between each. Cook for 4-5 minutes without moving them. Listen for a steady, even sizzle—if it’s too loud, the heat is too high; if it’s quiet, turn it up slightly. After 4 minutes, the bottoms should be a deep golden brown with a crisp crust. Flip each piece gently using tongs.
-
Cook the other side: Cook for another 4-5 minutes, rotating the pan halfway through for even browning. The cevapcici should feel firm to the touch and have a rich, dark brown colour all around. A meat thermometer inserted into the centre should read 71°C for beef and lamb. The smell in the kitchen will be intoxicating—smoky, garlicky, and utterly inviting.
-
Rest before serving: Transfer the cooked cevapcici to a warm plate and let them rest for 5 minutes. This allows the juices to redistribute, ensuring each bite is tender. You’ll notice the surface becoming slightly matte as they cool, which is a sign they’re ready for plating.
Notes
I hope this recipe becomes a treasured part of your entertaining repertoire—it certainly has in mine. There’s something deeply satisfying about watching guests reach for another piece, their eyes lighting up as they dip it into ajvar. If you give this a try, I’d love to hear how you plated it and what sides you chose. Drop a comment below and share your experience—your insights might just inspire someone else to host their own cevapcici night.