No Bake Chocolate Lasagna
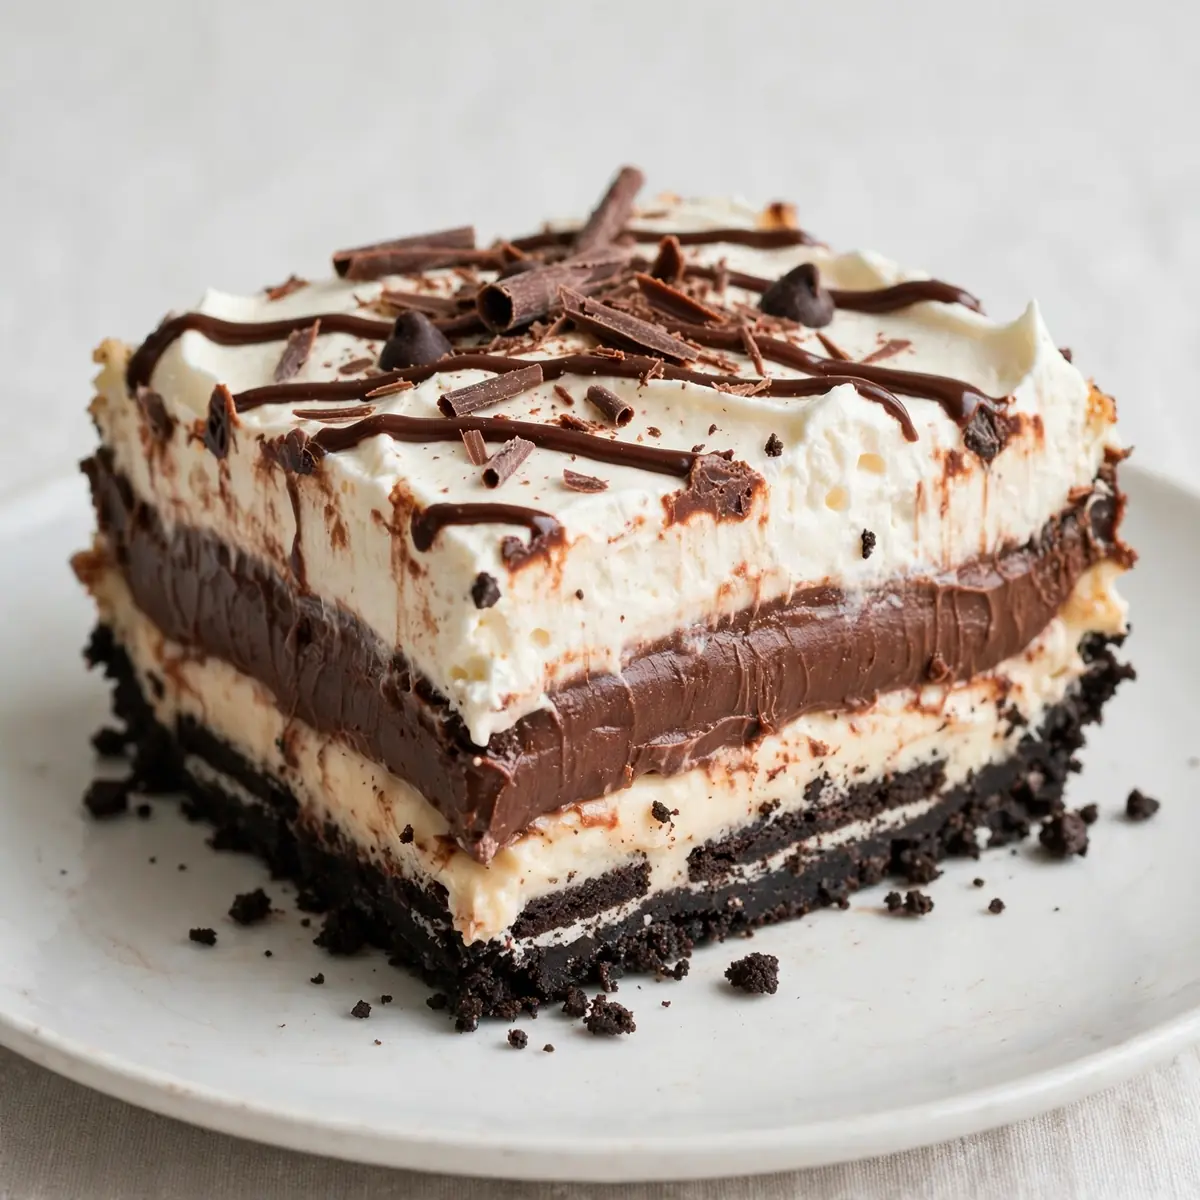
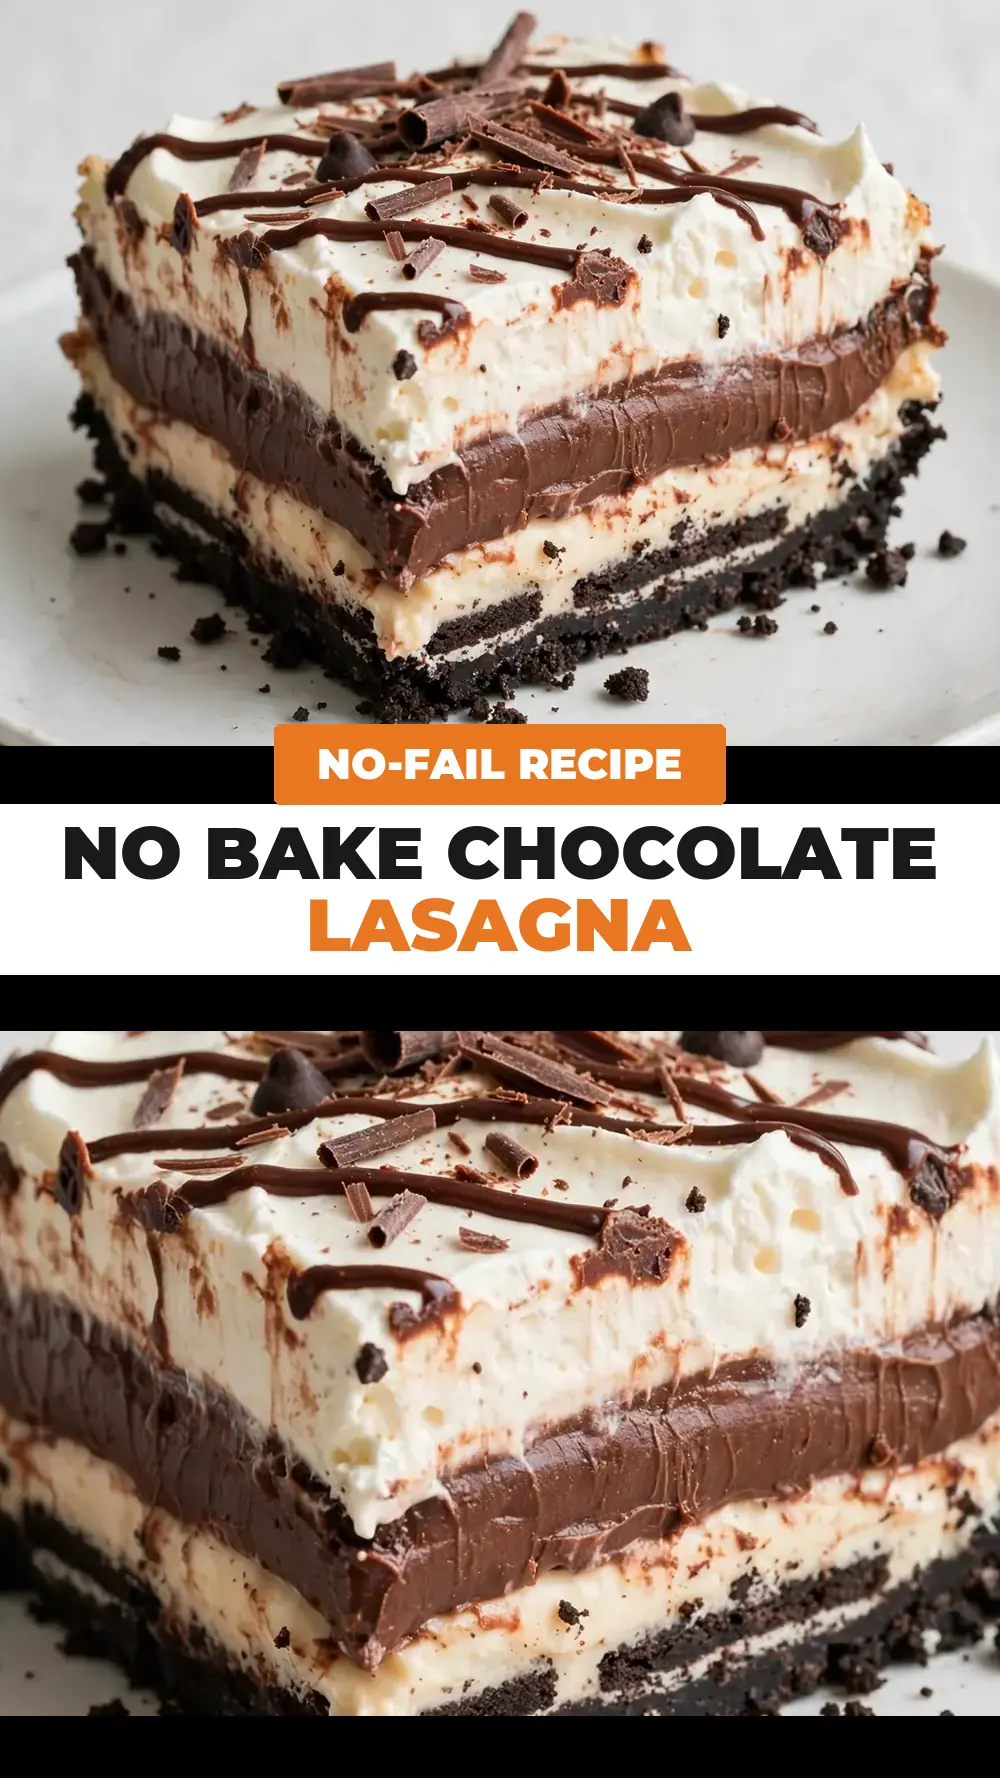
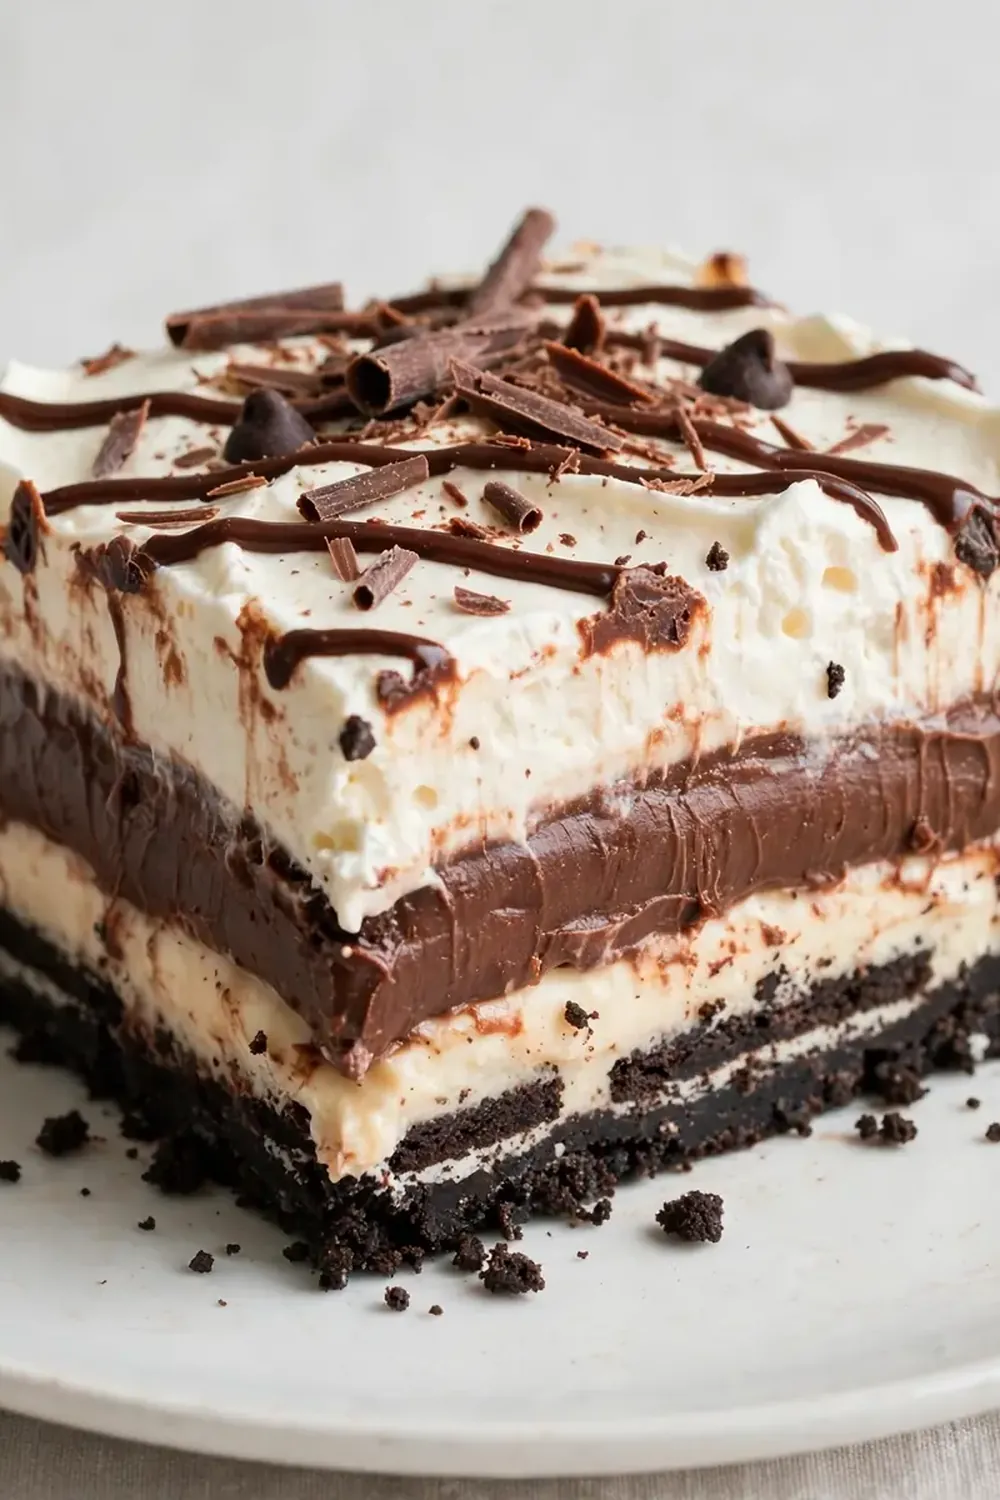
When you need a dessert that looks spectacular but requires absolutely no oven time, this no bake chocolate lasagna is the answer. It layers rich chocolate pudding, crisp biscuits, and a silky cream cheese layer into a chilled dessert that tastes far more complicated than it is.
Recipe Overview
- Prep Time: 30 minutes
- Chill Time: 4 hours minimum (overnight is best)
- Total Time: 4 hours 30 minutes
- Servings: 12 generous slices
- Difficulty: Easy
Why You’ll Love This No Bake Chocolate Lasagna
- No oven required: Perfect for warm days when you don’t want to heat up the kitchen.
- Make-ahead friendly: This dessert actually improves after a night in the fridge, so you can prepare it a day before your gathering.
- Customisable layers: You can swap the biscuit type, change the pudding flavour, or add different toppings with ease.
- Kid-friendly assembly: My kids absolutely devour this every time I make it, and they love helping to crush the biscuits and spread the layers.
- Feeds a crowd: This is a large dessert that slices beautifully, making it ideal for parties or family dinners.
Ingredients You’ll Need
- 400g digestive biscuits (or any plain tea biscuit)
- 150g unsalted butter, melted
- 500g full-fat cream cheese, softened to room temperature
- 200g icing sugar, sifted
- 1 teaspoon vanilla extract
- 600ml double cream (heavy cream)
- 2 x 100g packets instant chocolate pudding mix
- 800ml whole milk, cold
- 200g dark chocolate (70% cocoa), finely chopped
- 100ml double cream, for the ganache topping
- Chocolate shavings or curls, to decorate
Tip: Use full-fat cream cheese and double cream for the richest, most stable layers. Low-fat alternatives will make the filling runny and difficult to slice cleanly.
How to Make No Bake Chocolate Lasagna
- Prepare the biscuit base: Place the digestive biscuits in a large resealable bag and crush them with a rolling pin until you have fine crumbs mixed with a few slightly larger pieces. You should see a uniform sandy texture with no large chunks remaining. Pour the crumbs into a bowl, add the melted butter, and stir until every crumb is coated and the mixture looks like wet sand.
- Form the crust: Tip the buttery crumbs into a 23cm x 33cm (9×13 inch) dish. Press them down firmly and evenly using the flat bottom of a measuring cup or glass. The crust should feel compact and solid when you run your finger across it. Place the dish in the refrigerator while you prepare the next layer.
- Make the cream cheese layer: In a large bowl, beat the softened cream cheese with an electric mixer until it is completely smooth and free of lumps — you should see a glossy, pale white mixture. Add the sifted icing sugar and vanilla extract, then beat again until the mixture is light and fluffy, about 2 minutes. In a separate bowl, whip 300ml of the double cream until it holds stiff peaks; when you lift the beaters, the cream should stand up without drooping. Gently fold the whipped cream into the cream cheese mixture using a spatula until no white streaks remain. The final texture should be thick, airy, and spreadable.
- Spread the first filling layer: Remove the dish from the fridge. Spread the cream cheese mixture evenly over the biscuit crust using an offset spatula. Smooth the top so it is level — it should look like a thick, creamy blanket. Return the dish to the fridge to firm up while you make the pudding.
- Prepare the chocolate pudding: In a large bowl, whisk together the instant chocolate pudding mix and the cold milk. Whisk vigorously for 2 minutes until the mixture thickens noticeably — you will feel it become heavy and resistant in the bowl. The pudding should be thick enough to coat the back of a spoon heavily. Let it sit for 5 minutes to fully set.
- Assemble the pudding layer: Remove the dish from the fridge. Pour the thickened chocolate pudding over the cream cheese layer and spread it gently into an even layer. The pudding should be dark, glossy, and smooth across the surface. Tap the dish gently on the counter to release any air bubbles. Return the dish to the fridge for at least 30 minutes so the pudding sets firmly.
- Make the ganache topping: Place the finely chopped dark chocolate in a heatproof bowl. Heat 100ml of double cream in a small saucepan until it just begins to simmer — you will see tiny bubbles forming around the edges, but do not let it boil. Pour the hot cream over the chocolate and let it sit undisturbed for 2 minutes. Stir gently in one direction until the chocolate is completely melted and the ganache is smooth, dark, and shiny. Let it cool for 5 minutes until it thickens slightly but is still pourable.
- Finish and chill: Pour the ganache over the set pudding layer and tilt the dish to spread it evenly. The ganache should form a dark, glossy mirror across the top. Sprinkle with chocolate shavings or curls. Cover the dish with cling film and refrigerate for at least 4 hours, but overnight is best. The lasagna should feel firm and cold to the touch before slicing. After testing this recipe five times, I finally got it just right — the overnight rest is non-negotiable for clean slices.
Tips From My Kitchen
- Use cold milk for the pudding: Instant pudding requires cold milk to set properly. If the milk is even slightly warm, the pudding will stay thin and runny, and your layers will bleed into each other. Measure the milk straight from the fridge and whisk immediately.
- Soften cream cheese fully: Cold cream cheese will create lumps that never fully smooth out. Leave the cream cheese on the counter for at least an hour before starting. If you are short on time, cut it into small cubes and microwave on low power for 10-second intervals until it is soft to the touch but not warm.
- Press the crust firmly: A loose crust will crumble when you try to serve the slices. Use the flat bottom of a glass or measuring cup to press the crumbs with serious force. The crust should feel like a solid, compacted base when you press it with your finger.
- Whip cream to stiff peaks: Under-whipped cream will deflate when folded into the cream cheese, making the layer thin and runny. Whip until the cream holds its shape completely and leaves a clean trail when you lift the beaters. Stop immediately — over-whipping will turn it into butter.
- Chill between layers: Each layer needs time to set before you add the next one. If you rush, the layers will blend together and you will lose the beautiful striped effect when slicing. The cream cheese layer needs at least 15 minutes in the fridge, and the pudding needs 30 minutes.
Equipment You’ll Need
- 23cm x 33cm (9×13 inch) baking dish
- Rolling pin or heavy-bottomed pan for crushing biscuits
- Large resealable plastic bag
- Electric hand mixer or stand mixer
- Large mixing bowls (at least 3)
- Offset spatula or butter knife for spreading
- Small saucepan for heating cream
- Fine grater or vegetable peeler for chocolate shavings
Common Mistakes to Avoid
- Overcrowding the pan: This recipe is designed for a 23cm x 33cm dish. Using a smaller dish will make the layers too thick, resulting in a dessert that is difficult to slice and may collapse. Stick to the recommended size for the best structural integrity.
- Wrong temperature: The cream cheese must be at room temperature, and the milk must be very cold. If the cream cheese is cold, your filling will be lumpy. If the milk is warm, your pudding will never set. Check both temperatures before you begin.
- Skipping the rest time: The minimum chill time is 4 hours, but 8 hours or overnight is far superior. If you cut into this dessert too early, the layers will slide apart and you will end up with a messy, soupy plate. Patience is the secret to clean, beautiful slices.
Delicious Variations to Try
- Spicy Version: Add ½ teaspoon of cayenne pepper and 1 teaspoon of ground cinnamon to the pudding mixture before whisking. The warmth of the spices cuts through the richness beautifully and adds an unexpected depth of flavour.
- Vegetarian/Vegan Option: Use a plant-based cream cheese and coconut cream (chilled and whipped) instead of double cream. Choose a vegan chocolate pudding mix or make your own using cornflour, cocoa powder, and oat milk. The biscuit base works well with vegan butter and digestives that are accidentally vegan.
- Different Protein: While this is a dessert, you can turn it into a more substantial treat by adding a layer of crushed roasted peanuts or hazelnuts between the cream cheese and pudding layers. The nutty crunch provides a lovely textural contrast to the creamy layers.
What to Serve With No Bake Chocolate Lasagna
- A dollop of freshly whipped cream on each slice to balance the richness
- Fresh raspberries or strawberries for a bright, tart contrast
- A strong cup of black coffee or an espresso to cut through the sweetness
- A glass of cold milk — especially popular with younger diners
Still hungry for ideas? You might also love Christmas Cookie Lasagna Recipe No Bake Dessert, Healthy No Bake Bliss Balls from our sister kitchens.
Frequently Asked Questions
no bake chocolate lasagna
Ingredients
Method
-
Prepare the biscuit base: Place the digestive biscuits in a large resealable bag and crush them with a rolling pin until you have fine crumbs mixed with a few slightly larger pieces. You should see a uniform sandy texture with no large chunks remaining. Pour the crumbs into a bowl, add the melted butter, and stir until every crumb is coated and the mixture looks like wet sand.
-
Form the crust: Tip the buttery crumbs into a 23cm x 33cm (9×13 inch) dish. Press them down firmly and evenly using the flat bottom of a measuring cup or glass. The crust should feel compact and solid when you run your finger across it. Place the dish in the refrigerator while you prepare the next layer.
-
Make the cream cheese layer: In a large bowl, beat the softened cream cheese with an electric mixer until it is completely smooth and free of lumps — you should see a glossy, pale white mixture. Add the sifted icing sugar and vanilla extract, then beat again until the mixture is light and fluffy, about 2 minutes. In a separate bowl, whip 300ml of the double cream until it holds stiff peaks; when you lift the beaters, the cream should stand up without drooping. Gently fold the whipped cream into the cream cheese mixture using a spatula until no white streaks remain. The final texture should be thick, airy, and spreadable.
-
Spread the first filling layer: Remove the dish from the fridge. Spread the cream cheese mixture evenly over the biscuit crust using an offset spatula. Smooth the top so it is level — it should look like a thick, creamy blanket. Return the dish to the fridge to firm up while you make the pudding.
-
Prepare the chocolate pudding: In a large bowl, whisk together the instant chocolate pudding mix and the cold milk. Whisk vigorously for 2 minutes until the mixture thickens noticeably — you will feel it become heavy and resistant in the bowl. The pudding should be thick enough to coat the back of a spoon heavily. Let it sit for 5 minutes to fully set.
-
Assemble the pudding layer: Remove the dish from the fridge. Pour the thickened chocolate pudding over the cream cheese layer and spread it gently into an even layer. The pudding should be dark, glossy, and smooth across the surface. Tap the dish gently on the counter to release any air bubbles. Return the dish to the fridge for at least 30 minutes so the pudding sets firmly.
-
Make the ganache topping: Place the finely chopped dark chocolate in a heatproof bowl. Heat 100ml of double cream in a small saucepan until it just begins to simmer — you will see tiny bubbles forming around the edges, but do not let it boil. Pour the hot cream over the chocolate and let it sit undisturbed for 2 minutes. Stir gently in one direction until the chocolate is completely melted and the ganache is smooth, dark, and shiny. Let it cool for 5 minutes until it thickens slightly but is still pourable.
-
Finish and chill: Pour the ganache over the set pudding layer and tilt the dish to spread it evenly. The ganache should form a dark, glossy mirror across the top. Sprinkle with chocolate shavings or curls. Cover the dish with cling film and refrigerate for at least 4 hours, but overnight is best. The lasagna should feel firm and cold to the touch before slicing. After testing this recipe five times, I finally got it just right — the overnight rest is non-negotiable for clean slices.
Notes
I would love to hear how your no bake chocolate lasagna turns out. Have you tried any interesting variations, or did you discover a trick that made the layers even cleaner? Drop a comment below and share your experience — I read every single one and I am always looking for new ideas to test in my kitchen.