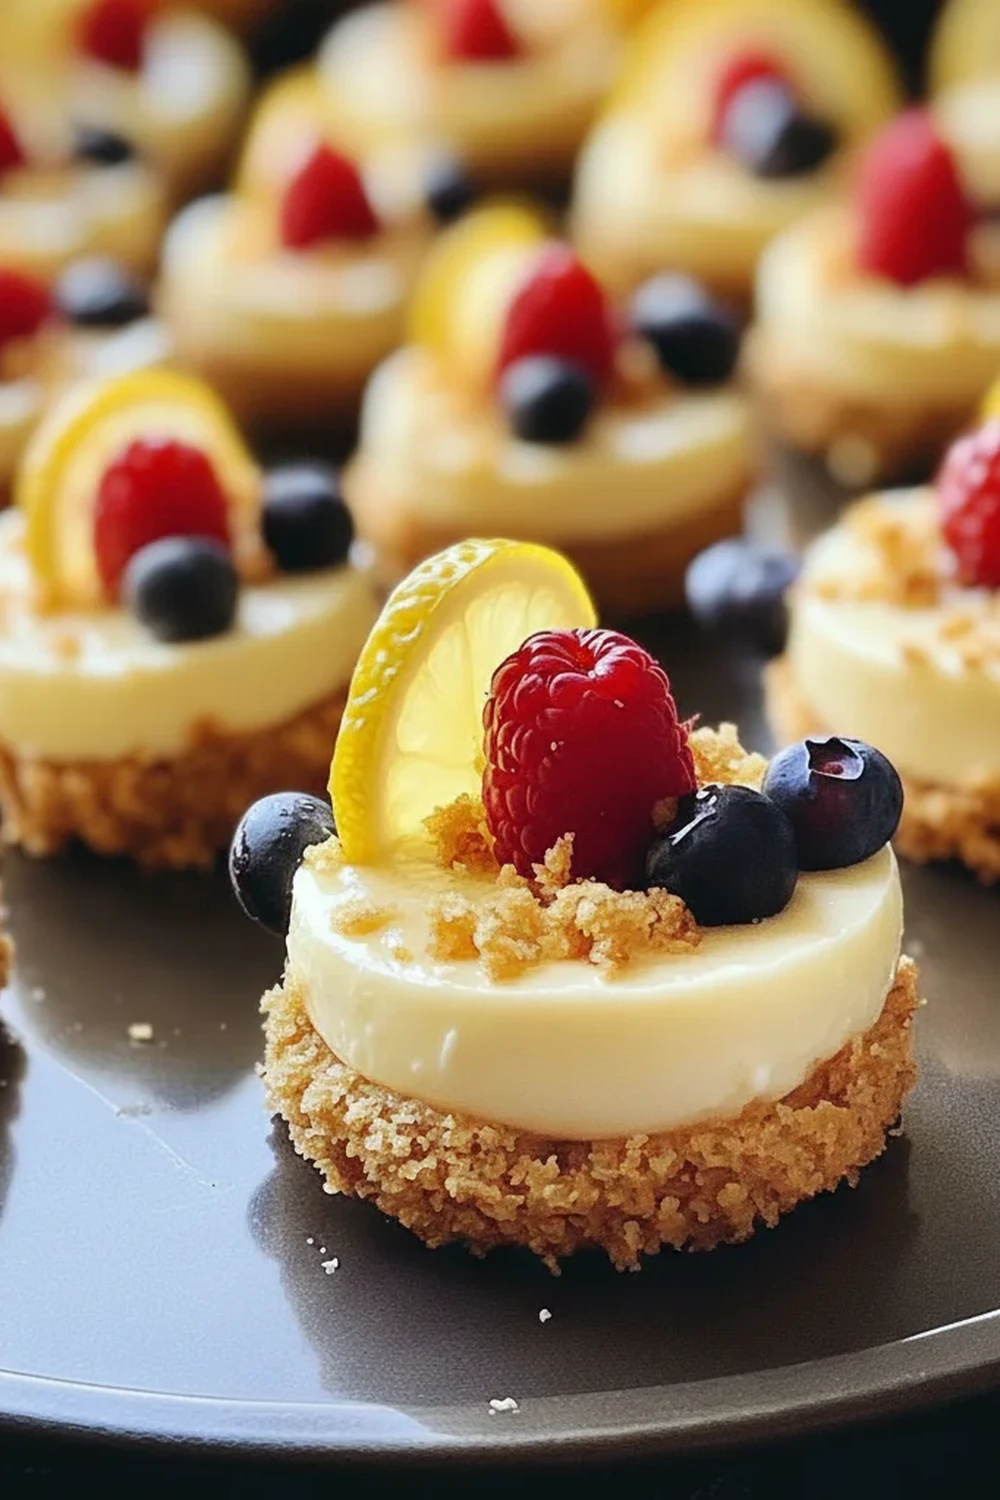
Zesty Mini Lemon Cheesecake Bites
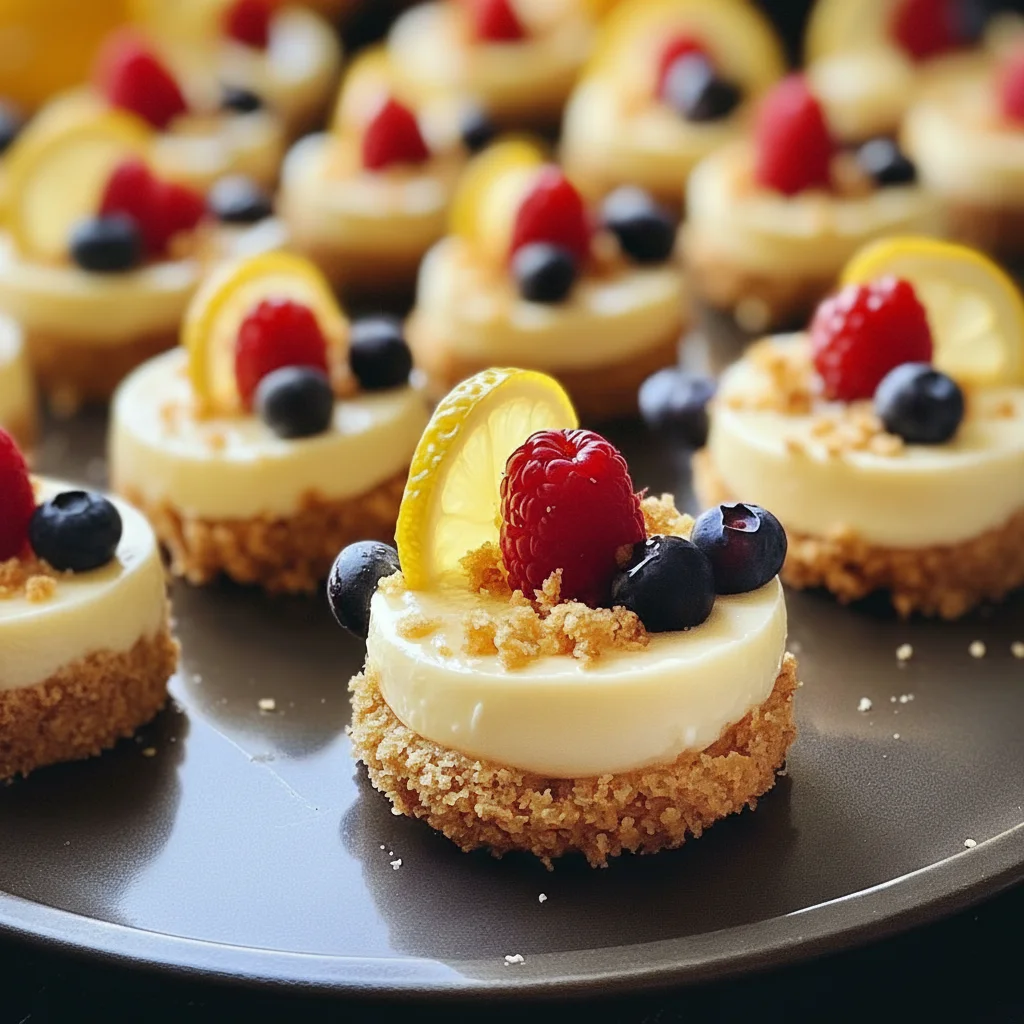
There’s something uniquely satisfying about a dessert that’s both elegant and delightfully simple to pop in your mouth. These Mini Lemon Cheesecake Bites are exactly that. They capture the essence of a classic lemon cheesecake—that buttery, crunchy biscuit base giving way to a rich, creamy, and zesty filling—all in one perfect, two-bite portion. I’ve been making this for over 3 years, and it never disappoints. It’s the recipe I turn to when I want to bring a little bit of sunshine to the table, regardless of the weather outside.
What I adore most is the balance. The tang from the fresh lemon juice and zest cuts through the richness of the cream cheese beautifully, so each bite feels bright and refreshing, never heavy. We’re not just using a hint of lemon here; we’re letting it be the star, creating a flavour that’s bold yet refined. This isn’t just a small dessert; it’s a small moment of pure bliss.
These little lemon bites are ideal when you want an impressive-looking dessert without the commitment of slicing a large cake. They work wonderfully for afternoon tea with friends, as a light finish after a Sunday roast like my Grilled Lamb Chops Recipe Tender, or packed up for a picnic. They’re individual portions of happiness that always get compliments.
Recipe Overview
This recipe guides you through creating individual lemon cheesecake bites with a crisp digestive biscuit base and a smooth, tangy cream cheese filling. Expect a vibrant, fresh lemon flavour that truly shines. From my own testing, I’ve found that letting the cream cheese and eggs come to full room temperature is the single most important step for achieving that flawlessly silky texture in the filling.
- Prep Time: 25 minutes
- Cook Time: 18 minutes
- Chill Time: 2 hours
- Total Time: 2 hours 43 minutes
- Servings: 24 bites
- Difficulty: Easy
Why You’ll Love These Mini Lemon Cheesecake Bites
- Vibrant Lemon Flavour: We use both the zest and juice of fresh lemons, which gives these cheesecake bites a genuinely zesty, bright taste that isn’t artificial. The tartness is perfectly balanced with the sweet, creamy filling.
- Ready in Under an Hour (Before Chilling): The active preparation and baking time come together in about 45 minutes, making it a very manageable baking project for a weekend afternoon.
- A Versatile Recipe: You can easily swap the digestive biscuits for ginger nuts for a bit of warmth, or even shortbread for an extra buttery base. A little white chocolate stirred into the filling also adds a lovely layer of decadence.
- Great for Gatherings: Because they’re already portioned, these bites are fantastic for parties, potlucks, and family get-togethers. There’s no slicing required, making them easy to serve and enjoy.
- Family Tested: I make this at least once a month – it’s become a family favourite. My children love grabbing one from the fridge for a treat, and they disappear very quickly whenever I take them to my parents’ house.
Ingredients You’ll Need
For the best results, I always recommend using full-fat ingredients, especially the cream cheese. It makes a world of difference to the final texture. I find that Philadelphia Original Full Fat Cream Cheese provides the perfect consistency and rich flavour that sets these mini cheesecakes so well.
- For the Biscuit Base:
- 200g digestive biscuits
- 100g unsalted butter, melted
- 1 tbsp caster sugar
- For the Lemon Filling:
- 500g full-fat cream cheese, at room temperature
- 150g caster sugar
- 2 large free-range eggs, at room temperature
- 1 tsp vanilla extract
- Zest of 2 large lemons
- 60ml fresh lemon juice (from about 1-2 lemons)
- 1 tbsp plain flour
- 120ml soured cream, at room temperature
Ashley’s Tip: Don’t be tempted to use bottled lemon juice. The flavour from freshly squeezed lemons is so much brighter and more aromatic, and you need the fresh zest anyway! It truly elevates the entire dessert.
How to Make Mini Lemon Cheesecake Bites
The process for making these lemon bites is straightforward. We’ll start by making and baking the buttery base, then whip up the creamy filling, bake them gently, and finally, let them chill to perfection. Following these steps ensures a smooth filling and a crisp crust.
- Prepare Your Tin: Preheat your oven to 180°C (160°C fan). Line a 24-hole mini muffin tin with paper cases.
- Make the Biscuit Base: Place the digestive biscuits in a food processor and pulse until they form fine crumbs. Alternatively, put them in a sealed bag and crush them with a rolling pin. Transfer the crumbs to a bowl, add the 1 tablespoon of caster sugar, and pour in the melted butter. Mix with a fork until all the crumbs are evenly moistened, like damp sand.
- Form the Bases: Spoon about 1 tablespoon of the biscuit mixture into each paper case. Use the back of a teaspoon or a small glass to press the crumbs down firmly and evenly. Bake for 5-7 minutes, until lightly golden. Set aside to cool while you make the filling.
- Start the Filling: In a large bowl using a stand mixer with the paddle attachment or a hand mixer, beat the room temperature cream cheese on a low-medium speed until completely smooth and free of lumps, about 2 minutes. Scrape down the sides and bottom of the bowl.
- Add Sugars and Flavour: Add the 150g of caster sugar and the plain flour and beat on low speed until just combined. Add the vanilla extract, lemon zest, and lemon juice, and mix again until smooth. What works best for me is keeping the mixer on a low speed throughout to avoid whipping too much air into the batter.
- Incorporate Eggs and Soured Cream: Add the room temperature eggs one at a time, mixing on low speed until each one is just incorporated. Don’t overmix! Finally, gently fold in the soured cream with a spatula until the batter is uniform.
- Fill and Bake: Carefully spoon the lemon cheesecake filling over the cooled biscuit bases, filling each case almost to the top. Bake for 15-18 minutes. The edges should be set, but the centre will still have a slight wobble when you gently shake the tin. This is key to a creamy texture.
- Cool and Chill: Turn off the oven and let the cheesecakes cool in the oven with the door slightly ajar for 30 minutes. Then, remove them from the oven and let them cool completely on a wire rack at room temperature. Once cool, cover and transfer the tin to the refrigerator to chill for at least 2 hours (or overnight) before serving.
Tips From My Kitchen
- Temperature Control is Key: I can’t stress this enough—your cream cheese, eggs, and soured cream *must* be at room temperature. Cold ingredients won’t combine properly and will result in a lumpy filling. Take them out of the fridge at least an hour before you begin.
- The Secret to No Cracks: I learned that the biggest culprits for cracked cheesecakes are over-mixing and sudden temperature changes. Mixing on a low speed, especially after adding the eggs, prevents incorporating excess air. Cooling them slowly in the turned-off oven helps prevent shocking the delicate filling. For more tips on this, BBC Good Food has an excellent guide on cheesecake techniques.
- Make-Ahead Magic: These cheesecake bites are brilliant for making in advance. You can prepare them completely a day or two before you need them. They actually taste even better the next day as the flavours have more time to meld and deepen.
- Storage: Store the mini cheesecakes in an airtight container in the refrigerator. They will keep well for up to 4 days. I find their texture is best within the first 2-3 days.
Equipment You’ll Need
- 24-hole mini muffin tin
- Paper liners/cases for the muffin tin
- Food processor or a rolling pin and sealed bag
- Stand mixer with paddle attachment or an electric hand mixer
- Mixing bowls
- Spatula
- Wire cooling rack
Common Mistakes to Avoid
- Over-mixing the Filling: Whipping too much air into the batter, particularly after adding the eggs, is the primary cause of cheesecakes rising up like soufflés in the oven and then cracking as they cool. Mix on low and stop as soon as the ingredients are combined.
- Using Cold Ingredients: If you add cold eggs or soured cream to your cream cheese base, it can cause the mixture to curdle and become lumpy. Patience is a virtue here; let everything come to room temperature first.
- Skipping the Chill Time: The final chill in the fridge isn’t just for getting them cold. This is a crucial step where the cheesecake filling firms up and sets completely. If you serve them too soon, they will be soft and won’t hold their shape properly.
Delicious Variations to Try
While the classic lemon is a star, this recipe is a wonderful canvas for other flavours. If you feel like experimenting, here are a few ideas I’ve tried and loved.
- Zesty Lime & Coconut Bites: Swap the lemon zest and juice for lime. For the base, use digestive biscuits but add 30g of desiccated coconut to the crumb mixture for a tropical twist.
- Ginger & Lemon: Replace the digestive biscuits with ginger nut biscuits. The gentle warmth and spice of the ginger pairs beautifully with the sharp lemon filling.
- White Chocolate & Raspberry: Reduce the sugar in the filling to 120g. Gently fold in 100g of melted and cooled white chocolate before pouring into the cases. After filling, press one or two fresh raspberries into the top of each cheesecake bite before baking. It looks as lovely as my Rose Gold Cake Recipe Elegant Dessert.
What to Serve With Mini Lemon Cheesecake Bites
These lemon bites are perfectly lovely on their own, but a little something extra can make them even more special. Here are my favourite pairings.
- Fresh Berries: A small handful of fresh raspberries, blueberries, or sliced strawberries provides a beautiful colour contrast and a burst of complementary flavour.
- A Dollop of Cream: A spoonful of lightly whipped double cream or a swirl of crème fraîche on top can temper the lemon’s tang and add another layer of creamy texture.
- A Refreshing Drink: These are wonderful with a cup of hot tea, but for a chilled treat, they go brilliantly with an Instant Coffee Iced Coffee Recipe Brew. The bitterness of the coffee is a great counterpoint to the sweet and tart dessert.
Frequently Asked Questions
Mini Lemon Cheesecake Bites
Ingredients
Method
- Prepare Your Tin: Preheat your oven to 180°C (160°C fan). Line a 24-hole mini muffin tin with paper cases.
- Make the Biscuit Base: Place the digestive biscuits in a food processor and pulse until they form fine crumbs. Alternatively, put them in a sealed bag and crush them with a rolling pin. Transfer the crumbs to a bowl, add the 1 tablespoon of caster sugar, and pour in the melted butter. Mix with a fork until all the crumbs are evenly moistened, like damp sand.
- Form the Bases: Spoon about 1 tablespoon of the biscuit mixture into each paper case. Use the back of a teaspoon or a small glass to press the crumbs down firmly and evenly. Bake for 5-7 minutes, until lightly golden. Set aside to cool while you make the filling.
- Start the Filling: In a large bowl using a stand mixer with the paddle attachment or a hand mixer, beat the room temperature cream cheese on a low-medium speed until completely smooth and free of lumps, about 2 minutes. Scrape down the sides and bottom of the bowl.
- Add Sugars and Flavour: Add the 150g of caster sugar and the plain flour and beat on low speed until just combined. Add the vanilla extract, lemon zest, and lemon juice, and mix again until smooth. What works best for me is keeping the mixer on a low speed throughout to avoid whipping too much air into the batter.
- Incorporate Eggs and Soured Cream: Add the room temperature eggs one at a time, mixing on low speed until each one is just incorporated. Don't overmix! Finally, gently fold in the soured cream with a spatula until the batter is uniform.
- Fill and Bake: Carefully spoon the lemon cheesecake filling over the cooled biscuit bases, filling each case almost to the top. Bake for 15-18 minutes. The edges should be set, but the centre will still have a slight wobble when you gently shake the tin. This is key to a creamy texture.
- Cool and Chill: Turn off the oven and let the cheesecakes cool in the oven with the door slightly ajar for 30 minutes. Then, remove them from the oven and let them cool completely on a wire rack at room temperature. Once cool, cover and transfer the tin to the refrigerator to chill for at least 2 hours (or overnight) before serving.
Notes
I hope you enjoy making these little bites of sunshine as much as I do. They are such a rewarding treat to bake and share. If you give this Mini Lemon Cheesecake Bites recipe a try, I’d love to hear how they turned out for you. Please leave a comment below and let me know your thoughts! Happy baking.
– Ashley Rivera