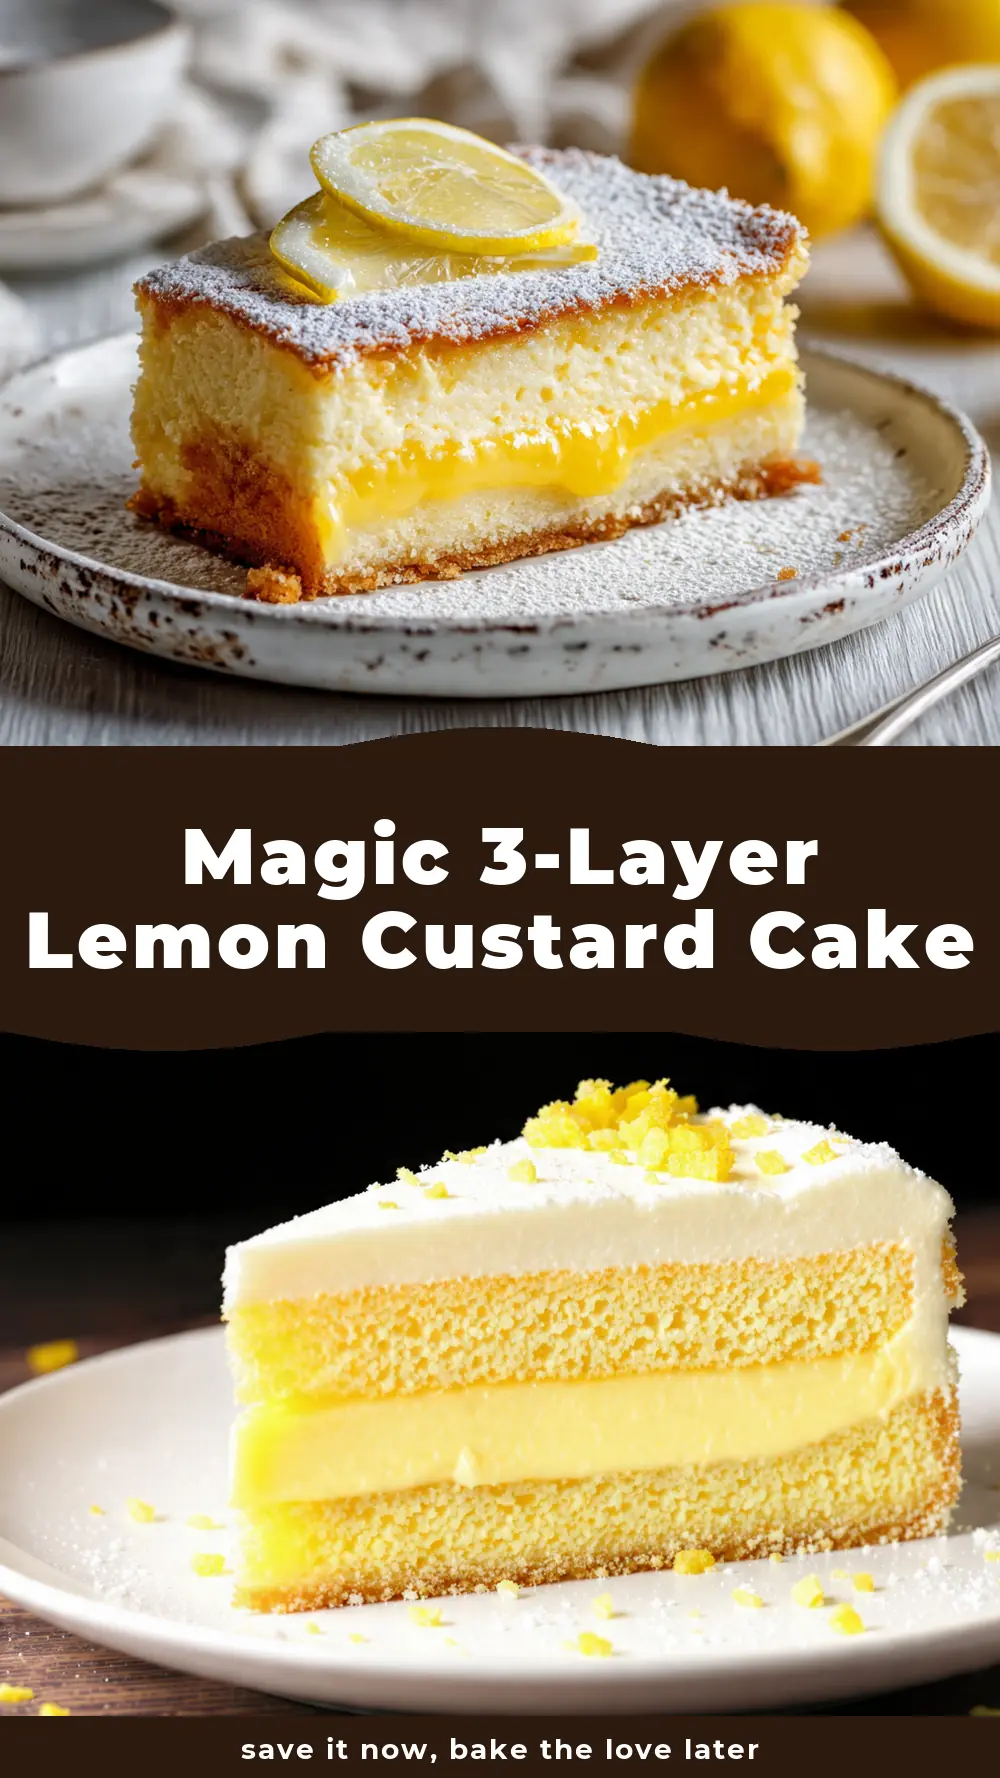
Magic 3-Layer Lemon Custard Cake
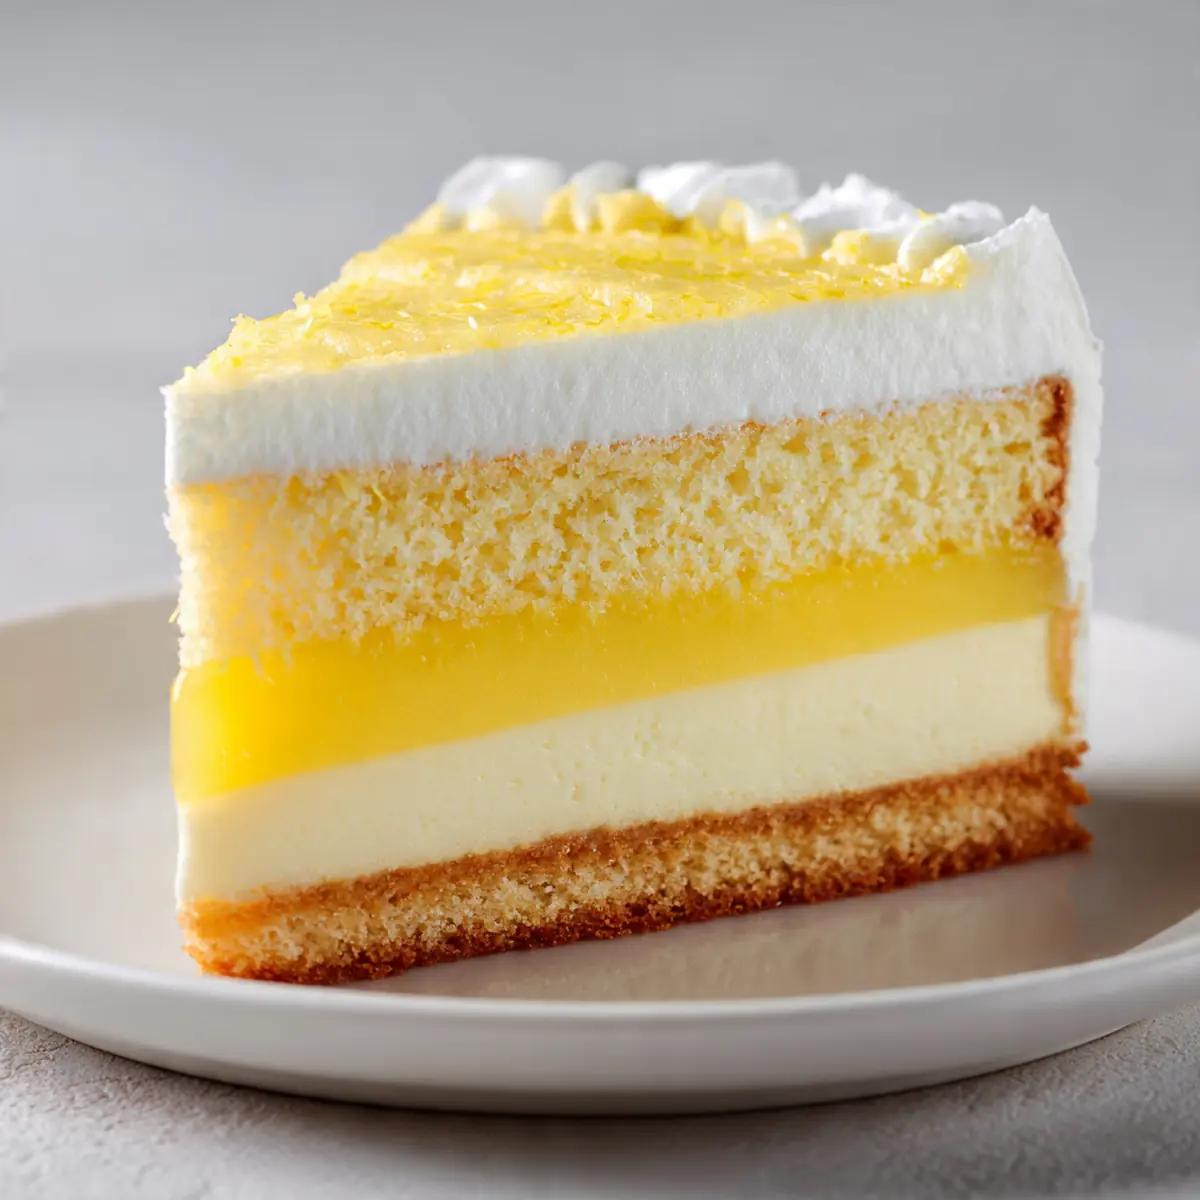
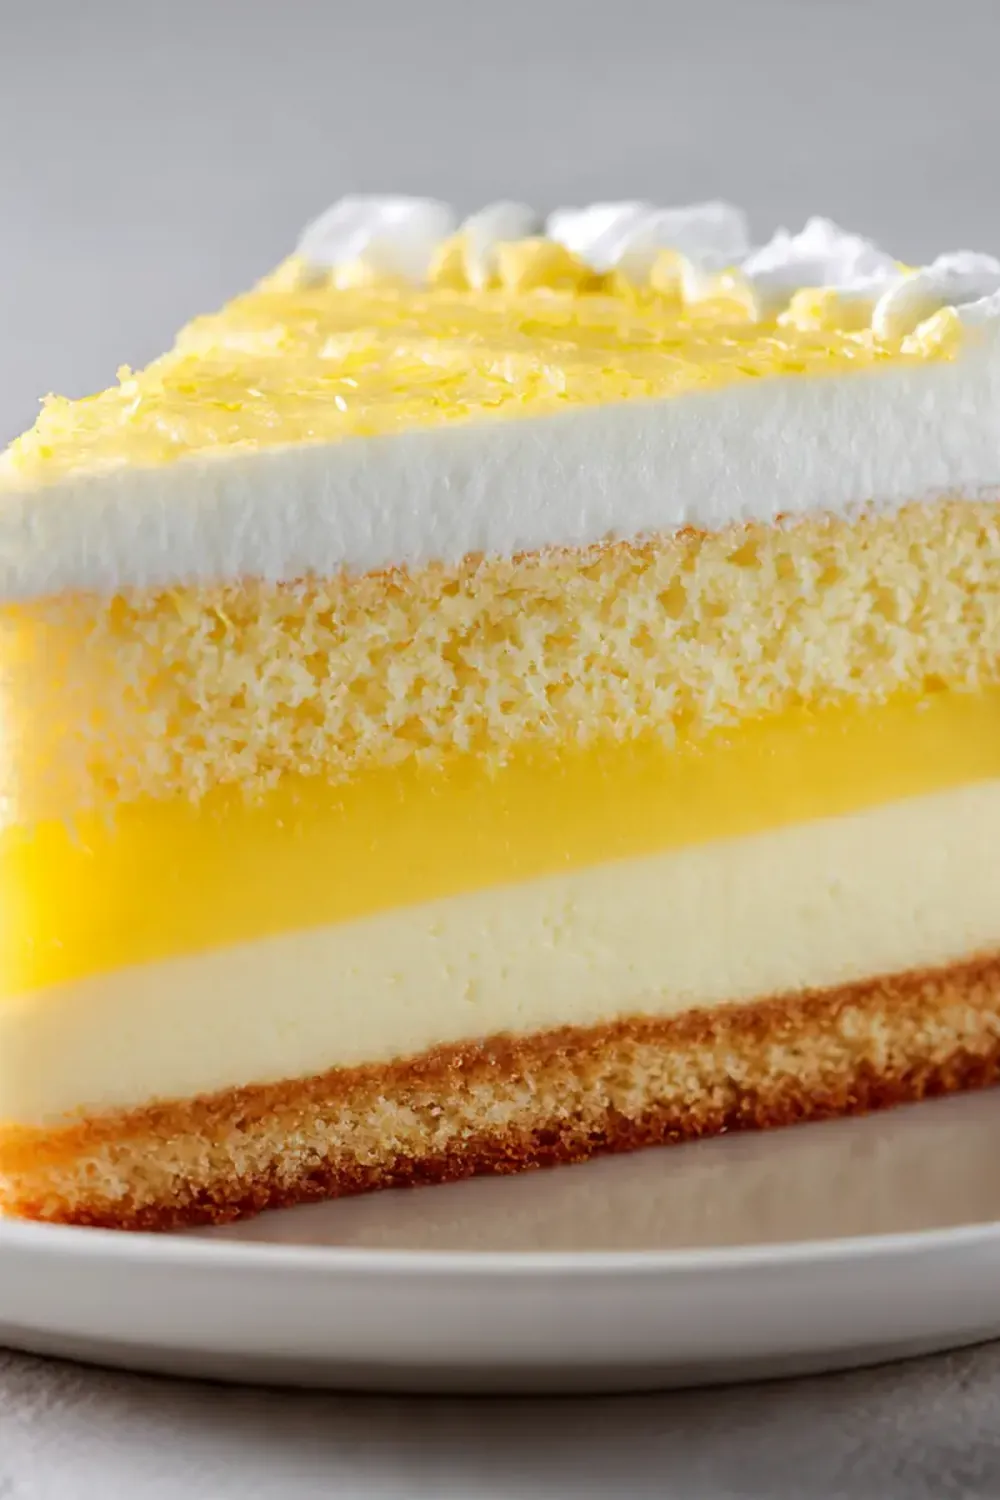
There’s something truly enchanting about a dessert that appears to defy gravity and logic, presenting itself as three distinct layers from a single batter. Today, we’re diving into the delightful world of the Magic 3-Layer Lemon Custard Cake – a truly special bake that has captivated my kitchen for years. This isn’t just a cake; it’s a culinary marvel that promises a dense custard base, a creamy middle, and a light, airy sponge top, all infused with the bright, zesty flavour of fresh lemon.
The result is a dessert that’s both elegant and comforting, perfect for a sunny afternoon tea or a sophisticated dinner party, or perhaps after a hearty meal like Traditional Steamed Idli Recipe For A Healthy Indian Breakfast, or even a Healthy Vegetarian Indian Breakfast Recipes: Poha.cookingenious.com/juicy-easy-air-fryer-meatballs/”>Juicy & Easy Air Fryer Meatballs , or even a Mouthwatering Garlic Parmesan Chicken & Potatoes Bake or a Mouthwatering Air Fryer Bbq Chicken .cookingenious.com/juicy-easy-air-fryer-meatballs/”>Juicy & Easy Air Fryer Meatballs , or even a Mouthwatering Garlic Parmesan Chicken & Potatoes Bake .cookingenious.com/traditional-steamed-idli-recipe-for-a-healthy-indian-breakfast/”>Traditional Steamed Idli Recipe For A Healthy Indian Breakfast .cookingenious.com/juicy-easy-air-fryer-meatballs/”>Juicy & Easy Air Fryer Meatballs . How could one batter separate so beautifully into three distinct textures? It felt like pure alchemy! But with a bit of patience and understanding of the technique, I discovered the magic truly unfolds in the oven. The result is a dessert that’s both elegant and comforting, perfect for a sunny afternoon tea or a sophisticated dinner party, or perhaps after a hearty meal like Traditional Steamed Idli Recipe For A Healthy Indian Breakfast .cookingenious.com/juicy-easy-air-fryer-meatballs/”>Juicy & Easy Air Fryer Meatballs , or even a Mouthwatering Garlic Parmesan Chicken & Potatoes Bake or a Mouthwatering Air Fryer Bbq Chicken.cookingenious.com/juicy-easy-air-fryer-meatballs/”>Juicy & Easy Air Fryer Meatballs , or even a Mouthwatering Garlic Parmesan Chicken & Potatoes Bake.cookingenious.com/traditional-steamed-idli-recipe-for-a-healthy-indian-breakfast/”>Traditional Steamed Idli Recipe For A Healthy Indian Breakfast.cookingenious.com/juicy-easy-air-fryer-meatballs/”>Juicy & Easy Air Fryer Meatballs. It’s a recipe I return to time and again, and I’m absolutely thrilled to share it with you.
This Magic 3-Layer Lemon Custard Cake showcases the versatility of humble ingredients transformed into something extraordinary. The secret lies in the ratio of ingredients and the specific baking method, allowing the egg whites to rise, the denser custard to settle, and the mid-layer to achieve a creamy consistency. It’s a testament to the wonders of baking, and once you master it, you’ll feel like a true kitchen wizard. Trust me, it’s worth every moment spent in the kitchen.
Recipe Overview
- Prep time: 25 minutes
- Cook time: 60-70 minutes
- Total time: 1 hour 25 minutes – 1 hour 35 minutes (plus cooling)
- Servings: 8-10 slices
- Difficulty: Medium
Why You’ll Love This Magic 3-Layer Lemon Custard Cake
- Incredible Texture: Experience three distinct textures in every bite – a dense, rich custard, a creamy, delicate filling, and a light, airy sponge.
- Zesty Lemon Brightness: Bursting with fresh lemon flavour, this cake offers a delightful tang that is both refreshing and invigorating.
- Visually Stunning: The clear separation of layers makes for an impressive presentation that will surely draw admiration from your guests.
- Versatile for Occasions: Elegant enough for special gatherings yet comforting for everyday indulgence, this cake fits any occasion beautifully.
- Rewarding Baking Experience: The process of watching the layers form is genuinely fascinating, making the baking journey as enjoyable as the eating.
Ingredients You’ll Need
- 125g unsalted butter, softened
- 150g caster sugar
- 4 large eggs, separated
- 1 teaspoon alcohol-free vanilla extract
- Zest of 2 large lemons
- 60ml fresh lemon juice
- 120g plain flour
- 500ml full-fat milk, warmed
- Icing sugar, for dusting
Tip: Ensure all your ingredients, especially the butter and eggs, are at room temperature. This helps them combine more smoothly, creating a homogeneous batter that is crucial for the layers to form correctly.
How to Make Magic 3-Layer Lemon Custard Cake
- Prepare Your Tin and Oven: Preheat your oven to 160°C (140°C fan/Gas Mark 3). Grease a 20cm round baking tin generously and line the base with baking parchment. Place the tin inside a larger roasting tray; this will be used for a water bath, ensuring an even, gentle bake.
- Cream Butter and Sugar: In a large mixing bowl, using a stand mixer or hand mixer, cream together the softened butter and caster sugar until the mixture is light and fluffy, taking on a pale, creamy yellow hue. Scrape down the sides of the bowl to ensure everything is well combined.
- Incorporate Egg Yolks and Flavourings: Add the egg yolks one at a time, beating well after each addition until fully incorporated and the mixture looks smooth and glossy. Stir in the alcohol-free vanilla extract, lemon zest, and fresh lemon juice. The aroma of lemon will start to fill your kitchen at this stage.
- Add Flour and Milk: Gradually beat in the plain flour until just combined, being careful not to overmix. The batter will be thick. Slowly pour in the warm milk, mixing constantly until the batter is smooth and quite thin, like a pouring custard.
- Fold in Egg Whites: In a separate, clean bowl, whisk the egg whites until they form stiff peaks. They should be glossy white and hold their shape firmly. Gently fold the stiff egg whites into the batter in three additions. Do this carefully, trying to retain as much air as possible. The mixture will look quite liquid with fluffy white clouds floating on top – this is exactly what you want.
- Bake the Cake: Pour the ethereal batter into your prepared baking tin. Carefully pour hot water into the larger roasting tray, around the baking tin, so it comes about 2-3cm up the sides of the tin. This water bath is essential for the custard layer to set beautifully. Bake for 60-70 minutes. When ready, the top should be a light golden-brown and feel springy to the touch. A slight wobble in the centre is normal, indicating the custard layer is still delicate.
- Cool and Chill: Remove the tin from the water bath and let it cool completely on a wire rack. Once at room temperature, cover the cake and chill it in the refrigerator for at least 4 hours, or ideally overnight. This chilling time is crucial for the layers to fully set and firm up.
- Serve: Once thoroughly chilled, carefully remove the cake from the tin. Dust generously with icing sugar before slicing and serving. Each slice will reveal the distinct magic of its three layers, a true feast for the eyes and the palate.
Tips From My Kitchen
- Room Temperature Ingredients are Key: For the most luscious texture and seamless blending, ensure your butter and eggs are at room temperature. Cold butter won’t cream properly with sugar, leading to a lumpy batter, and cold eggs can cause the mixture to curdle. Taking them out of the fridge an hour or two before you start makes a world of difference.
- Warm Milk, Not Hot: Gently warming the milk helps it incorporate smoothly into the batter, preventing any lumps and ensuring the batter remains a uniform consistency. However, avoid hot milk, as it could scramble the egg yolks when added. Just take the chill off it.
- Gentle Folding of Egg Whites: The magic of the three layers largely relies on the air incorporated into the egg whites. When folding them into the batter, use a light hand and a figure-of-eight motion. Overmixing will deflate the whites, resulting in a denser cake without the distinct sponge layer. We want those airy clouds to float!
- The Water Bath is Non-Negotiable: I used to struggle with this dish until I discovered this technique. Baking this cake in a water bath (bain-marie) is absolutely essential. It provides a moist, even heat, allowing the delicate custard layer to set slowly and preventing the cake from drying out or cracking. Don’t skip this step if you want that creamy base.
- Patience During Chilling: I make this at least once a week – it’s become a family favourite, and I’ve learned that the chilling time is not merely a suggestion. The cake needs ample time in the refrigerator for the layers to fully firm up and become distinct. Rushing this step will result in a messy, unset cake. Plan ahead and allow for at least 4 hours, or better yet, chill it overnight.
Equipment You’ll Need
- Stand mixer or hand mixer
- 20cm round baking tin
- Larger roasting tray (for water bath)
- Parchment paper
- Wire cooling rack
- Large mixing bowls (at least two)
- Whisk or spatula
- Measuring cups and spoons
Common Mistakes to Avoid
- Overmixing the Batter: Once the flour is added, mix only until just combined. Overmixing develops the gluten in the flour, which can lead to a tough cake rather than the desired delicate texture, particularly affecting the top sponge layer.
- Skipping the Water Bath: As mentioned in my tips, this is crucial. Without the water bath, the cake will bake too quickly and unevenly, leading to a dry, cracked top and an unset, curdled bottom layer. Always use a water bath for this recipe.
- Not Chilling Long Enough: The layers need time to set completely. If you cut into the cake before it’s thoroughly chilled (at least 4 hours, preferably overnight), the custard and creamy layers will be too soft and might run, losing the distinct three-layer effect.
Delicious Variations to Try
- Berry Burst Version: For a delightful twist, gently fold in 100g of fresh raspberries or blueberries into the batter just before adding the egg whites. The berries will sink into the middle layer, adding bursts of fruity flavour and colour.
- Chocolate Citrus Option: Swirl 50g of melted dark chocolate into a small portion of the batter before pouring it into the tin for a marbled effect, or sprinkle mini chocolate chips over the top layer before baking for a subtle chocolatey crunch.
- Spiced Lemon: Introduce a hint of warmth by adding ½ teaspoon of ground cardamom or a pinch of nutmeg along with the flour. These spices beautifully complement the bright lemon flavour without overpowering it.
What to Serve With Magic 3-Layer Lemon Custard Cake
- A simple dusting of icing sugar (as recommended)
- A dollop of freshly whipped cream
- A scoop of vanilla bean ice cream
- Fresh berries, such as raspberries or blueberries
- A light fruit coulis, like raspberry or passion fruit
Frequently Asked Questions
Magic 3-Layer Lemon Custard Cake
Ingredients
Method
-
Prepare Your Tin and Oven: Preheat your oven to 160°C (140°C fan/Gas Mark 3). Grease a 20cm round baking tin generously and line the base with baking parchment. Place the tin inside a larger roasting tray; this will be used for a water bath, ensuring an even, gentle bake.
-
Cream Butter and Sugar: In a large mixing bowl, using a stand mixer or hand mixer, cream together the softened butter and caster sugar until the mixture is light and fluffy, taking on a pale, creamy yellow hue. Scrape down the sides of the bowl to ensure everything is well combined.
-
Incorporate Egg Yolks and Flavourings: Add the egg yolks one at a time, beating well after each addition until fully incorporated and the mixture looks smooth and glossy. Stir in the alcohol-free vanilla extract, lemon zest, and fresh lemon juice. The aroma of lemon will start to fill your kitchen at this stage.
-
Add Flour and Milk: Gradually beat in the plain flour until just combined, being careful not to overmix. The batter will be thick. Slowly pour in the warm milk, mixing constantly until the batter is smooth and quite thin, like a pouring custard.
-
Fold in Egg Whites: In a separate, clean bowl, whisk the egg whites until they form stiff peaks. They should be glossy white and hold their shape firmly. Gently fold the stiff egg whites into the batter in three additions. Do this carefully, trying to retain as much air as possible. The mixture will look quite liquid with fluffy white clouds floating on top – this is exactly what you want.
-
Bake the Cake: Pour the ethereal batter into your prepared baking tin. Carefully pour hot water into the larger roasting tray, around the baking tin, so it comes about 2-3cm up the sides of the tin. This water bath is essential for the custard layer to set beautifully. Bake for 60-70 minutes. When ready, the top should be a light golden-brown and feel springy to the touch. A slight wobble in the centre is normal, indicating the custard layer is still delicate.
-
Cool and Chill: Remove the tin from the water bath and let it cool completely on a wire rack. Once at room temperature, cover the cake and chill it in the refrigerator for at least 4 hours, or ideally overnight. This chilling time is crucial for the layers to fully set and firm up.
-
Serve: Once thoroughly chilled, carefully remove the cake from the tin. Dust generously with icing sugar before slicing and serving. Each slice will reveal the distinct magic of its three layers, a true feast for the eyes and the palate.
Notes
And there you have it – the Magic 3-Layer Lemon Custard Cake. It’s a wonderful baking adventure that yields truly delightful results, a testament to the fact that sometimes, the simplest ingredients can create the most extraordinary dishes. I hope you enjoy baking and sharing this unique dessert as much as I do. Do let me know in the comments below if you try it, and what you thought of its magical transformation!