No Bake Lemon Tarts
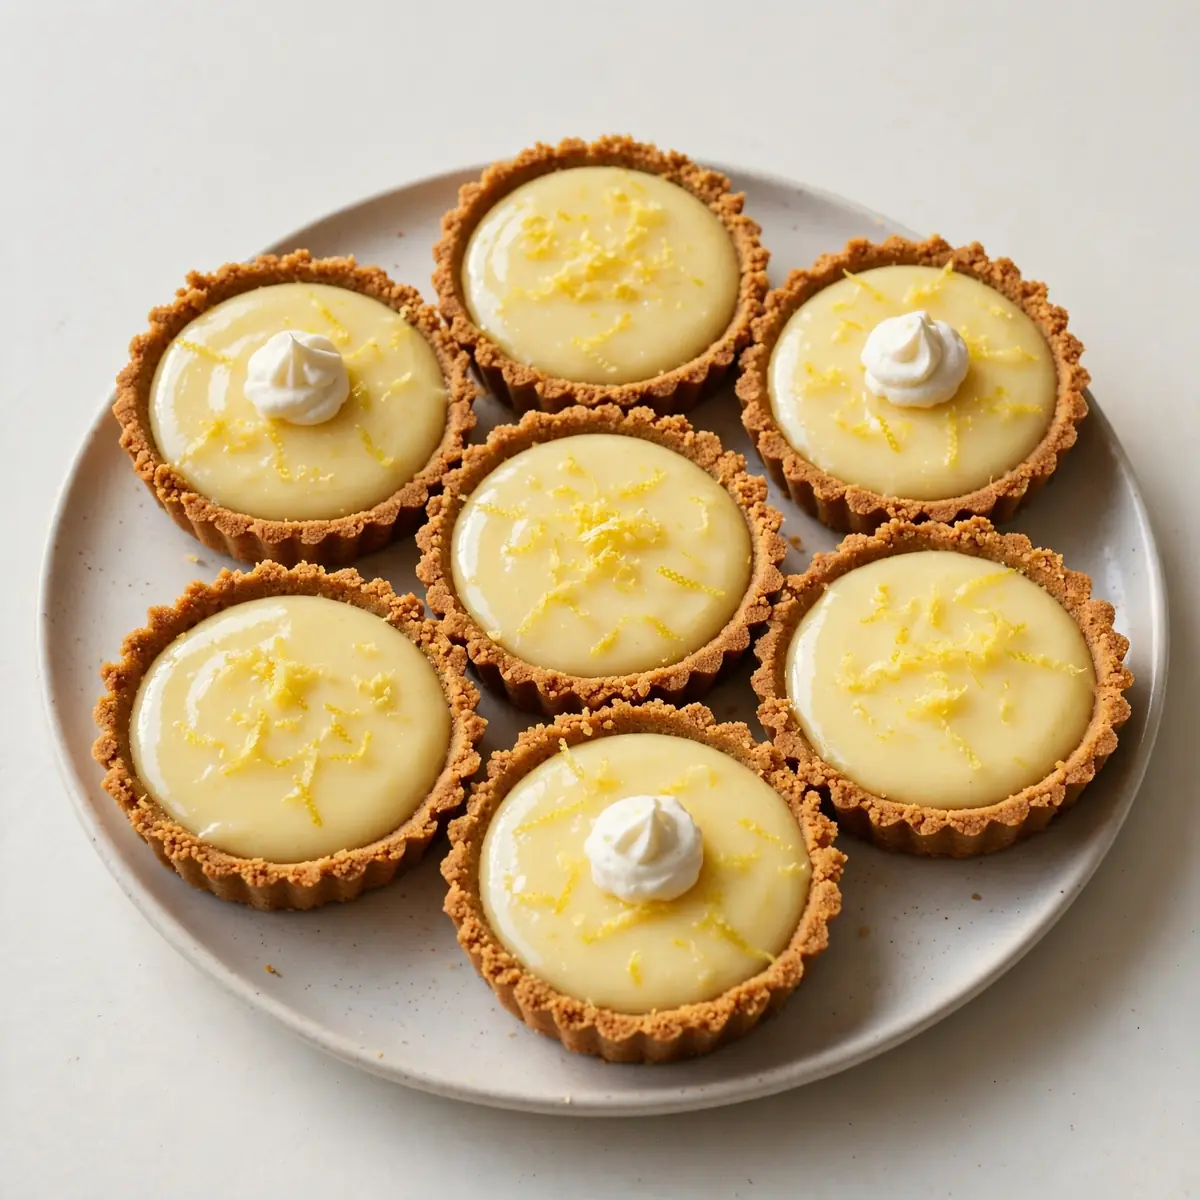
If you’re after a zesty, creamy, and utterly refreshing dessert that doesn’t require turning on the oven, these no bake lemon tarts are about to become your new go-to. I’ve perfected the silky, tangy filling and buttery biscuit base so you get a perfect slice every single time.
Recipe Overview
- Prep Time: 25 minutes
- Chill Time: 4 hours (minimum)
- Total Time: 4 hours 25 minutes
- Servings: 12 individual tarts
- Difficulty: Easy
Why You’ll Love This No Bake Lemon Tarts
- No oven required: Perfect for hot days when you want a dessert without heating up the kitchen.
- Bright, bold lemon flavour: Using fresh juice and zest gives a natural tang that shop-bought versions simply can’t match.
- Creamy, melt-in-the-mouth texture: The filling sets to a soft, luscious consistency that’s neither too firm nor too runny.
- Make-ahead friendly: These tarts actually improve after a night in the fridge, making them ideal for entertaining.
- Customisable base: You can use digestives, shortbread, or even gluten-free biscuits without compromising the structure.

Ingredients You’ll Need
- 250g digestive biscuits (or shortbread biscuits)
- 100g unsalted butter, melted
- 1 tablespoon caster sugar
- 400ml condensed milk (one standard tin)
- 120ml fresh lemon juice (about 3-4 large lemons)
- Finely grated zest of 2 lemons
- 2 large egg yolks
- 1 teaspoon vanilla extract
- Pinch of fine sea salt
- 300ml double cream, cold
- 2 tablespoons icing sugar, sifted
- Extra lemon zest and thin lemon slices, to garnish
Tip: For the best flavour, use unwaxed lemons and always roll them firmly on the countertop before juicing — this helps release more juice and makes them easier to squeeze.
How to Make No Bake Lemon Tarts
- Make the biscuit base: Place the digestive biscuits in a sealed food bag and crush them into fine crumbs using a rolling pin — you want a texture like damp sand, with no large chunks remaining. Tip the crumbs into a bowl, add the caster sugar, then pour in the melted butter. Stir until every crumb is coated and the mixture clumps together when pressed between your fingers.
- Press into the tin: Line a 12-hole muffin tin with paper cases or use a loose-bottomed tart tin. Divide the crumb mixture evenly between the cases, then press down firmly using the back of a spoon or the bottom of a glass. The base should feel compact and hold its shape when touched. Place the tin in the fridge to firm up while you prepare the filling.
- Prepare the lemon filling: In a medium heatproof bowl, whisk together the condensed milk, lemon juice, lemon zest, egg yolks, vanilla extract, and salt. The mixture will look smooth and pale yellow at first, then it will begin to thicken slightly as the lemon juice reacts with the condensed milk — this is exactly what you want.
- Cook the filling gently: Set the bowl over a pan of simmering water (make sure the bowl doesn’t touch the water). Stir continuously with a silicone spatula for 8-10 minutes, until the mixture visibly thickens and coats the back of a spoon. You’ll notice it change from a runny liquid to a custard-like consistency, and it will smell intensely of fresh lemon.
- Cool the filling: Remove the bowl from the heat and set it aside to cool for 15 minutes, stirring occasionally to prevent a skin from forming. The filling should be warm but not hot to the touch before you proceed.
- Whip the cream: In a separate large bowl, pour the cold double cream and add the sifted icing sugar. Whisk using an electric hand mixer on medium speed until soft peaks form — when you lift the beaters, the cream should hold a gentle curl but still be smooth and silky. Be careful not to overwhip, or the cream will become grainy.
- Fold together: Gently fold the cooled lemon mixture into the whipped cream using a large metal spoon. Use a figure-of-eight motion, cutting through the centre and bringing the mixture up from the bottom. Stop as soon as you can’t see any streaks of white — the finished filling should be a uniform pale yellow, airy, and mousse-like in texture.
- Fill and chill: Spoon the filling into the chilled biscuit bases, dividing it evenly. Smooth the tops with the back of a spoon. Place the tarts back in the fridge for at least 4 hours, preferably overnight. The filling will set to a firm yet creamy consistency that holds its shape when sliced. After testing this recipe five times, I finally got it just right — the overnight chill really makes a difference to the texture.
Tips From My Kitchen
- Use room-temperature eggs: Cold egg yolks can cause the filling to seize or become lumpy when combined with the warm lemon mixture. Let your eggs sit on the counter for 20 minutes before you start.
- Don’t skip the double boiler: Cooking the lemon mixture over direct heat can scramble the egg yolks and ruin the silky texture. The gentle steam heat ensures a smooth, lump-free curd.
- Chill your cream and bowl: For the best whipped cream, put your mixing bowl and beaters in the freezer for 10 minutes before you start. Cold cream whips faster and holds its volume better.
- Press the bases firmly: If the biscuit base is too loose, it will crumble when you try to eat the tart. Use the flat bottom of a glass to press the crumbs down with even, firm pressure.
- Line your tin with paper cases: This makes removing the tarts much easier and prevents the delicate filling from cracking. If using a loose-bottomed tart tin, line the base with baking parchment.
Equipment You’ll Need
- 12-hole muffin tin or 12cm loose-bottomed tart tin
- Mixing bowls (at least 3 different sizes)
- Silicone spatula
- Electric hand mixer or whisk
- Fine microplane or zester
- Citrus juicer
- Heatproof bowl for double boiler
- Rolling pin and food bag (for crushing biscuits)
- Measuring jug and spoons
Common Mistakes to Avoid
- Overcrowding the pan: If you’re making these tarts in a standard muffin tin, don’t be tempted to overfill the paper cases. Leave at least 5mm of space at the top, as the filling needs room to settle without spilling over the edges when you move the tin to the fridge.
- Wrong temperature: The filling must be cooked over simmering water, not boiling. If the water is bubbling vigorously, the heat is too high and will cook the egg yolks unevenly. Keep the water at a gentle simmer — small bubbles rising to the surface, not a rolling boil.
- Skipping the rest time: These tarts need a minimum of 4 hours in the fridge to set properly. If you try to rush them, the filling will be runny and won’t hold its shape when you remove the paper cases. Patience is key here — overnight is always best.
Delicious Variations to Try
- Spicy Version: Add a pinch of ground cardamom or a small grating of fresh ginger to the lemon filling before cooking. The warm spice notes complement the citrus beautifully.
- Vegan Option: Use a plant-based condensed milk (coconut-based works well), replace the egg yolks with 2 tablespoons of cornflour mixed with 3 tablespoons of water, and use a vegan double cream alternative. The texture will be slightly lighter but still delicious.
- Different Protein: For a savoury-sweet twist, serve these tarts alongside a plate of Grilled Lamb Chops Recipe Tender — the tangy lemon cuts through the richness of the lamb perfectly.
What to Serve With No Bake Lemon Tarts
- A handful of fresh raspberries or blueberries for a pop of colour and extra tartness
- A dollop of crème fraîche or Greek yoghurt to balance the sweetness
- A cup of strong black tea or an espresso — the bitterness contrasts beautifully with the sweet, tangy filling
- If you’re planning a full meal, start with Chicken Shawarma Bowl Recipe Middle Eastern for a hearty, flavour-packed dinner before bringing out these bright tarts for dessert
Still hungry for ideas? You might also love Easy Lemon Curd Tarts Recipe Uk, Hot Chocolate Peppermint Fudge No Bake from our sister kitchens.
Frequently Asked Questions
no bake lemon tarts
Ingredients
Method
- Make the biscuit base: Place the digestive biscuits in a sealed food bag and crush them into fine crumbs using a rolling pin — you want a texture like damp sand, with no large chunks remaining. Tip the crumbs into a bowl, add the caster sugar, then pour in the melted butter. Stir until every crumb is coated and the mixture clumps together when pressed between your fingers.
- Press into the tin: Line a 12-hole muffin tin with paper cases or use a loose-bottomed tart tin. Divide the crumb mixture evenly between the cases, then press down firmly using the back of a spoon or the bottom of a glass. The base should feel compact and hold its shape when touched. Place the tin in the fridge to firm up while you prepare the filling.
- Prepare the lemon filling: In a medium heatproof bowl, whisk together the condensed milk, lemon juice, lemon zest, egg yolks, vanilla extract, and salt. The mixture will look smooth and pale yellow at first, then it will begin to thicken slightly as the lemon juice reacts with the condensed milk — this is exactly what you want.
- Cook the filling gently: Set the bowl over a pan of simmering water (make sure the bowl doesn’t touch the water). Stir continuously with a silicone spatula for 8-10 minutes, until the mixture visibly thickens and coats the back of a spoon. You’ll notice it change from a runny liquid to a custard-like consistency, and it will smell intensely of fresh lemon.
- Cool the filling: Remove the bowl from the heat and set it aside to cool for 15 minutes, stirring occasionally to prevent a skin from forming. The filling should be warm but not hot to the touch before you proceed.
- Whip the cream: In a separate large bowl, pour the cold double cream and add the sifted icing sugar. Whisk using an electric hand mixer on medium speed until soft peaks form — when you lift the beaters, the cream should hold a gentle curl but still be smooth and silky. Be careful not to overwhip, or the cream will become grainy.
- Fold together: Gently fold the cooled lemon mixture into the whipped cream using a large metal spoon. Use a figure-of-eight motion, cutting through the centre and bringing the mixture up from the bottom. Stop as soon as you can’t see any streaks of white — the finished filling should be a uniform pale yellow, airy, and mousse-like in texture.
- Fill and chill: Spoon the filling into the chilled biscuit bases, dividing it evenly. Smooth the tops with the back of a spoon. Place the tarts back in the fridge for at least 4 hours, preferably overnight. The filling will set to a firm yet creamy consistency that holds its shape when sliced. After testing this recipe five times, I finally got it just right — the overnight chill really makes a difference to the texture.
Notes
There you have it — a beautifully simple dessert that delivers maximum flavour with minimum fuss. My kids absolutely devour this every time I make it, and I love that I can prepare it the night before a gathering. If you give these no bake lemon tarts a try, I’d love to hear how they turned out in the comments below. Happy baking!