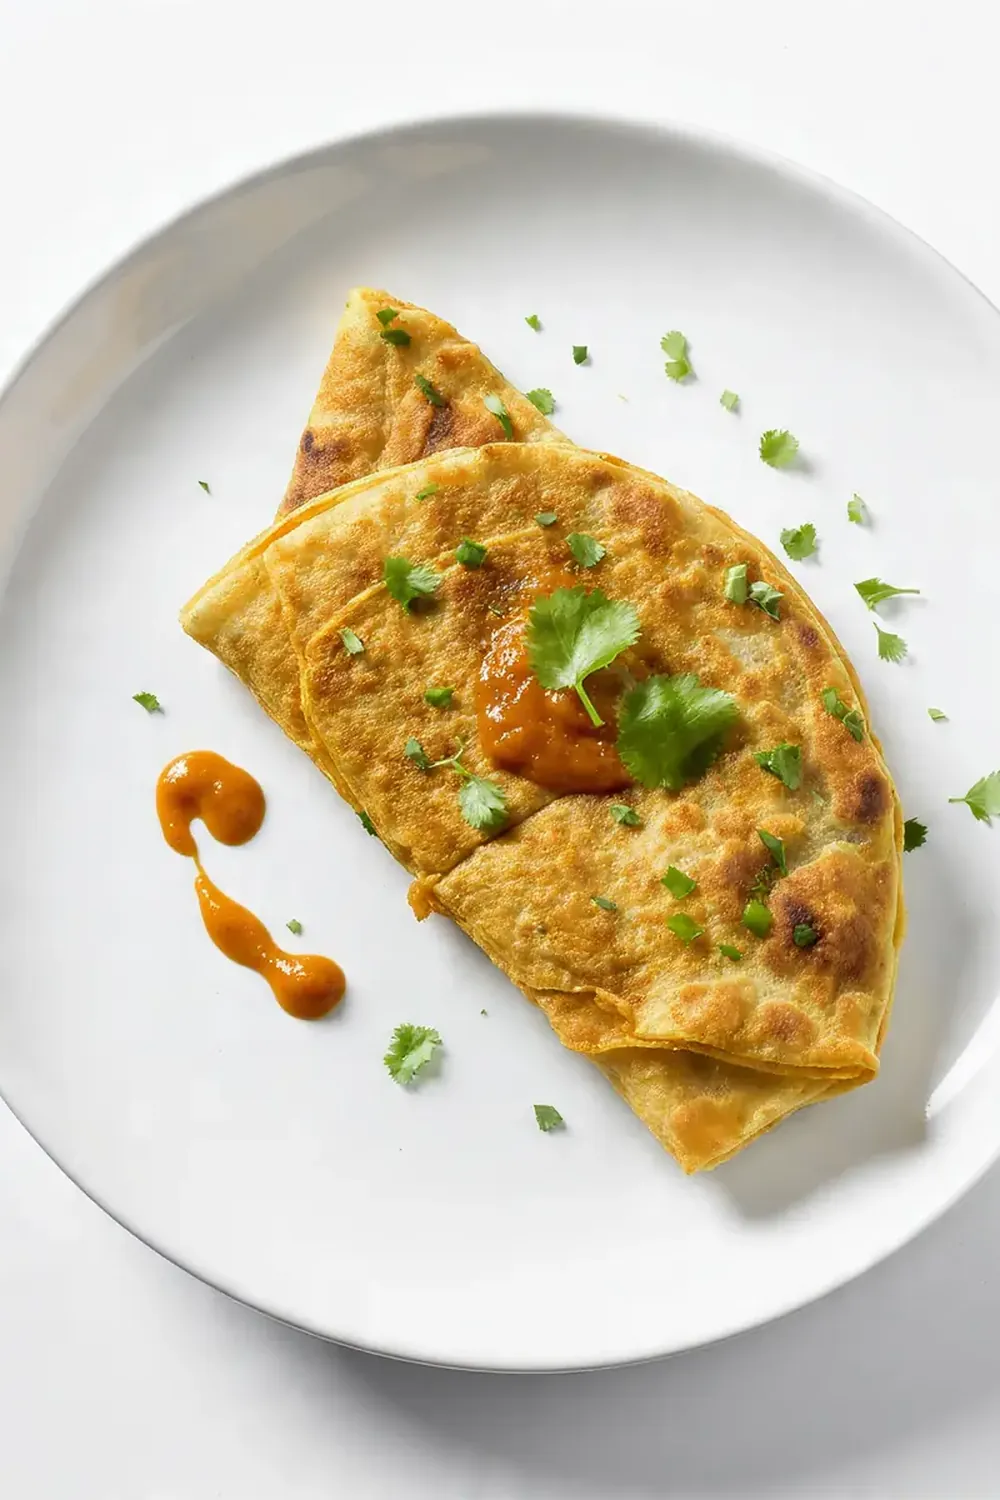
High-Energy Indian Paratha Rolls Breakfast
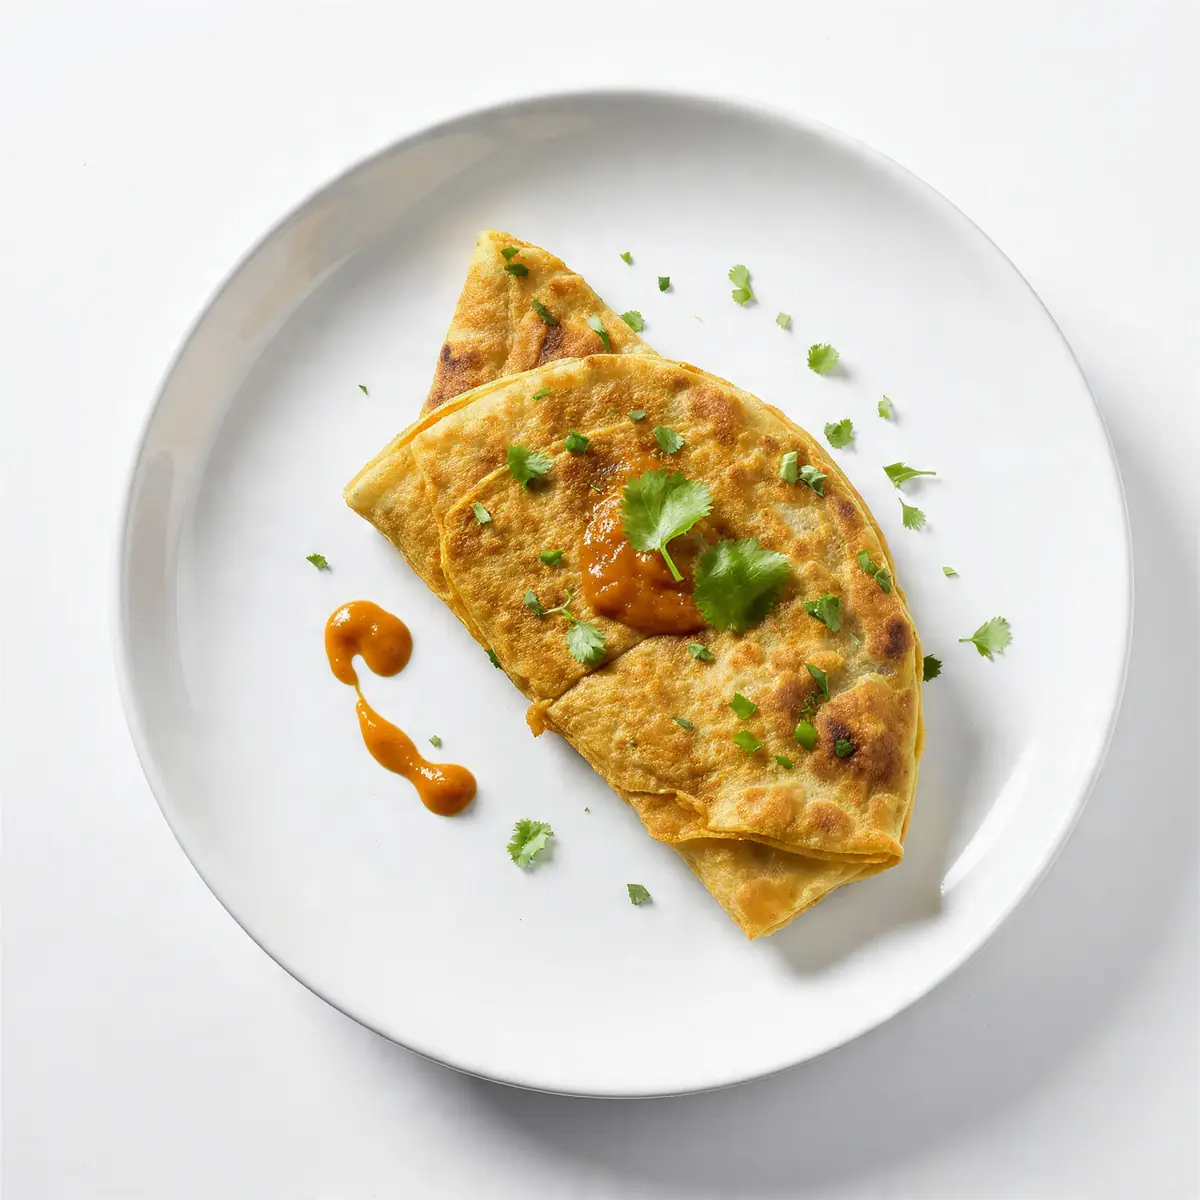
There’s nothing quite like starting your day with something truly satisfying, and these High-Energy Indian Paratha Rolls are just the ticket for a vibrant breakfast that keeps you going.
Recipe Overview
- Prep Time: 45 minutes
- Cook Time: 30 minutes
- Total Time: 1 hour 15 minutes
- Servings: 6 rolls
- Difficulty: Medium
Why You’ll Love This High-Energy Indian Paratha Rolls Breakfast
For me, breakfast isn’t just a meal; it’s the foundation of the day. And while I love a classic full English, sometimes my family craves something with a bit more zest, a different kind of warmth, perhaps even a sweet treat like Easy Keto Breakfast Muffins (Low-Carb Morning Meal), Easy No-Bake Oreo Cheesecake Cups, Sweet Blueberry Cream Cheese Breakfast Quesadillas , or Healthy Air Fryer Churro Bites Coated In Cinnamon Sugar .cookingenious.com/easy-no-bake-oreo-cheesecake-cups/”>Easy No-Bake Oreo Cheesecake Cups or Sweet Blueberry Cream Cheese Breakfast Quesadillas .cookingenious.com/sweet-blueberry-cream-cheese-breakfast-quesadillas/”>Sweet Blueberry Cream Cheese Breakfast Quesadillas .cookingenious.com/healthy-air-fryer-churro-bites-coated-in-cinnamon-sugar/”>Healthy Air Fryer Churro Bites Coated In Cinnamon Sugar.cookingenious.com/easy-no-bake-oreo-cheesecake-cups/”>Easy No-Bake Oreo Cheesecake Cups or Sweet Blueberry Cream Cheese Breakfast Quesadillas .cookingenious.com/sweet-blueberry-cream-cheese-breakfast-quesadillas/”>Sweet Blueberry Cream Cheese Breakfast Quesadillas. That’s where these High-Energy Indian Paratha Rolls come into their own. I first started experimenting with parathas years ago, trying to recreate the incredible street food experience from a trip to India. My kids absolutely devour this every time I make it, especially when they have a busy day ahead, whether it’s school or sports, much like they enjoy a comforting meal such as Simple Creamy Ground Beef & Bowtie Pasta , Garlic Butter Steak Pasta (Easy 30-Minute Meal) , or Healthy Greek Chicken Bowls With Feta & Fresh Veggies.cookingenious.com/garlic-butter-steak-pasta-easy-30-minute-meal/”>Garlic Butter Steak Pasta (Easy 30-Minute Meal).cookingenious.com/simple-creamy-ground-beef-bowtie-pasta/”>Simple Creamy Ground Beef & Bowtie Pasta.
I used to struggle with getting the parathas just right – that perfect balance of crispy exterior and soft, flaky layers – until I discovered a simple technique involving multiple folds and a light brushing of ghee. It truly transformed my paratha making. This recipe isn’t just about the parathas themselves; it’s about the vibrant, spiced filling that turns them into a complete, handheld breakfast. We’re talking about a blend of wholesome ingredients that pack a nutritional punch and an explosion of flavour.
What I particularly appreciate about these rolls is how versatile they are. They’re substantial enough to power you through the morning, yet light enough not to leave you feeling sluggish. They offer a wonderful alternative to typical breakfast fare, introducing exciting textures and aromatic spices to your morning routine. Plus, they make excellent packed lunches, staying delicious even when eaten cold. It’s a dish that brings a little bit of joy and a whole lot of energy to the start of any day.
- A Flavourful Kickstart: Infused with aromatic Indian spices, these rolls awaken your palate and senses.
- Sustained Energy Release: Packed with wholesome ingredients like wholemeal flour, vegetables, and protein, they provide lasting energy.
- Customisable Goodness: Easily adapt the filling with your favourite vegetables or protein to suit your taste.
- Perfect for On-the-Go: These handheld rolls are ideal for busy mornings or as a satisfying packed lunch.
- An Adventure in Every Bite: Experience the delightful texture of flaky paratha combined with a richly spiced filling.
Ingredients You’ll Need
- 300g wholemeal flour (plus extra for dusting)
- 100g plain flour
- 1 teaspoon salt
- 200ml warm water (approximately)
- 2 tablespoons ghee or vegetable oil (for dough)
- 50g ghee or vegetable oil (for cooking parathas)
- 2 tablespoons vegetable oil (for filling)
- 1 medium onion, finely chopped
- 2 cloves garlic, minced
- 1-inch ginger, grated
- 1 green chilli, finely chopped (optional, adjust to taste)
- 150g cooked chicken breast, shredded (or 150g paneer, crumbled)
- 100g spinach, roughly chopped
- 1 medium carrot, grated
- 1/2 teaspoon turmeric powder
- 1 teaspoon ground coriander
- 1/2 teaspoon garam masala
- Salt and black pepper to taste
- Fresh coriander, chopped (for garnish)
- Juice of 1/2 a lemon
Tip: Don’t be afraid to adjust the spices in the filling to your preference. A little extra chilli or a touch more garam masala can really elevate the flavour profile.
How to Make High-Energy Indian Paratha Rolls Breakfast
- Prepare the Dough: In a large mixing bowl, combine the wholemeal flour, plain flour, and salt. Gradually add the warm water, mixing until a shaggy dough forms. Add 2 tablespoons of ghee or vegetable oil and knead the dough on a lightly floured surface for about 8-10 minutes, until it feels smooth and elastic. It should have a soft, pliable texture. Cover the dough with a damp cloth and let it rest for at least 30 minutes at room temperature. This resting period is crucial for developing gluten, which results in a softer, more manageable dough and flakier parathas.
- Make the Filling: While the dough rests, heat 2 tablespoons of vegetable oil in a large frying pan over medium heat. Add the chopped onion and cook until it softens and turns translucent, emitting a sweet aroma, about 5-7 minutes. Stir in the minced garlic, grated ginger, and chopped green chilli (if using), cooking for another minute until fragrant. The kitchen will begin to fill with a wonderful, spicy scent.
- Build the Filling’s Flavour: Add the shredded chicken (or crumbled paneer), chopped spinach, and grated carrot to the pan. Cook for 3-4 minutes, stirring frequently, until the spinach wilts and the carrot softens slightly, losing its raw crunch. Stir in the turmeric powder, ground coriander, and garam masala. Cook for another 1-2 minutes, allowing the spices to toast and release their full aroma. Season with salt and black pepper to taste. Remove the filling from the heat and stir in the fresh lemon juice and chopped fresh coriander. Set aside to cool slightly.
- Shape the Parathas: Divide the rested dough into 6 equal portions. Roll each portion into a smooth ball. On a lightly floured surface, roll one dough ball into a thin circle, about 15-20cm in diameter. Brush a thin layer of ghee or oil over the entire surface of the circle, then fold it in half to form a semi-circle. Brush with more ghee/oil, then fold it in half again to form a triangle. This layering technique helps create the flaky texture. Roll out the triangle carefully into another circle, about 18-20cm in diameter, ensuring it’s not too thin that it tears, nor too thick that it’s doughy. Repeat with the remaining dough balls.
- Cook the Parathas: Heat a large frying pan or griddle over medium-high heat. Once hot, place one rolled paratha onto the dry pan. Cook for about 30 seconds until small bubbles appear on the surface and the dough looks slightly paler. Flip the paratha, then brush a teaspoon of ghee or oil generously over the cooked side. Cook for another minute until that side starts to turn golden brown. Flip again, brush ghee/oil on the second side, and cook for 1-2 minutes, pressing gently with a spatula, until both sides are golden brown with some darker crispy spots, and the paratha puffs up slightly in places, indicating the layers are separating. You’ll hear a gentle sizzling sound. Remove from the pan and keep warm while you cook the remaining parathas.
- Assemble the Rolls: Lay a warm paratha flat. Spoon a generous amount of the prepared filling down the centre of the paratha. Carefully roll the paratha up tightly, creating a neat, handheld roll. The warmth of the paratha will help it conform to the filling. Repeat with the remaining parathas and filling. Serve immediately, perhaps with a dollop of natural yoghurt or a fresh chutney on the side. The aroma of warm paratha and spiced filling is truly inviting.
Tips From My Kitchen
- Don’t Skimp on the Resting Time for the Dough: This is absolutely non-negotiable for tender, pliable parathas. The 30-minute rest allows the gluten in the flour to relax, making the dough much easier to roll out without it springing back. If you skip this, you’ll find yourself fighting with the dough, resulting in tough, chewy parathas instead of the desired flaky ones. Think of it as giving the dough a little nap so it can perform its best!
- Master the Ghee/Oil Layering: The secret to those beautiful, flaky layers in a paratha lies in the strategic application of ghee or oil during the folding process. After rolling out your first circle, brushing it lightly, folding it into a semi-circle, then brushing again before the final triangle fold creates pockets of fat that separate the dough layers as it cooks. Without this, your parathas will be dense and flat. It’s like creating tiny internal steam pockets that puff up the bread.
- Heat Control is Key When Cooking: Cooking parathas requires a medium-high heat. If your pan isn’t hot enough, the paratha will dry out and become leathery before it browns. If it’s too hot, it will burn on the outside before the inside is cooked through, or before it has a chance to puff up. Look for the pan to be hot enough that a drop of water sizzles instantly but doesn’t evaporate violently. This ensures even cooking and that beautiful golden-brown exterior.
- Don’t Overfill Your Rolls: While it’s tempting to load up your paratha with as much delicious filling as possible, overfilling can make it incredibly difficult to roll neatly. It can also cause the paratha to tear, leading to a messy eating experience. Aim for a generous but manageable amount, leaving a small border around the edges of the paratha, allowing you to create a secure roll. It’s about balance for both structural integrity and enjoyment.
- Prep Ahead for Ease: Both the dough and the filling can be prepared in advance. You can make the dough, wrap it tightly in cling film, and store it in the fridge for up to 24 hours. The filling can also be made a day ahead and kept in an airtight container in the fridge. This makes assembling the rolls on a busy morning much quicker and less stressful, allowing you to enjoy a fresh, warm breakfast with minimal fuss.
Equipment You’ll Need
- Large frying pan or skillet
- Sharp knife and cutting board
- Mixing bowls
- Wooden spoon or spatula
- Rolling pin
Common Mistakes to Avoid
- Overcrowding the pan: When cooking the parathas, avoid putting more than one at a time in a standard-sized frying pan. Overcrowding drops the pan’s temperature, leading to steamed rather than crispy parathas, and makes it difficult to flip and brush with ghee effectively. Cook them one at a time for the best results.
- Wrong temperature: As mentioned in my tips, too low a heat will result in dry, tough parathas, while too high a heat will burn them before they can cook through and develop their characteristic flakiness. Aim for a consistent medium-high heat, adjusting as needed, to achieve a beautiful golden-brown finish with tender layers.
- Skipping the rest time: Neglecting to let the dough rest after kneading is a common pitfall. The rest period allows the gluten to relax, which makes the dough significantly easier to roll out thinly without it snapping back. Without this, you’ll struggle to get those lovely, even parathas.
What to Serve With High-Energy Indian Paratha Rolls Breakfast
- A dollop of cooling natural yoghurt
- A vibrant mango or mint chutney
- A simple tomato and onion salad
- A glass of freshly squeezed orange juice
- A warm cup of Masala Chai
Frequently Asked Questions
High-Energy Indian Paratha Rolls Breakfast
Ingredients
Method
-
Prepare the Dough: In a large mixing bowl, combine the wholemeal flour, plain flour, and salt. Gradually add the warm water, mixing until a shaggy dough forms. Add 2 tablespoons of ghee or vegetable oil and knead the dough on a lightly floured surface for about 8-10 minutes, until it feels smooth and elastic. It should have a soft, pliable texture. Cover the dough with a damp cloth and let it rest for at least 30 minutes at room temperature. This resting period is crucial for developing gluten, which results in a softer, more manageable dough and flakier parathas.
-
Make the Filling: While the dough rests, heat 2 tablespoons of vegetable oil in a large frying pan over medium heat. Add the chopped onion and cook until it softens and turns translucent, emitting a sweet aroma, about 5-7 minutes. Stir in the minced garlic, grated ginger, and chopped green chilli (if using), cooking for another minute until fragrant. The kitchen will begin to fill with a wonderful, spicy scent.
-
Build the Filling’s Flavour: Add the shredded chicken (or crumbled paneer), chopped spinach, and grated carrot to the pan. Cook for 3-4 minutes, stirring frequently, until the spinach wilts and the carrot softens slightly, losing its raw crunch. Stir in the turmeric powder, ground coriander, and garam masala. Cook for another 1-2 minutes, allowing the spices to toast and release their full aroma. Season with salt and black pepper to taste. Remove the filling from the heat and stir in the fresh lemon juice and chopped fresh coriander. Set aside to cool slightly.
-
Shape the Parathas: Divide the rested dough into 6 equal portions. Roll each portion into a smooth ball. On a lightly floured surface, roll one dough ball into a thin circle, about 15-20cm in diameter. Brush a thin layer of ghee or oil over the entire surface of the circle, then fold it in half to form a semi-circle. Brush with more ghee/oil, then fold it in half again to form a triangle. This layering technique helps create the flaky texture. Roll out the triangle carefully into another circle, about 18-20cm in diameter, ensuring it’s not too thin that it tears, nor too thick that it’s doughy. Repeat with the remaining dough balls.
-
Cook the Parathas: Heat a large frying pan or griddle over medium-high heat. Once hot, place one rolled paratha onto the dry pan. Cook for about 30 seconds until small bubbles appear on the surface and the dough looks slightly paler. Flip the paratha, then brush a teaspoon of ghee or oil generously over the cooked side. Cook for another minute until that side starts to turn golden brown. Flip again, brush ghee/oil on the second side, and cook for 1-2 minutes, pressing gently with a spatula, until both sides are golden brown with some darker crispy spots, and the paratha puffs up slightly in places, indicating the layers are separating. You’ll hear a gentle sizzling sound. Remove from the pan and keep warm while you cook the remaining parathas.
-
Assemble the Rolls: Lay a warm paratha flat. Spoon a generous amount of the prepared filling down the centre of the paratha. Carefully roll the paratha up tightly, creating a neat, handheld roll. The warmth of the paratha will help it conform to the filling. Repeat with the remaining parathas and filling. Serve immediately, perhaps with a dollop of natural yoghurt or a fresh chutney on the side. The aroma of warm paratha and spiced filling is truly inviting.
Notes
There you have it – a truly invigorating way to begin your day! These High-Energy Indian Paratha Rolls are more than just a meal; they’re an experience, a little journey for your taste buds. I genuinely hope you give this recipe a try and discover the joy of making these flavourful rolls for your family. Do let me know in the comments below how they turn out for you!