Blackberry Cheesecake Recipe Creamy
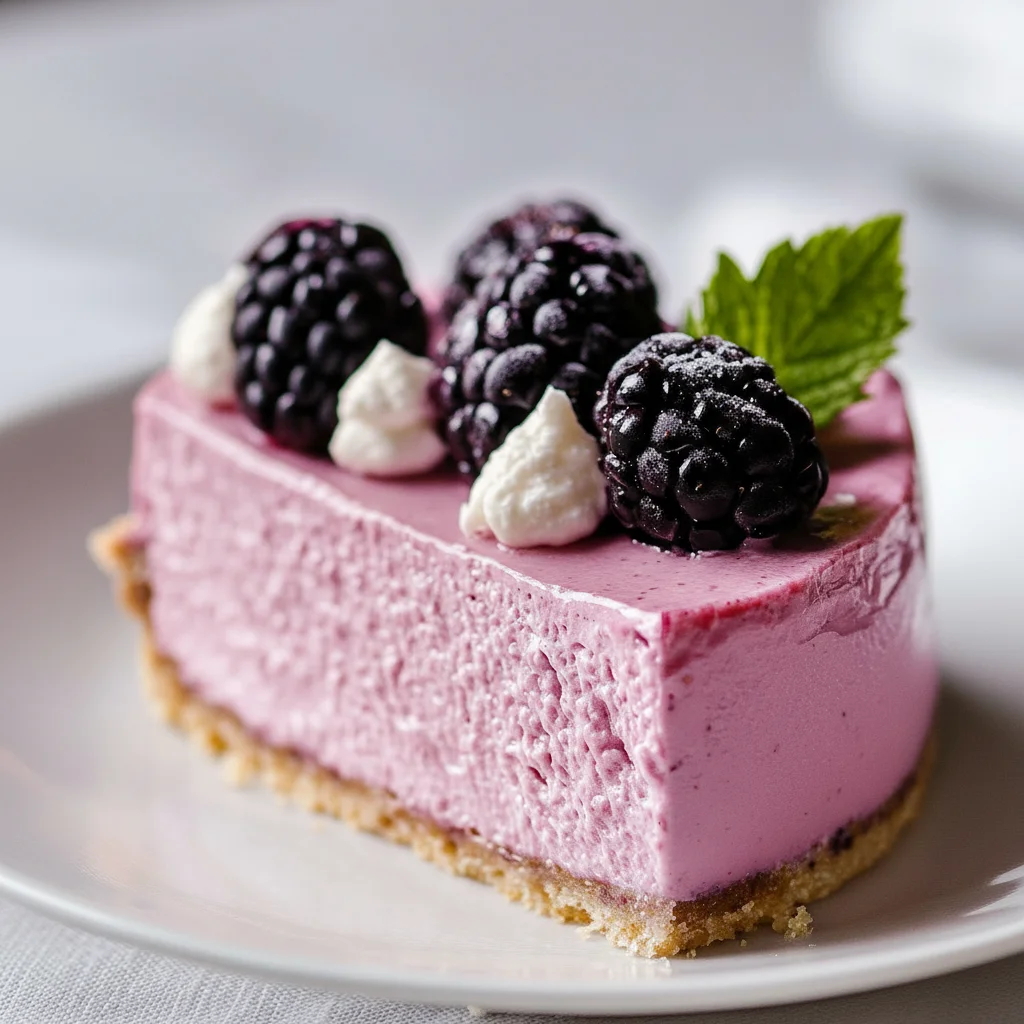
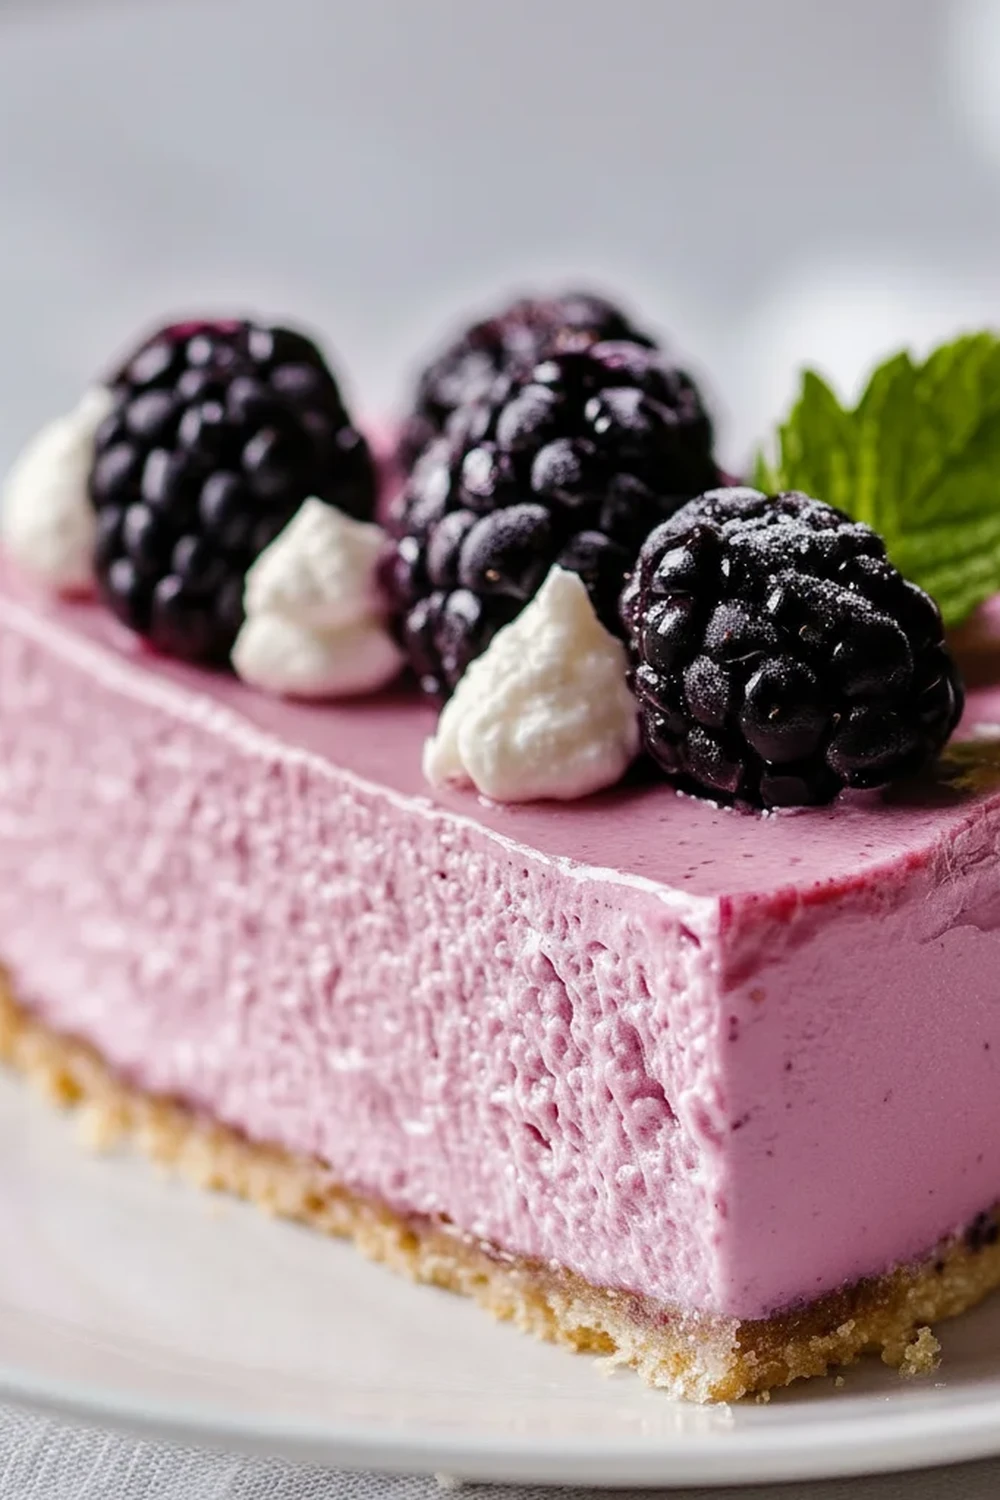
There’s something truly special about a dessert that looks spectacular but doesn’t require hours of complicated baking. This blackberry cheesecake recipe is exactly that. It captures the essence of late summer with its jammy, sharp blackberry topping swirled over a ridiculously creamy, decadent filling, all sitting on a buttery, crunchy biscuit base. We’re not just making any cheesecake; we’re creating a dessert that balances sweet and tart flavours so beautifully that it feels both indulgent and refreshing at the same time.
I developed this recipe after a particularly successful trip to a local pick-your-own farm, returning home with punnets full of gorgeous, plump blackberries. I wanted to create a centrepiece dessert that let their flavour shine without being overly sweet. This is my go-to recipe when I need something special but straightforward. The deep purple of the blackberry coulis against the pale, creamy filling makes it a visually stunning addition to any table, ideal for rounding off a family Sunday lunch or for a summer garden party with friends.
What we’ll make together is a no-bake cheesecake, which means you don’t even need to turn on your oven. The magic happens in the fridge, where the filling sets to a perfect, sliceable consistency. It’s a dessert that always gets compliments, delivering a rich, satisfying texture and a vibrant berry taste that feels wonderfully homemade and full of care.
Recipe Overview
This no-bake blackberry cheesecake recipe combines a classic digestive biscuit base with a velvety cream cheese filling and a vibrant, homemade blackberry coulis. The result is a dessert that’s creamy, tangy, and sweet all in one bite. I’ve found that making the coulis from scratch, rather than using a shop-bought jam, gives it a much fresher, more authentic fruit flavour that really elevates the entire dessert.
- Prep Time: 35 minutes
- Chill Time: 6 hours (or overnight)
- Total Time: 6 hours 35 minutes
- Servings: 10-12 slices
- Difficulty: Medium
Why You’ll Love This Blackberry Cheesecake Recipe
- Genuine Flavour: The homemade blackberry coulis provides a genuine burst of tart berry flavour that cuts through the rich, luxurious sweetness of the cream cheese filling. It’s a sophisticated taste that isn’t cloying.
- Comes Together in About 35 Minutes: The active preparation for this cheesecake is surprisingly quick. The base and filling are ready for the fridge in just over half an hour, leaving you free while it sets.
- Flexible Recipe: You can easily swap the blackberries for other seasonal berries like raspberries or blueberries. For the base, try using ginger nuts for a bit of warmth or even chocolate digestives for a richer flavour.
- Great for Special Occasions: This works beautifully for a summer gathering, an elegant dinner party dessert, or even as a stunning alternative to a traditional birthday cake. For another impressive dessert, you could try this Rose Gold Cake Recipe.
- Family Tested: This recipe is a firm favourite in my house. My husband, who’s usually picky about desserts, asked for seconds the first time I made it!
Ingredients You’ll Need
For a truly creamy cheesecake, I always recommend using full-fat block cream cheese, like Philadelphia. The spreadable kind in a tub has a higher water content and won’t set as firmly. The quality of your ingredients really makes a difference here.
- For the Biscuit Base:
- 250g digestive biscuits
- 125g unsalted butter, melted
- For the Creamy Filling:
- 600g full-fat cream cheese, at room temperature
- 100g icing sugar, sifted
- 1 tsp vanilla extract
- 300ml double cream, cold
- For the Blackberry Topping:
- 300g fresh or frozen blackberries
- 75g caster sugar
- 1 tbsp lemon juice
- 1 tbsp cornflour mixed with 2 tbsp cold water (optional, for thickening)
Ashley’s Tip: Make sure your cream cheese is genuinely at room temperature. If it’s too cold, your filling will be lumpy. I usually take it out of the fridge a good two hours before I start.
How to Make This Blackberry Cheesecake Recipe
We’ll start by making the buttery base, then whip up the smooth filling, and finally, create that gorgeous blackberry topping. The process is straightforward, and the main thing you need is a bit of patience while it chills to perfection in the fridge.
- Prepare the Tin: Lightly grease and line the base of a 23cm (9-inch) springform cake tin with baking parchment. This will make it much easier to release the cheesecake later.
- Make the Biscuit Base: Crush the digestive biscuits into fine crumbs. You can do this by placing them in a food processor or putting them in a sealed plastic bag and bashing them with a rolling pin (a great way to get some frustration out!). Pour the melted butter over the crumbs and mix until it looks like wet sand.
- Press the Base: Tip the buttery crumbs into your prepared tin. Use the back of a spoon or the bottom of a glass to press them down firmly and evenly across the base and slightly up the sides. Place the tin in the fridge to chill for at least 30 minutes while you make the filling.
- Create the Blackberry Coulis: Place the blackberries, caster sugar, and lemon juice in a small saucepan over a medium heat. Cook for 8-10 minutes, stirring occasionally, until the berries have broken down and the sauce has thickened slightly. For a smoother sauce, you can press it through a fine-mesh sieve to remove the seeds. If you prefer a thicker topping, stir in the cornflour slurry and cook for another minute until it thickens. Set aside to cool completely.
- Whip the Filling: In a large bowl, use an electric mixer to beat the room-temperature cream cheese and sifted icing sugar together until smooth and creamy. Be careful not to over-beat. Stir in the vanilla extract.
- Fold in the Cream: In a separate bowl, whip the cold double cream until it holds soft peaks. Be careful not to overwhip it into butter! Gently fold the whipped cream into the cream cheese mixture using a spatula until just combined. What works best for me is adding the cream in three stages to keep the mixture light and airy.
- Assemble the Cheesecake: Spoon the creamy filling onto the chilled biscuit base and smooth the top with a spatula. Now, dollop about half of the cooled blackberry coulis over the top. Use a skewer or the tip of a knife to gently swirl the sauce into the cheesecake filling to create a marbled effect.
- Chill to Set: Cover the cheesecake carefully with cling film (without touching the surface) and place it in the fridge to set for at least 6 hours, but overnight is even better for a firm, clean slice.
- Serve: Once set, carefully run a thin knife around the edge of the cheesecake before releasing the springform tin. Top with the remaining blackberry coulis and a few fresh blackberries before slicing and serving.
Tips From My Kitchen
- Temperature is Key: For the smoothest, lump-free filling, your cream cheese absolutely must be at room temperature. Cold cream cheese will not blend smoothly with the sugar and will result in a grainy texture.
- The Secret to Clean Slices: I learned this trick a long time ago and it never fails. To get perfectly neat slices, dip a large, sharp knife into a jug of hot water, wipe it dry, and then make your cut. Repeat this for every single slice. It melts the cheesecake just enough to glide through without dragging.
- Make-Ahead Magic: This cheesecake is an ideal dessert to prepare in advance. You can make it completely up to 2 days ahead and keep it covered in the fridge. The flavour actually deepens and improves overnight.
- Storage: Leftover cheesecake will keep well in the fridge for up to 4 days. Make sure it’s covered or stored in an airtight container to prevent it from absorbing any other fridge smells.
Delicious Variations to Try
Once you’ve mastered the basic recipe, it’s fun to experiment. This blackberry cheesecake is wonderfully adaptable. Here are a few of my favourite variations:
- Citrus Twist: Add the finely grated zest of one lemon or lime to the cream cheese filling along with the vanilla. The citrus brightens the flavour and complements the tartness of the blackberries beautifully.
- White Chocolate Dream: For an even more decadent treat, melt 100g of good-quality white chocolate and let it cool slightly before folding it into the cream cheese mixture just before you add the whipped cream.
- A Different Berry: This recipe works wonderfully with other berries. Try making a raspberry coulis for a classic combination, or use a mix of summer berries for a different look and taste. A creamy peanut butter smoothie shows how versatile berries can be!
What to Serve With This Blackberry Cheesecake
This creamy dessert is a star on its own, but a few simple accompaniments can make it even more special. Here’s what we like to serve it with:
- A Dollop of Cream: A spoonful of softly whipped double cream or a thick crème fraîche adds another layer of creamy texture and balances the sweetness.
- Fresh Mint: A few fresh mint leaves not only add a touch of green but also provide a lovely, fresh aroma that complements the berry flavour.
- Coffee or Dessert Wine: A freshly brewed coffee or a small glass of a sweet dessert wine, like a Sauternes, makes a sophisticated pairing for an after-dinner treat. If you fancy a main course before this, these Grilled Lamb Chops would be a fantastic choice.
Frequently Asked Questions
Blackberry Cheesecake Recipe
Ingredients
Method
- Prepare the Tin: Lightly grease and line the base of a 23cm (9-inch) springform cake tin with baking parchment. This will make it much easier to release the cheesecake later.
- Make the Biscuit Base: Crush the digestive biscuits into fine crumbs. You can do this by placing them in a food processor or putting them in a sealed plastic bag and bashing them with a rolling pin (a great way to get some frustration out!). Pour the melted butter over the crumbs and mix until it looks like wet sand.
- Press the Base: Tip the buttery crumbs into your prepared tin. Use the back of a spoon or the bottom of a glass to press them down firmly and evenly across the base and slightly up the sides. Place the tin in the fridge to chill for at least 30 minutes while you make the filling.
- Create the Blackberry Coulis: Place the blackberries, caster sugar, and lemon juice in a small saucepan over a medium heat. Cook for 8-10 minutes, stirring occasionally, until the berries have broken down and the sauce has thickened slightly. For a smoother sauce, you can press it through a fine-mesh sieve to remove the seeds. If you prefer a thicker topping, stir in the cornflour slurry and cook for another minute until it thickens. Set aside to cool completely.
- Whip the Filling: In a large bowl, use an electric mixer to beat the room-temperature cream cheese and sifted icing sugar together until smooth and creamy. Be careful not to over-beat. Stir in the vanilla extract.
- Fold in the Cream: In a separate bowl, whip the cold double cream until it holds soft peaks. Be careful not to overwhip it into butter! Gently fold the whipped cream into the cream cheese mixture using a spatula until just combined. What works best for me is adding the cream in three stages to keep the mixture light and airy.
- Assemble the Cheesecake: Spoon the creamy filling onto the chilled biscuit base and smooth the top with a spatula. Now, dollop about half of the cooled blackberry coulis over the top. Use a skewer or the tip of a knife to gently swirl the sauce into the cheesecake filling to create a marbled effect.
- Chill to Set: Cover the cheesecake carefully with cling film (without touching the surface) and place it in the fridge to set for at least 6 hours, but overnight is even better for a firm, clean slice.
- Serve: Once set, carefully run a thin knife around the edge of the cheesecake before releasing the springform tin. Top with the remaining blackberry coulis and a few fresh blackberries before slicing and serving.
Notes
I really hope you enjoy making this blackberry cheesecake recipe. It’s one of those desserts that feels like a real treat, and the process of swirling the deep purple coulis into the pale filling is so satisfying. It’s a true taste of the season, and I’d love to hear how it turns out for you. Please leave a comment below and let me know if you tried any delicious variations!