Crispy Chicken Katsu Recipe Fried
There’s a special kind of satisfaction that comes from hearing the audible crunch of a perfectly fried piece of chicken. It’s a sound that promises a juicy, tender interior and a wonderfully textured coating. For me, that ultimate crunch is embodied by Japanese Chicken Katsu. The first time I truly understood the magic of a perfect fried cutlet wasn’t in Japan, but in a tiny, family-run spot in Milan. This was inspired by a dish I had at a little restaurant in Italy, a cotoletta alla milanese that was so thin and crisp it practically shattered. It immediately reminded me of my love for Katsu, and I became obsessed with recreating that same textural perfection in my own kitchen.
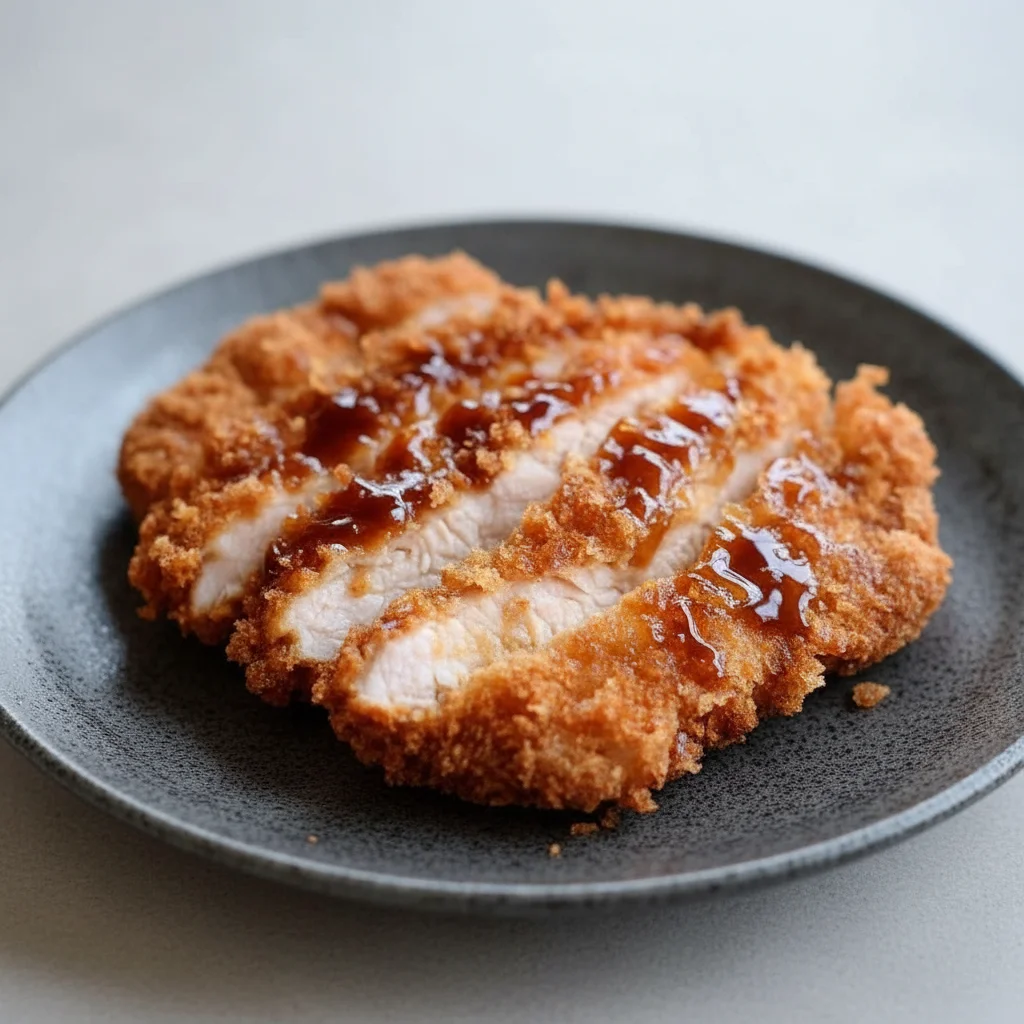
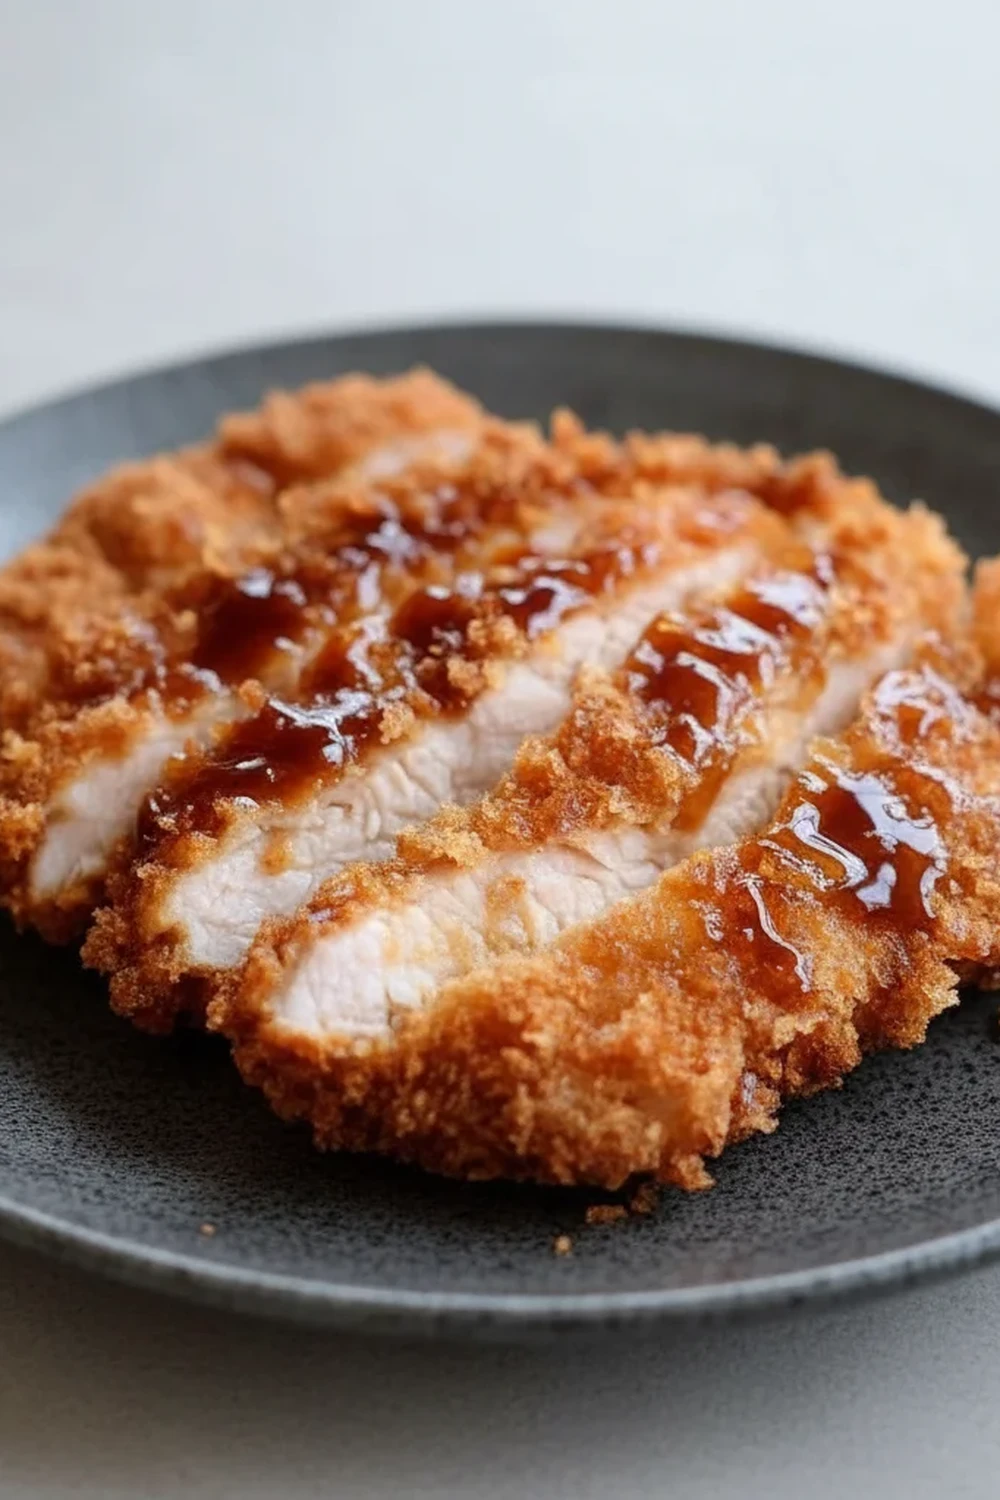
This Crispy Chicken Katsu recipe is the culmination of that quest. It’s all about creating a golden, craggy crust using Japanese panko breadcrumbs that stays shatteringly crisp, even when drizzled with a rich, tangy homemade Tonkatsu sauce. The chicken inside remains incredibly moist and flavourful, protected by its crunchy armour. It’s a dish that transforms a simple chicken breast into something truly spectacular.
This is one of those meals that works beautifully for a weeknight dinner when you want something a bit special, but it’s also impressive enough to serve when you have friends over. It’s straightforward to make, and the results are consistently fantastic. Everyone in my family gets excited when they know chicken katsu is on the menu, and I’m sure yours will too.
Recipe Overview
This recipe guides you through creating an authentic-tasting Chicken Katsu with a focus on achieving the crispiest possible coating. The chicken is pounded thin for quick, even cooking, then coated in flour, egg, and finally, panko breadcrumbs before being shallow-fried to a perfect golden brown. When I was testing this, I found that letting the breaded chicken rest for just 10 minutes before frying really helps the coating adhere, so don’t skip that step!
- Prep Time: 15 minutes
- Cook Time: 10 minutes
- Total Time: 25 minutes
- Servings: 4 people
- Difficulty: Easy
Why You’ll Love This Crispy Chicken Katsu Recipe
- The Ultimate Crispy Texture: We use panko breadcrumbs, which are lighter and flakier than regular breadcrumbs. They absorb less oil, resulting in a coating that isn’t greasy, just incredibly light and crunchy.
- Comes Together in Under 30 Minutes: From prepping the chicken to serving, this dish is surprisingly speedy, making it ideal for busy weeknights when you’re craving something special.
- A Delicious Homemade Sauce: The accompanying Tonkatsu sauce is a simple mix of common cupboard ingredients that creates a sweet, savoury, and tangy flavour that perfectly complements the rich fried cutlet. It’s much better than any shop-bought version.
- Great for Meal Prep: You can bread the chicken cutlets in the morning or the night before and keep them in the fridge. When you’re ready to eat, they go straight into the pan, cutting your dinner-time work in half. This is a lifesaver for me on hectic days.
- Family Tested and Approved: My youngest, who can be a bit fussy, absolutely adores this. The combination of crispy coating and simple, juicy chicken always gets compliments and guarantees clean plates all around.
Ingredients You’ll Need
For this katsu recipe, the quality of the breadcrumbs is key. I always use Japanese panko breadcrumbs – the Obento brand is excellent and widely available in UK supermarkets. They are the secret to that signature light, airy crunch that defines a great Japanese fried cutlet.
- For the Chicken Katsu:
- 4 boneless, skinless chicken breasts (about 600-700g total)
- 75g plain flour
- 1 tsp salt
- ½ tsp black pepper
- ½ tsp garlic powder
- 2 large free-range eggs, beaten
- 150g panko breadcrumbs
- Vegetable or rapeseed oil, for frying (about 250ml)
- For the Tonkatsu Sauce:
- 120ml tomato ketchup
- 3 tbsp Worcestershire sauce
- 2 tbsp soy sauce (I prefer Kikkoman)
- 1 tbsp mirin (or 1 tsp caster sugar)
- For Serving (Optional):
- Steamed short-grain rice
- Finely shredded white cabbage
- Lemon wedges
Ashley’s Tip: If you find your panko breadcrumbs are very fine, you can gently toast them in a dry pan for a minute or two before breading the chicken. This gives them a head start on browning and adds an extra layer of nutty flavour.
How to Make This Crispy Chicken Katsu Recipe
The process is a classic three-stage breading technique. We’ll set up a little assembly line which makes the whole thing feel organised and mess-free. The key is to press the panko on firmly to get a nice, thick coating.
- Prepare the Chicken: Place a chicken breast between two sheets of baking parchment or in a large plastic bag. Using a rolling pin or meat mallet, gently pound it to an even thickness of about 1.5cm (just over half an inch). This ensures it cooks quickly and evenly. Repeat with the remaining chicken breasts.
- Set Up Your Breading Station: You’ll need three shallow dishes. In the first, mix the plain flour, salt, pepper, and garlic powder. In the second, lightly beat the two eggs. In the third, spread out the panko breadcrumbs.
- Coat the Chicken: Working with one chicken breast at a time, dredge it in the seasoned flour, shaking off any excess. Next, dip it into the beaten egg, making sure it’s fully coated. Finally, press it firmly into the panko breadcrumbs, turning it over to coat both sides completely. I find that using one hand for the “wet” stage (egg) and the other for the “dry” stages (flour, panko) helps keep my fingers from becoming a sticky mess.
- Rest the Chicken: Place the breaded chicken cutlets on a wire rack or a plate. Let them rest for at least 10 minutes. This helps the coating to dry out slightly and adhere to the chicken, which is crucial for a non-soggy, super crispy result. While they rest, you can make the sauce.
- Make the Tonkatsu Sauce: In a small bowl, simply whisk together the ketchup, Worcestershire sauce, soy sauce, and mirin (or sugar) until smooth. Set aside.
- Heat the Oil: Pour enough vegetable oil into a large, heavy-bottomed frying pan or skillet to come about 1.5cm up the sides. Heat over a medium-high heat until it reaches about 170°C (340°F). If you don’t have a thermometer, you can test it by dropping in a panko crumb – it should sizzle immediately and turn golden in about 30 seconds.
- Fry the Chicken: Carefully place two chicken cutlets into the hot oil, ensuring not to overcrowd the pan. Fry for 3-4 minutes per side, until the coating is a deep golden brown and the chicken is cooked through. The internal temperature should be 74°C (165°F).
- Drain and Serve: Remove the cooked katsu from the pan and place it on a wire rack to drain any excess oil. This is much better than using kitchen paper, which can trap steam and make the underside soggy. Repeat with the remaining chicken. Let it rest for a minute before slicing into strips. Serve immediately with steamed rice, shredded cabbage, and a generous drizzle of the Tonkatsu sauce.
Tips From My Kitchen
- Temperature Control is Key: The oil temperature is crucial. If it’s too low, the chicken will absorb too much oil and become greasy. If it’s too high, the panko will burn before the chicken is cooked. Aim for a steady 170°C. Adjust the heat as you go to maintain this temperature.
- The Secret to Extra Crunch: I learned that gently pressing the panko crumbs onto the chicken, rather than just lightly dipping it, makes a huge difference. This creates a denser, more substantial crust that holds up beautifully. It’s a small detail that elevates the final fried cutlet.
- Make-Ahead Advice: You can prepare the breaded chicken cutlets up to 8 hours in advance. Lay them in a single layer on a tray lined with baking parchment, cover loosely with cling film, and store in the refrigerator. The Tonkatsu sauce can be made up to a week ahead and kept in an airtight container in the fridge.
- Storage and Reheating: Leftover chicken katsu can be stored in an airtight container in the fridge for up to 3 days. To reheat and bring back the crispiness, place it on a wire rack on a baking tray and bake in a preheated oven at 200°C (180°C fan) for 10-15 minutes, or until hot and crispy. Avoid the microwave at all costs!
Equipment You’ll Need
You don’t need any highly specialised equipment for this recipe, just a few kitchen basics. Having everything ready before you start makes the process smooth and enjoyable.
- Large heavy-bottomed frying pan or skillet
- Sharp knife and cutting board
- Three shallow bowls or dishes for breading
- Tongs for flipping the chicken
- Wire rack for draining
- Meat mallet or rolling pin
What to Serve With This Crispy Chicken Katsu Recipe
The traditional accompaniments are what make this a complete and satisfying meal. The freshness of the sides cuts through the richness of the fried chicken perfectly. For another satisfying meal idea that uses rice, check out my recipe for Stuffed Peppers With Rice Recipe Dinner.
- Steamed Japanese Rice: A bowl of fluffy, slightly sticky short-grain rice is the classic base. Its plainness is the perfect foil for the flavourful chicken and sauce.
- Shredded Cabbage: A pile of very finely shredded raw white cabbage provides a cool, crisp contrast in texture and temperature. A squeeze of lemon over the top makes it even better.
- Miso Soup: A small bowl of savoury miso soup served alongside makes the meal feel even more authentic and comforting.
- Drink Pairing: A crisp Japanese lager like Asahi or Sapporo cuts through the richness beautifully. For a non-alcoholic option, a cold glass of roasted barley tea (mugicha) is wonderfully refreshing.
Frequently Asked Questions
Crispy Chicken Katsu Recipe
Ingredients
Method
- Prepare the Chicken: Place a chicken breast between two sheets of baking parchment or in a large plastic bag. Using a rolling pin or meat mallet, gently pound it to an even thickness of about 1.5cm (just over half an inch). This ensures it cooks quickly and evenly. Repeat with the remaining chicken breasts.
- Set Up Your Breading Station: You'll need three shallow dishes. In the first, mix the plain flour, salt, pepper, and garlic powder. In the second, lightly beat the two eggs. In the third, spread out the panko breadcrumbs.
- Coat the Chicken: Working with one chicken breast at a time, dredge it in the seasoned flour, shaking off any excess. Next, dip it into the beaten egg, making sure it's fully coated. Finally, press it firmly into the panko breadcrumbs, turning it over to coat both sides completely. I find that using one hand for the "wet" stage (egg) and the other for the "dry" stages (flour, panko) helps keep my fingers from becoming a sticky mess.
- Rest the Chicken: Place the breaded chicken cutlets on a wire rack or a plate. Let them rest for at least 10 minutes. This helps the coating to dry out slightly and adhere to the chicken, which is crucial for a non-soggy, super crispy result. While they rest, you can make the sauce.
- Make the Tonkatsu Sauce: In a small bowl, simply whisk together the ketchup, Worcestershire sauce, soy sauce, and mirin (or sugar) until smooth. Set aside.
- Heat the Oil: Pour enough vegetable oil into a large, heavy-bottomed frying pan or skillet to come about 1.5cm up the sides. Heat over a medium-high heat until it reaches about 170°C (340°F). If you don't have a thermometer, you can test it by dropping in a panko crumb – it should sizzle immediately and turn golden in about 30 seconds.
- Fry the Chicken: Carefully place two chicken cutlets into the hot oil, ensuring not to overcrowd the pan. Fry for 3-4 minutes per side, until the coating is a deep golden brown and the chicken is cooked through. The internal temperature should be 74°C (165°F).
- Drain and Serve: Remove the cooked katsu from the pan and place it on a wire rack to drain any excess oil. This is much better than using kitchen paper, which can trap steam and make the underside soggy. Repeat with the remaining chicken. Let it rest for a minute before slicing into strips. Serve immediately with steamed rice, shredded cabbage, and a generous drizzle of the Tonkatsu sauce.
Notes
I really hope you give this Crispy Chicken Katsu recipe a try. It’s a meal that brings a little bit of Japanese culinary magic into your home, and the process of making it is just as rewarding as eating it. That first slice through the crunchy coating is a moment of pure joy. If you make it, please let me know how it turned out in the comments below. I love hearing about your experiences in the kitchen!
Happy cooking,
Ashley