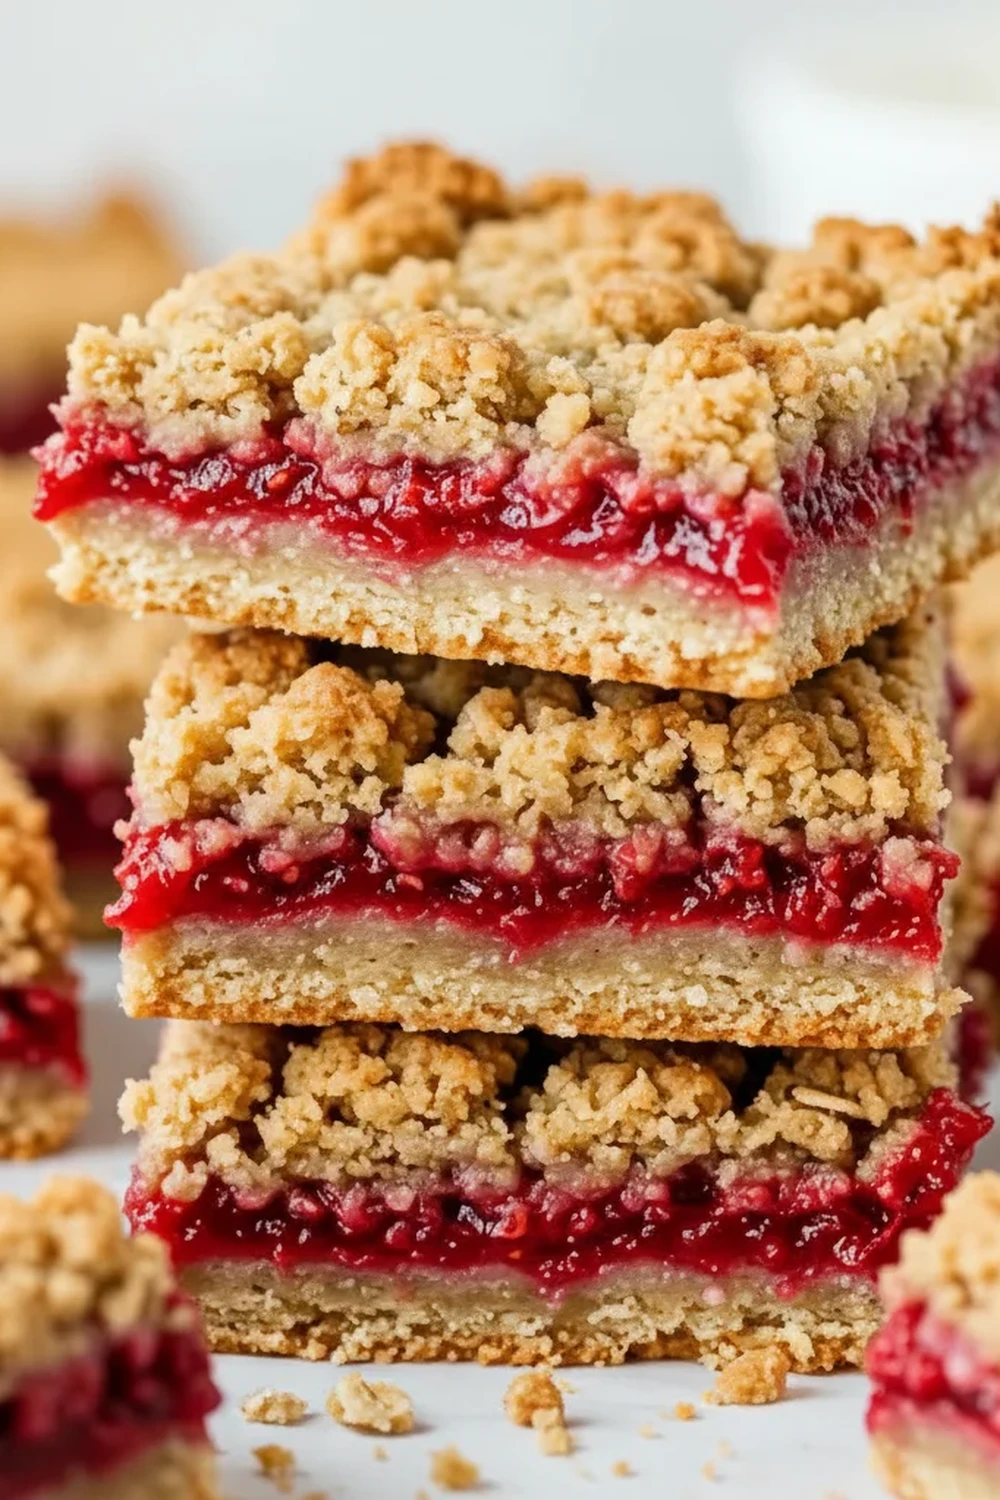
Buttery Sweet Raspberry Bars
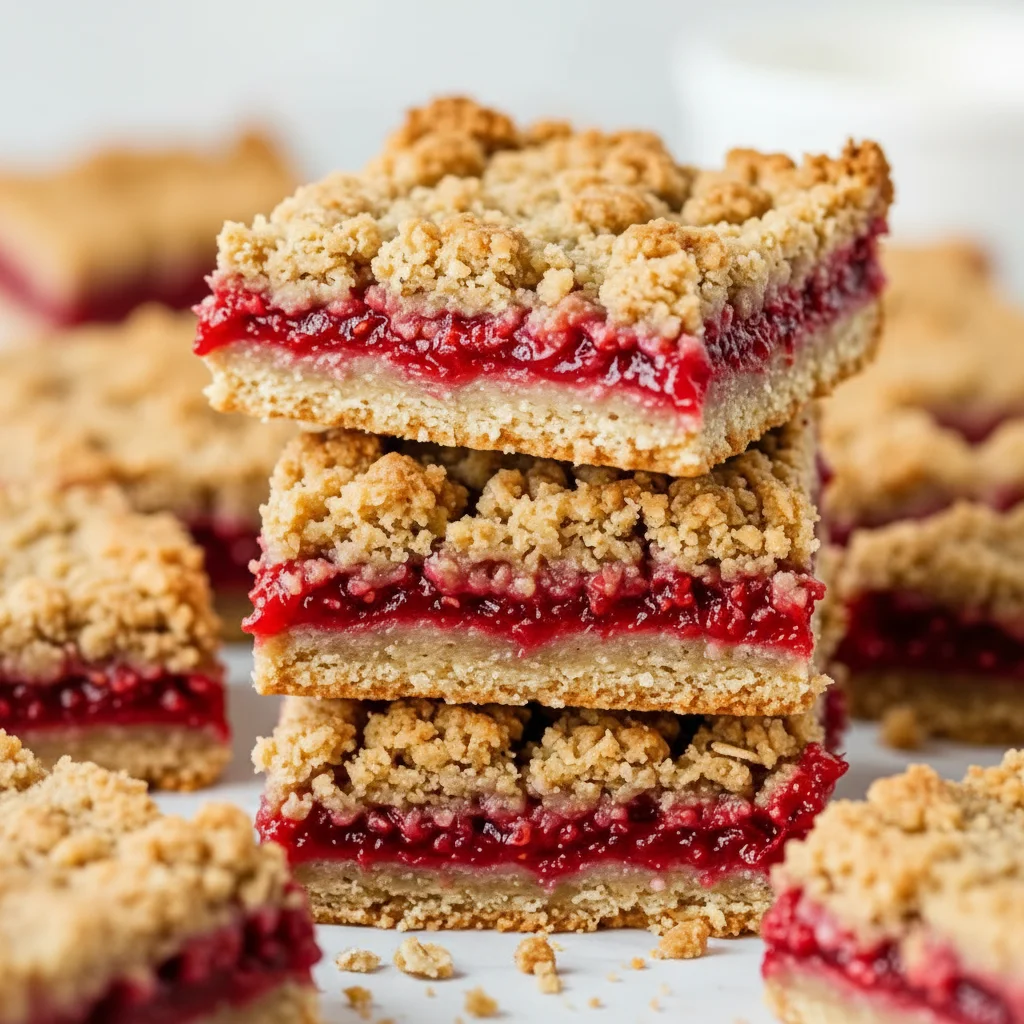
There are few things more welcoming than the scent of buttery crumble and warm fruit baking in the oven. It’s a smell that promises comfort and a moment of pure bliss with a cup of tea. These Raspberry Bars are the very embodiment of that promise. They feature a generous, jammy layer of sharp raspberry filling, sandwiched between a substantial, oaty crumble that serves as both the base and the topping. The base is firm and biscuit-like, while the topping is wonderfully crisp, creating a delightful textural contrast with every single bite.
This is my go-to recipe when I need something that looks and tastes impressive but comes together with minimal fuss. It’s a brilliant bake for using up that jar of raspberry jam in the cupboard or for showcasing fresh raspberries when they are in season. We’re not aiming for a delicate little pastry here; these are hearty, satisfying fruit bars. They are ideal for popping into a lunchbox, taking along to a picnic, or simply enjoying as an afternoon treat. The balance of the tangy fruit against the sweet, wholesome crumble is what makes these crumb bars so incredibly moreish.
What I love most is how adaptable this raspberry dessert is. While the recipe is written for a classic raspberry filling, it works beautifully with a whole host of other fruits. It’s the kind of recipe that, once you’ve made it, becomes a firm favourite in your baking repertoire. It’s a straightforward bake that delivers fantastic results every time, and one that always gets compliments from friends and family.
Recipe Overview
This recipe creates wonderfully chewy and crisp Raspberry Bars with a vibrant, fruity centre. The process involves making a single crumble mixture, which is then divided to create both a pressed base and a scattered topping. It’s an efficient method that yields a beautifully layered result. I’ve tested this with both fresh and frozen raspberries, and my note is to toss frozen berries in a little cornflour to prevent the filling from becoming too watery during baking.
- Prep Time: 20 minutes
- Cook Time: 40-45 minutes
- Total Time: 1 hour 5 minutes (plus cooling time)
- Servings: 16 bars
- Difficulty: Easy
Why You’ll Love These Raspberry Bars
- Sublime Texture and Flavour: You get a buttery, shortbread-like base, a layer of sharp and sweet raspberry filling that becomes wonderfully jammy, and a crunchy, oaty crumble topping. The flavours are distinct yet they meld together beautifully.
- Comes Together in Under an Hour: From gathering your ingredients to pulling the golden-brown tray from the oven, the active process is straightforward and takes around an hour before you let it cool.
- A Truly Flexible Recipe: Don’t have raspberry jam? Use strawberry, apricot, or blackberry. You can add a handful of white chocolate chips to the filling or some chopped nuts to the crumble for extra crunch.
- Works Wonderfully for Any Casual Occasion: These cookie bars are brilliant for bake sales, family get-togethers, or simply as a weekend baking project. They travel well, making them great for sharing.
- Family Tested and Approved: This is a recipe that everyone seems to love. My husband, who’s usually picky about desserts, asked for seconds the first time I made them!
Ingredients You’ll Need
This recipe uses standard pantry staples, which is one of its many charms. For the filling, I recommend using a good quality raspberry jam with a high fruit content, like Bonne Maman or Tiptree, as it provides a much more intense flavour. The difference is truly noticeable.
- For the Crumble Base and Topping:
- 225g unsalted butter, cold and cubed
- 280g plain flour
- 150g caster sugar
- 100g rolled oats (not instant or jumbo)
- 1/2 teaspoon baking powder
- 1/4 teaspoon salt
- 1 teaspoon vanilla extract
- For the Raspberry Filling:
- 250g good-quality raspberry jam
- 150g fresh or frozen raspberries
- 1 tablespoon cornflour (especially if using frozen raspberries)
- 1 tablespoon lemon juice
Ashley’s Tip: Ensure your butter is very cold, directly from the fridge. Using cold, cubed butter is the secret to achieving that perfect, slightly crumbly, shortbread-like texture in the base and a crisp topping.
How to Make Raspberry Bars
The method for these crumb bars is delightfully simple. We create one mixture for the base and topping, which saves time and washing up. The key is to press the base down firmly to create a solid foundation for that lovely raspberry filling.
- Prepare Your Tin and Oven: Preheat your oven to 180°C (160°C fan). Grease and line a 20cm x 30cm (8×12 inch) rectangular baking tin with baking parchment, leaving some overhang on the sides to make it easy to lift the bars out later.
- Make the Crumble Mixture: In a large bowl, combine the plain flour, caster sugar, rolled oats, baking powder, and salt. Give it a good whisk to mix everything together evenly.
- Add the Butter: Add the cold, cubed butter to the dry ingredients. Using your fingertips, rub the butter into the flour mixture until it resembles coarse breadcrumbs with some larger, pea-sized lumps remaining. This texture is what gives the bars their character. What works best for me is to work quickly so the butter doesn’t warm up too much. Stir in the vanilla extract.
- Form the Base: Take about two-thirds of the crumble mixture and press it firmly and evenly into the bottom of your prepared baking tin. Use the back of a spoon or the bottom of a glass to compact it down into a solid layer.
- Prepare the Filling: In a separate bowl, gently mix the raspberry jam, fresh or frozen raspberries, and lemon juice. If you’re using frozen raspberries, toss them in the cornflour first before adding them to the jam. This helps to thicken any extra liquid they release.
- Assemble the Bars: Spread the raspberry mixture evenly over the pressed crumble base, leaving a small 1cm border around the edges to prevent the jam from catching and burning.
- Add the Topping: Sprinkle the remaining one-third of the crumble mixture evenly over the raspberry layer. Don’t press it down; let it remain loose and crumbly.
- Bake to Perfection: Place the tin in the preheated oven and bake for 40-45 minutes. You’ll know it’s ready when the topping is a lovely golden brown and the raspberry filling is bubbling gently at the edges.
- Cool Completely: This is a crucial step! Allow the bars to cool completely in the tin before even thinking about slicing them. I usually let them cool on a wire rack for at least 2 hours. This allows the filling to set, ensuring you get clean, neat slices.
Tips From My Kitchen
- Temperature is Key: For the best texture, always use cold butter. If your kitchen is warm, you can even pop the bowl of crumble mixture in the fridge for 10-15 minutes before pressing it into the tin.
- The Secret to Clean Slices: Patience! The bars must be completely cool before slicing. For extra-sharp edges, I sometimes chill the entire cooled slab in the fridge for 30 minutes before lifting it out of the tin and cutting with a large, sharp knife.
- Make-Ahead Magic: You can prepare the crumble mixture up to 2 days in advance. Store it in an airtight container in the fridge. When you’re ready to bake, just press it into the tin and proceed with the recipe.
- Storage Savvy: Store the cooled Raspberry Bars in an airtight container at room temperature for up to 3 days. They will last for up to a week in the fridge, though the crumble will soften slightly.
Delicious Variations to Try
Once you’ve mastered the classic recipe, it’s fun to experiment with other flavours. This crumble base is wonderfully versatile and pairs well with a range of fillings and additions.
- Lemon & Blueberry Bars: Swap the raspberry jam for lemon curd and use fresh blueberries instead of raspberries for a different kind of fruit bar. The bright citrus flavour is a wonderful alternative.
- Almond & Cherry Bars: Add 75g of flaked almonds to the crumble topping and use cherry jam for the filling. A 1/2 teaspoon of almond extract in the crumble mix also deepens the flavour nicely.
- Apple & Cinnamon Crumble Bars: For an autumnal twist, use a thick apple compote or apple butter for the filling and add a teaspoon of ground cinnamon to the dry ingredients for the crumble. It’s like a handheld apple crumble!
What to Serve With Raspberry Bars
These bars are magnificent on their own, but they can easily be elevated into a more substantial raspberry dessert with a few simple accompaniments.
- Clotted Cream or Custard: For a truly British experience, serve a warm square with a generous dollop of clotted cream or a drizzle of warm, vanilla-scented custard.
- Vanilla Bean Ice Cream: The contrast of a warm fruit bar with cold, creamy ice cream is always a winner.
- A Good Cup of Tea: A classic pairing that never fails. Earl Grey or a simple English Breakfast tea cuts through the sweetness beautifully. It’s also lovely with a refreshing homemade Instant Coffee Iced Coffee on a warmer day.
Frequently Asked Questions
Raspberry Bars
Ingredients
Method
- Prepare Your Tin and Oven: Preheat your oven to 180°C (160°C fan). Grease and line a 20cm x 30cm (8x12 inch) rectangular baking tin with baking parchment, leaving some overhang on the sides to make it easy to lift the bars out later.
- Make the Crumble Mixture: In a large bowl, combine the plain flour, caster sugar, rolled oats, baking powder, and salt. Give it a good whisk to mix everything together evenly.
- Add the Butter: Add the cold, cubed butter to the dry ingredients. Using your fingertips, rub the butter into the flour mixture until it resembles coarse breadcrumbs with some larger, pea-sized lumps remaining. This texture is what gives the bars their character. What works best for me is to work quickly so the butter doesn't warm up too much. Stir in the vanilla extract.
- Form the Base: Take about two-thirds of the crumble mixture and press it firmly and evenly into the bottom of your prepared baking tin. Use the back of a spoon or the bottom of a glass to compact it down into a solid layer.
- Prepare the Filling: In a separate bowl, gently mix the raspberry jam, fresh or frozen raspberries, and lemon juice. If you're using frozen raspberries, toss them in the cornflour first before adding them to the jam. This helps to thicken any extra liquid they release.
- Assemble the Bars: Spread the raspberry mixture evenly over the pressed crumble base, leaving a small 1cm border around the edges to prevent the jam from catching and burning.
- Add the Topping: Sprinkle the remaining one-third of the crumble mixture evenly over the raspberry layer. Don't press it down; let it remain loose and crumbly.
- Bake to Perfection: Place the tin in the preheated oven and bake for 40-45 minutes. You'll know it's ready when the topping is a lovely golden brown and the raspberry filling is bubbling gently at the edges.
- Cool Completely: This is a crucial step! Allow the bars to cool completely in the tin before even thinking about slicing them. I usually let them cool on a wire rack for at least 2 hours. This allows the filling to set, ensuring you get clean, neat slices.
Notes
I really hope you give these delightful Raspberry Bars a go. They are such a satisfying and straightforward bake, perfect for when you need a little treat. They fill the kitchen with the most amazing aroma, and the result is a tray of pure joy. If you’re looking for another stunning bake, you might also like my Rose Gold Cake Recipe. I’d love to hear how you get on with these bars, so please do leave a comment below and let me know! Happy baking, Ashley.