Easter Dirt Cake Casserole Recipe
There’s something wonderfully nostalgic about a dirt cake. It reminds me of childhood parties, with its layers of creamy pudding and crushed chocolate biscuits that look just like garden soil. For years, I wanted to create a version that felt special enough for a holiday table but retained all that playful charm. This Easter Dirt Cake Casserole Recipe is the brilliant result. I’ve been making this for over 4 years, and it never disappoints, blending that classic fun with a slightly more elegant, shareable format.
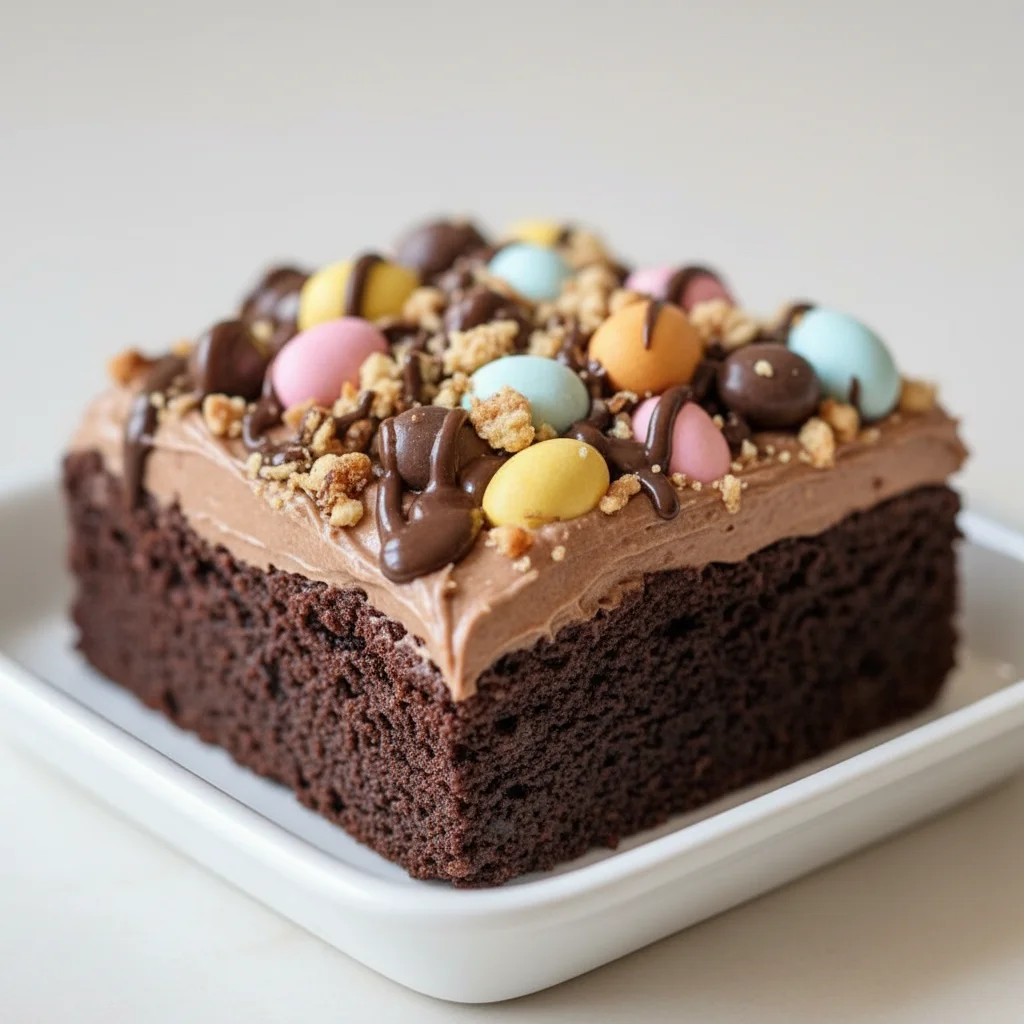
What makes this casserole dessert so delightful is the texture. You get the soft, yielding cream cheese layer, which is light and tangy, followed by the satisfying crunch of the chocolate biscuit “dirt.” Instead of gummy worms, we’re bringing in the Easter theme with speckled mini eggs, little chocolate bunnies peeking out from the soil, and maybe even a carrot patch made of piped orange icing. It’s a dessert that tells a story and gets everyone at the table smiling before they’ve even taken a bite.
This recipe is ideal when you’re feeding a family or bringing a dessert to an Easter gathering. It’s a no-bake wonder, which means your oven is free for the main course, like our family’s favourite Grilled Lamb Chops. Children absolutely adore helping to make this; crushing the biscuits and decorating the top are jobs they take very seriously! It’s a treat that feels both celebratory and completely stress-free to prepare.
Recipe Overview
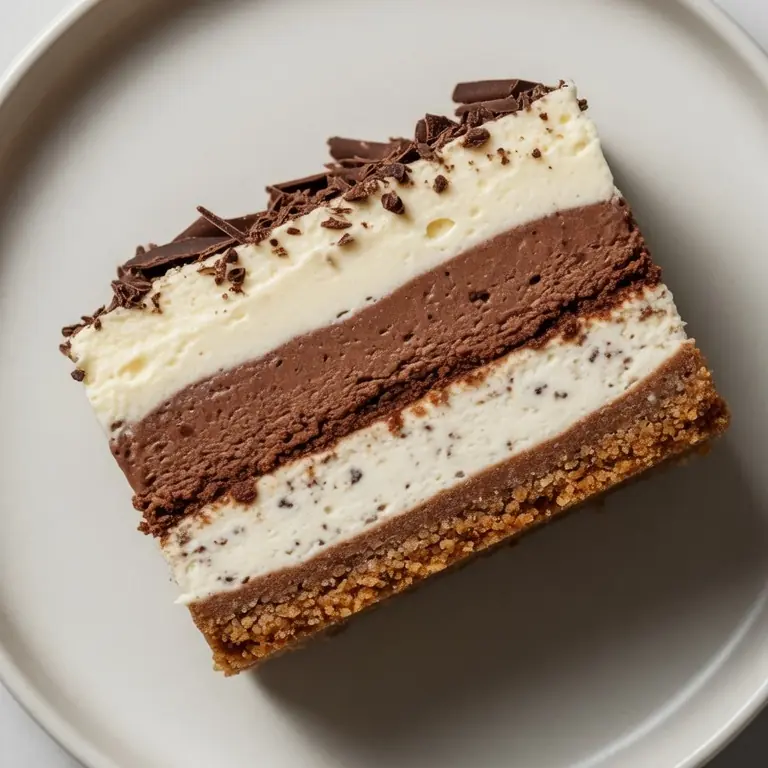
This Easter Dirt Cake Casserole is a no-bake layered dessert featuring a rich, velvety cream cheese filling sandwiched between layers of crushed chocolate sandwich biscuits. The flavour is a lovely balance of sweet, creamy, and deep chocolate notes. My personal testing note is that chilling it for the full four hours (or even overnight) is non-negotiable; it allows the cream layer to set properly and the flavours to meld together beautifully.
- Prep Time: 25 minutes
- Chill Time: 4 hours
- Total Time: 4 hours 25 minutes
- Servings: 10-12 people
- Difficulty: Easy
Why You’ll Love This Easter Dirt Cake Casserole Recipe
- Wonderful Textures & Flavours: The filling isn’t just sweet; it has a lovely tang from the full-fat cream cheese which cuts through the richness of the double cream and the dark chocolate biscuits. It’s light, moussey, and utterly moreish.
- Ready in Under 30 Minutes (plus chilling): The hands-on part of this recipe is remarkably swift. You can have the entire dessert assembled and in the fridge in about 25 minutes, leaving you plenty of time to focus on other things.
- A Flexible Recipe: You can easily adapt the decorations. Use any of your favourite Easter chocolates! Sometimes we add a layer of caramel sauce on top of the first biscuit base for an extra decadent touch.
- Great for Holiday Gatherings: It’s made in a casserole dish, making it straightforward to transport and serve to a group. It works wonderfully for Easter Sunday lunch, school holiday treats, or any spring celebration.
- Family Tested and Approved: Friends always ask me for this recipe after trying it at our Easter get-togethers. My children, now teenagers, still insist it’s a non-negotiable part of our holiday menu.

Ingredients You’ll Need
This recipe uses simple, accessible ingredients. For the cream cheese layer, I always use Philadelphia full-fat block cream cheese. I find its firm texture and distinct tang provide the best foundation for the filling, preventing it from becoming too runny or overly sweet.
- For the “Dirt” Base and Topping:
- 500g chocolate sandwich biscuits (like Oreos)
- 120g unsalted butter, melted
- For the Creamy Filling:
- 450g full-fat cream cheese, softened to room temperature
- 200g icing sugar, sifted
- 2 tsp vanilla extract
- 480ml double cream, cold
- For the Easter Decoration:
- 1 bag of Cadbury Mini Eggs
- A few chocolate bunnies or chicks
- Optional: green-coloured desiccated coconut for “grass”
Ashley’s Tip: Don’t be tempted to use a low-fat cream cheese here. The fat content is crucial for the structure and richness of the filling. Using a low-fat version can result in a watery, less stable dessert.
How to Make Easter Dirt Cake Casserole
The process for this dessert is all about layering. We create our base, whip up the dreamy filling, and then assemble it all before letting the fridge do the hard work. It’s a straightforward method that delivers impressive results.
- First, prepare your “dirt.” Place the chocolate sandwich biscuits (filling and all) into a food processor and pulse until you have fine crumbs. If you don’t have a food processor, pop them in a sturdy, sealed food bag and crush them with a rolling pin.
- In a medium bowl, combine the biscuit crumbs with the 120g of melted unsalted butter. Mix well until all the crumbs are evenly moistened and look like damp soil.
- Take a 2.5-litre (or roughly 22×33 cm) casserole or baking dish. Press half of the buttery crumb mixture firmly and evenly into the bottom of the dish to create your base. Set aside.
- Now for the filling. In a large bowl, using a stand mixer or an electric hand mixer, beat the 450g of softened cream cheese on medium speed until completely smooth and free of lumps, about 2 minutes.
- Add the 200g of sifted icing sugar and 2 tsp of vanilla extract to the cream cheese. Beat again on low speed, then increase to medium, until everything is well combined and silky. Scrape down the sides of the bowl as needed.
- In a separate, clean bowl, whip the 480ml of cold double cream until it forms stiff peaks. You can learn more about getting the perfect consistency from this helpful guide. Be careful not to over-whip it into butter!
- Gently fold about a third of the whipped cream into the cream cheese mixture to lighten it. Then, add the remaining whipped cream and fold until just combined. What works best for me is using a large spatula in a gentle figure-of-eight motion to keep the air in the cream.
- Spread the cream cheese mixture evenly over the biscuit base in your casserole dish. Smooth the top with the back of a spoon or an offset spatula.
- Sprinkle the remaining half of the biscuit crumb mixture evenly over the top of the cream layer, covering it completely to create the top layer of “dirt.”
- Cover the dish with cling film and refrigerate for at least 4 hours, or ideally overnight. This chilling time is essential for the dessert to set properly.
- Just before serving, decorate your Easter dirt cake. Arrange chocolate bunnies, sprinkle over mini eggs, and add patches of green coconut “grass” if you’re using it. Serve chilled.
Tips From My Kitchen
- Temperature is Key: Ensure your cream cheese is properly at room temperature. Cold cream cheese will result in a lumpy filling that’s impossible to smooth out. I take mine out of the fridge about an hour before I start.
- The Secret Step: Don’t skip sifting the icing sugar. It seems like a small thing, but it prevents chalky lumps in your otherwise silky-smooth cream filling. I learned that the hard way many years ago!
- Make-Ahead Magic: This is a fantastic dessert to make a day in advance. Simply assemble the entire casserole, cover it tightly, and keep it in the fridge. Wait to add the decorations until just before you serve to keep them looking their best.
- Storage Savvy: Leftovers can be stored, covered, in the refrigerator for up to 3 days. The biscuit topping will soften slightly over time, but it remains absolutely delicious.
Equipment You’ll Need
You don’t need a lot of fancy gadgets for this recipe, which is part of its charm.
- Stand mixer or electric hand mixer
- 2.5-litre (22×33 cm or similar) casserole dish
- Food processor (or a rolling pin and a zip-top bag)
- Large mixing bowls
- Spatula
Common Mistakes to Avoid
- Using Warm Double Cream: Your double cream must be very cold, straight from the fridge. Warm cream will not whip up into stiff peaks, and your filling will be runny and sad.
- Under-Beating the Cream Cheese: If you don’t beat the cream cheese until it’s perfectly smooth at the start, you will have small lumps in your final dessert. Take the extra minute to get it right.
- Skipping the Chill Time: I know it’s tempting to dig in straight away, but this dessert needs time for the filling to firm up. If you serve it too early, it won’t hold its shape and the layers will merge. Patience is rewarded!
Delicious Variations to Try
While the classic is fantastic, this Easter dirt cake is a brilliant canvas for customisation. Here are a few ideas we’ve tried and loved.
- White Chocolate Version: Use white chocolate sandwich biscuits (like Golden Oreos) and decorate with white chocolate mini eggs for a completely different look and a sweeter, creamier flavour profile.
- Peanut Butter Twist: Swirl 100g of smooth peanut butter into the cream cheese mixture before folding in the whipped cream. Decorate with peanut butter cups for an irresistible combination.
- A Boozy Touch (for adults): Add 2 tablespoons of Baileys Irish Cream or Kahlúa to the cream cheese mixture for a grown-up version. This is lovely for an evening dessert after a big family meal.
What to Serve With This Easter Dirt Cake Casserole Recipe
This dessert is quite rich and satisfying on its own, but a few simple pairings can elevate the experience.
- Fresh Berries: A small bowl of fresh raspberries or sliced strawberries on the side provides a lovely, sharp contrast to the creamy sweetness of the cake.
- A Good Coffee: A freshly brewed coffee or an espresso is the perfect partner. Its slight bitterness cuts through the richness beautifully. For a refreshing option, try our Instant Iced Coffee Recipe.
- Vanilla Ice Cream: For a truly indulgent treat, a simple scoop of good quality vanilla bean ice cream served alongside a slice of the dirt cake is heavenly.
Frequently Asked Questions
Easter Dirt Cake Casserole Recipe
Ingredients
Method
- First, prepare your "dirt." Place the chocolate sandwich biscuits (filling and all) into a food processor and pulse until you have fine crumbs. If you don't have a food processor, pop them in a sturdy, sealed food bag and crush them with a rolling pin.
- In a medium bowl, combine the biscuit crumbs with the 120g of melted unsalted butter. Mix well until all the crumbs are evenly moistened and look like damp soil.
- Take a 2.5-litre (or roughly 22x33 cm) casserole or baking dish. Press half of the buttery crumb mixture firmly and evenly into the bottom of the dish to create your base. Set aside.
- Now for the filling. In a large bowl, using a stand mixer or an electric hand mixer, beat the 450g of softened cream cheese on medium speed until completely smooth and free of lumps, about 2 minutes.
- Add the 200g of sifted icing sugar and 2 tsp of vanilla extract to the cream cheese. Beat again on low speed, then increase to medium, until everything is well combined and silky. Scrape down the sides of the bowl as needed.
- In a separate, clean bowl, whip the 480ml of cold double cream until it forms stiff peaks. You can learn more about getting the perfect consistency from this helpful guide. Be careful not to over-whip it into butter!
- Gently fold about a third of the whipped cream into the cream cheese mixture to lighten it. Then, add the remaining whipped cream and fold until just combined. What works best for me is using a large spatula in a gentle figure-of-eight motion to keep the air in the cream.
- Spread the cream cheese mixture evenly over the biscuit base in your casserole dish. Smooth the top with the back of a spoon or an offset spatula.
- Sprinkle the remaining half of the biscuit crumb mixture evenly over the top of the cream layer, covering it completely to create the top layer of "dirt."
- Cover the dish with cling film and refrigerate for at least 4 hours, or ideally overnight. This chilling time is essential for the dessert to set properly.
- Just before serving, decorate your Easter dirt cake. Arrange chocolate bunnies, sprinkle over mini eggs, and add patches of green coconut "grass" if you're using it. Serve chilled.
Notes
I really hope you and your family enjoy making and eating this Easter Dirt Cake Casserole Recipe as much as we do. It’s such a fun, festive, and genuinely delicious dessert that brings a little bit of joy to the table. If you try it, I’d love to hear how it went! Please leave a comment below and let me know what decorations you used. Happy Easter!
– Ashley Rivera