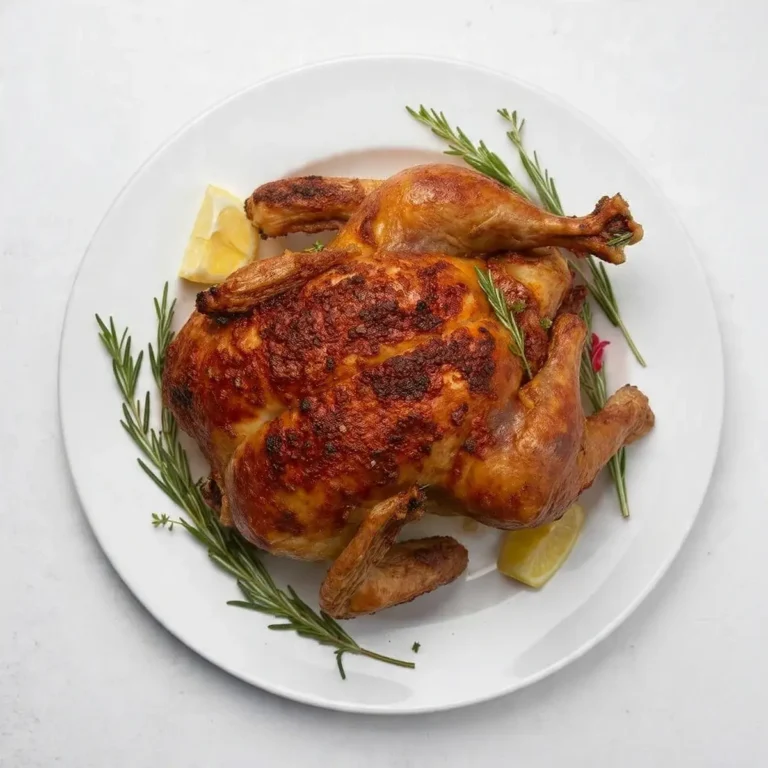
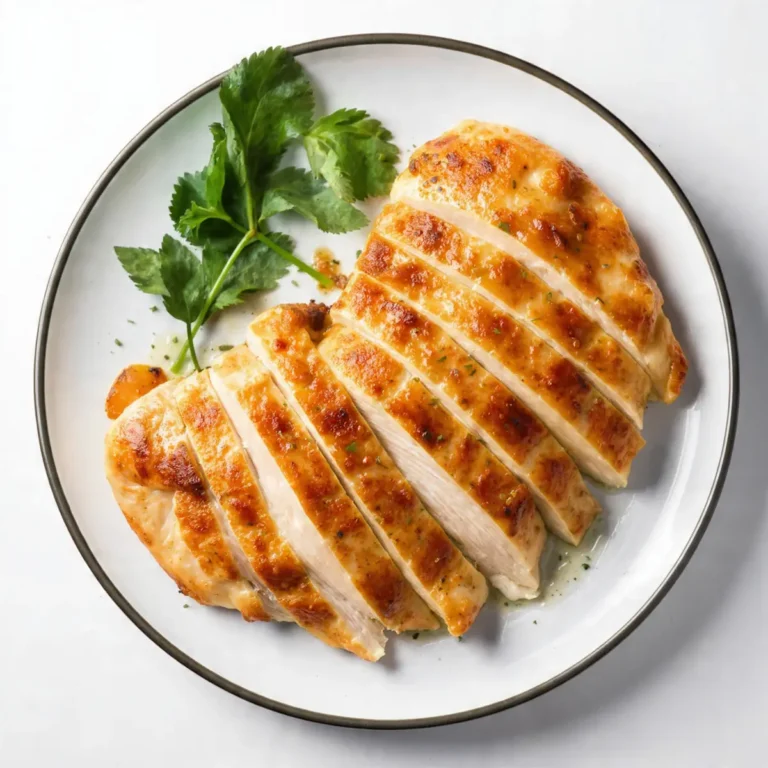
Chicken Fried Chicken Recipe Crispy
There are some meals that just feel like a warm hug, and for me, this Chicken Fried Chicken recipe is the ultimate culinary embrace. It’s more than just fried chicken; it’s a tender chicken breast, flattened and coated in a craggy, savoury, and outrageously crispy crust, then generously smothered in a creamy, peppery gravy. The sound of the chicken sizzling in the pan is one of my favourite kitchen soundtracks. It signals that something truly wonderful is on its way to the dinner table.
I’ve been making this for over 8 years, and it never disappoints. It’s my go-to recipe when I want to cook something that feels special yet deeply comforting. Unlike its bone-in cousin, chicken fried chicken is boneless, making it incredibly easy to eat with a knife and fork, ensuring you get a perfect bite of crispy chicken and creamy gravy every single time. It’s a taste of the American South, refined in my own British kitchen over years of testing and tweaking. This is the kind of satisfying meal that reminds me of why I love to cook, similar to the joy I get from making a hearty pot of Lentil Soup on a cold day.
This dish is ideal when you want to impress without spending hours over the stove. It works beautifully for a Sunday dinner, a celebratory weeknight meal, or simply when a craving for some serious comfort food strikes. Everyone seems to love this, from fussy eaters to seasoned foodies, and it always gets compliments.
Recipe Overview
This recipe guides you through creating an exceptionally crispy, well-seasoned chicken breast, served with a classic white pepper gravy made right in the same pan. The flavour profile is savoury and rich, with a peppery warmth that runs through both the chicken’s crust and the sauce. The secret is the double dredge, which I found after many tests is the only way to get that signature, ultra-crunchy coating that stays put. It’s a straightforward process that delivers restaurant-quality results at home.
- Prep Time: 15 minutes
- Cook Time: 20 minutes
- Total Time: 35 minutes
- Servings: 4 people
- Difficulty: Medium
Why You’ll Love This Chicken Fried Chicken Recipe
- Genuine Flavour: The seasoned flour, packed with paprika, garlic, and plenty of black pepper, creates a savoury crust that is bursting with flavour. The gravy, made from the delicious pan drippings, is rich, creamy, and the ideal partner for the crispy chicken.
- Ready in Under 40 Minutes: From prepping the chicken to ladling the gravy, this entire meal comes together in about 35 minutes, making it achievable even on a busier evening.
- Flexible Recipe: This method is very forgiving. You can use boneless chicken thighs for an even juicier result, or adjust the heat in the flour mix by adding a pinch of cayenne pepper.
- Great for a Hearty Meal: This works beautifully for a weekend family dinner when you want something substantial and satisfying. It’s also the meal I turn to after a particularly long or challenging week.
- Family Tested: My family adores this recipe. My husband consistently says it’s the best fried chicken he’s ever had, and it’s one of the few meals that guarantees completely clean plates all around.

Ingredients You’ll Need
For the best results, start with good-quality ingredients. I always use free-range chicken breasts and find that using buttermilk (if you have it) instead of regular milk for the egg wash adds a lovely subtle tang. For the flour, any standard plain flour will do the job perfectly.
- For the Chicken:
- 4 boneless, skinless chicken breasts (about 170g each)
- 250g plain flour
- 2 tsp salt
- 2 tsp freshly ground black pepper
- 1 tsp smoked paprika
- 1 tsp garlic powder
- 1 tsp onion powder
- ½ tsp mustard powder
- 2 large free-range eggs
- 60ml whole milk or buttermilk
- ~500ml vegetable or sunflower oil, for frying
- For the Gravy:
- 60g pan drippings (fat and crispy bits from frying)
- 60g plain flour
- 700ml whole milk
- 1 tsp freshly ground black pepper, or to taste
- Salt, to taste
Ashley’s Tip: Don’t be shy with the black pepper in both the flour mixture and the gravy. It’s the signature flavour in this Southern-style dish and what makes it truly authentic.
How to Make Chicken Fried Chicken Recipe
The process is broken down into three main stages: preparing the chicken, frying it to golden perfection, and then making a quick pan gravy. We’ll set up a simple dredging station to make coating the chicken a breeze.
- Prepare the Chicken: Place a chicken breast between two sheets of cling film or baking parchment. Using a meat mallet or a rolling pin, gently pound the chicken until it is an even thickness of about 1.5cm (just over ½ inch). This ensures it cooks evenly. Repeat with the remaining chicken breasts.
- Set Up the Dredging Station: You’ll need two shallow dishes. In the first, whisk together the 250g plain flour, salt, 2 tsp black pepper, paprika, garlic powder, onion powder, and mustard powder. In the second dish, whisk the eggs and milk (or buttermilk) together until smooth.
- Double Dredge the Chicken: Take one pounded chicken breast and dredge it thoroughly in the seasoned flour, shaking off any excess. Next, dip it into the egg wash, ensuring it’s fully coated. Finally, place it back into the seasoned flour for a second, generous coating. Press the flour onto the chicken firmly to help it adhere. Place the coated chicken on a wire rack. Repeat for all pieces.
- Rest the Chicken: Let the coated chicken rest on the wire rack for at least 10 minutes. What works best for me is using this time to get my side dishes ready. This resting step is vital; it allows the coating to hydrate and cling to the chicken, which prevents it from falling off during frying.
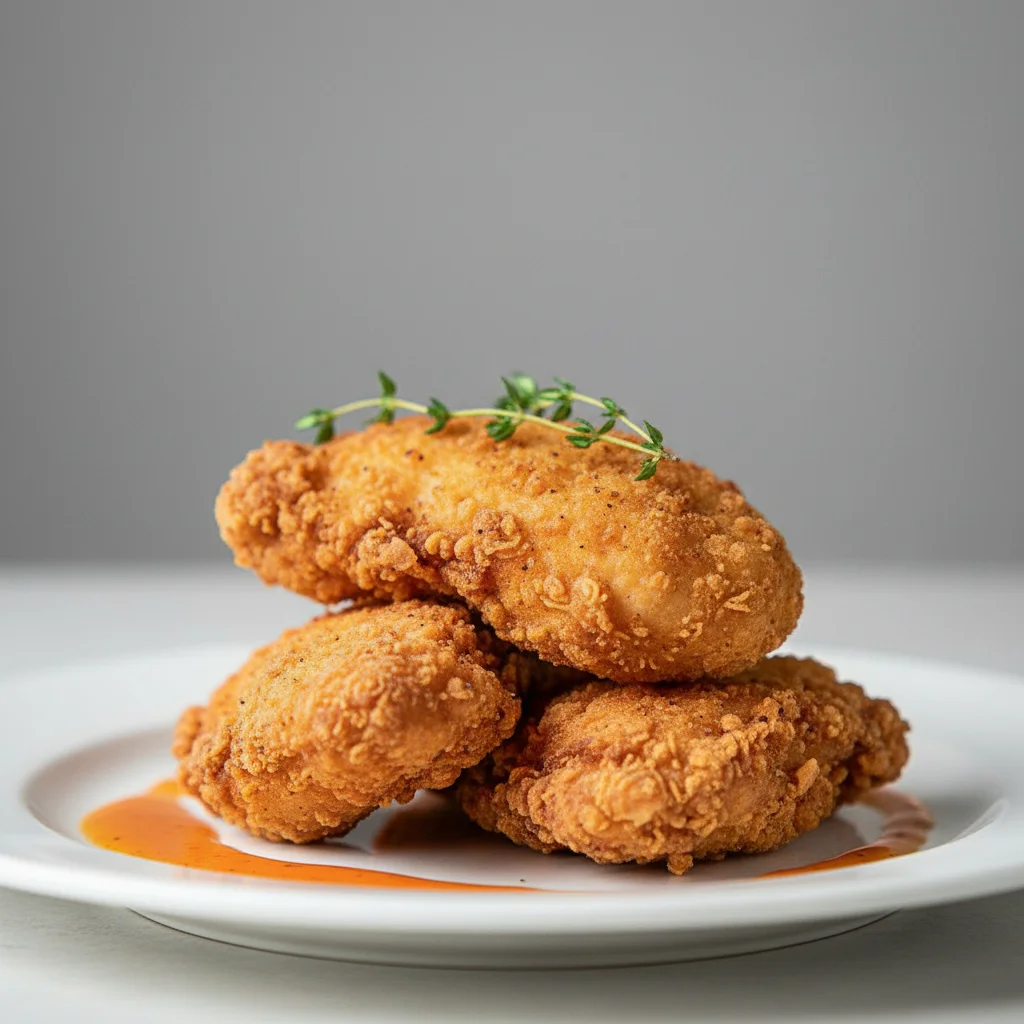
- Fry the Chicken: Pour the oil into a large, heavy-bottomed frying pan or skillet to a depth of about 2cm. Heat over a medium-high heat until it reaches 175°C (350°F). If you don’t have a thermometer, a pinch of flour should sizzle vigorously when dropped in. Carefully place two pieces of chicken in the pan, ensuring not to overcrowd it. Fry for 4-5 minutes per side, until deep golden brown, crispy, and cooked through. The internal temperature should be 74°C. Check government advice like from the Food Standards Agency (FSA) for the latest safe cooking temperatures.
- Drain and Keep Warm: Remove the cooked chicken from the pan and place it back on the wire rack to drain. You can keep the cooked chicken warm in a low oven (around 100°C) while you fry the remaining batch.
- Make the Pan Gravy: Carefully pour off all but about 60g (roughly 4 tablespoons) of the hot oil from the pan, leaving the browned, crispy bits (the fond) behind. Return the pan to a medium heat. Whisk in the 60g of flour to create a paste (a roux). Cook for one minute, stirring constantly.
- Finish the Gravy: Gradually pour in the whole milk while whisking continuously to prevent lumps. Bring the gravy to a simmer and cook for 3-5 minutes, until it has thickened enough to coat the back of a spoon. Season generously with the remaining 1 tsp of black pepper and salt to your taste.
- Serve Immediately: Serve the crispy chicken fried chicken immediately, with a generous ladle of the creamy pepper gravy poured over the top.
Tips From My Kitchen
- Temperature Control: A kitchen thermometer is invaluable for frying. Maintaining the oil at 175°C is key. If the oil is too cool, the chicken will absorb it and become greasy; if it’s too hot, the crust will burn before the chicken inside is fully cooked.
- The Secret Step: I learned that the double dredge is non-negotiable for that classic, craggy crust. The first layer of flour gives the egg something to cling to, and the second layer builds that substantial, crispy coating we’re looking for.
- Make-Ahead: The seasoned flour mixture can be made up to a month in advance and stored in an airtight container. This makes assembly a little quicker on the day you want to cook.
- Storage: Store leftover chicken and gravy separately in airtight containers in the refrigerator for up to 3 days. To reheat, place the chicken on a rack in a 190°C oven for 10-15 minutes, until hot and crisp. Gently reheat the gravy in a saucepan over low heat.
Equipment You’ll Need
- Large heavy-bottomed frying pan or cast-iron skillet
- Meat mallet or rolling pin
- Two shallow dishes for dredging
- Wire rack
- Tongs
- Whisk
Common Mistakes to Avoid
- Overcrowding the pan: Adding too many pieces of chicken at once will cause the oil temperature to drop dramatically. This steams the chicken rather than frying it, leading to a soggy crust. Fry in batches of two for the best results.
- Wrong temperature: Frying without monitoring the oil temperature is a gamble. A simple kitchen thermometer removes the guesswork and guarantees a perfectly golden, crispy finish every time.
- Skipping the rest time: That 10-minute rest after dredging is crucial. It gives the flour time to absorb moisture from the egg wash, creating a “glue” that helps the crust adhere to the chicken in the hot oil. Don’t skip it!
Delicious Variations to Try
Once you’ve mastered the basic recipe, it’s fun to experiment. The coating and gravy are a wonderful canvas for other flavours. For other protein ideas, you might enjoy my recipe for Grilled Lamb Chops.
- Spicy Version: For a bit of a kick, add 1-2 teaspoons of cayenne pepper to your seasoned flour mixture. You can also add a dash of your favourite hot sauce to the egg wash.
- Herbaceous Gravy: Add a sprig of thyme or a teaspoon of chopped fresh sage to the gravy as it simmers to infuse it with a lovely, earthy flavour.
- Different Protein: This technique, which is reminiscent of the method used for chicken-fried steak, works wonderfully with thin pork loin steaks or turkey breast escalopes as well.
What to Serve With Chicken Fried Chicken Recipe
This dish calls for classic accompaniments that can stand up to its rich flavour and soak up every last drop of that incredible gravy.
- Creamy Mashed Potatoes: This is the quintessential pairing. A fluffy, buttery pile of mash is the perfect vessel for the creamy pepper gravy.
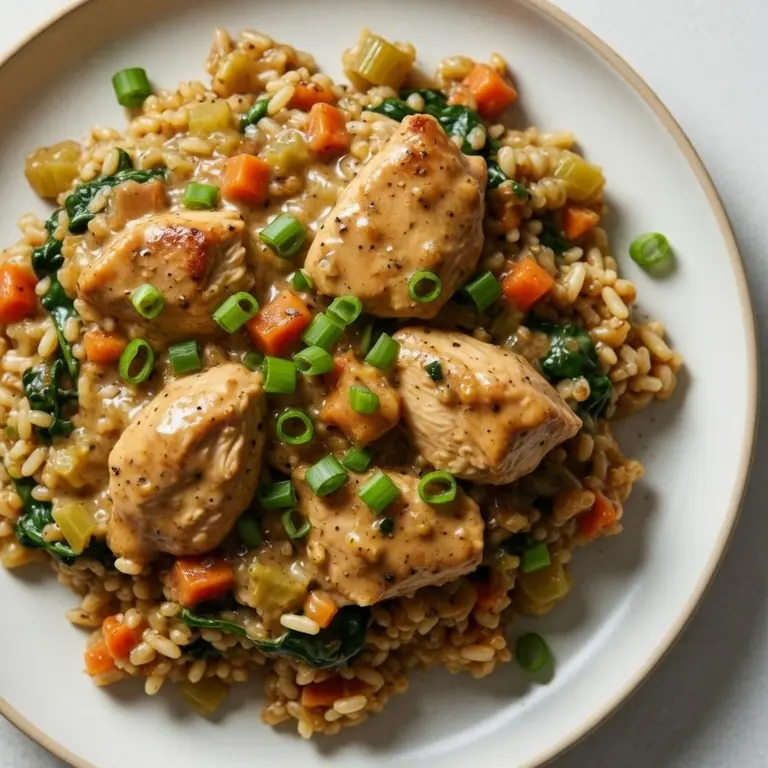
- Sautéed Green Beans: A side of simple green beans, perhaps sautéed with a little garlic and lemon zest, provides a fresh, crisp contrast that cuts through the richness of the main dish. You could also serve it with something like these easy Stuffed Peppers for a fuller meal.
- Drink Pairing: A cold, crisp lager or a simple glass of iced tea are both classic Southern pairings that work beautifully. The carbonation of the beer helps cleanse the palate between bites.
Frequently Asked Questions
Chicken Fried Chicken Recipe
Ingredients
Method
- Prepare the Chicken: Place a chicken breast between two sheets of cling film or baking parchment. Using a meat mallet or a rolling pin, gently pound the chicken until it is an even thickness of about 1.5cm (just over ½ inch). This ensures it cooks evenly. Repeat with the remaining chicken breasts.
- Set Up the Dredging Station: You'll need two shallow dishes. In the first, whisk together the 250g plain flour, salt, 2 tsp black pepper, paprika, garlic powder, onion powder, and mustard powder. In the second dish, whisk the eggs and milk (or buttermilk) together until smooth.
- Double Dredge the Chicken: Take one pounded chicken breast and dredge it thoroughly in the seasoned flour, shaking off any excess. Next, dip it into the egg wash, ensuring it's fully coated. Finally, place it back into the seasoned flour for a second, generous coating. Press the flour onto the chicken firmly to help it adhere. Place the coated chicken on a wire rack. Repeat for all pieces.
- Rest the Chicken: Let the coated chicken rest on the wire rack for at least 10 minutes. What works best for me is using this time to get my side dishes ready. This resting step is vital; it allows the coating to hydrate and cling to the chicken, which prevents it from falling off during frying.
- Fry the Chicken: Pour the oil into a large, heavy-bottomed frying pan or skillet to a depth of about 2cm. Heat over a medium-high heat until it reaches 175°C (350°F). If you don't have a thermometer, a pinch of flour should sizzle vigorously when dropped in. Carefully place two pieces of chicken in the pan, ensuring not to overcrowd it. Fry for 4-5 minutes per side, until deep golden brown, crispy, and cooked through. The internal temperature should be 74°C. Check government advice like from the Food Standards Agency (FSA) for the latest safe cooking temperatures.
- Drain and Keep Warm: Remove the cooked chicken from the pan and place it back on the wire rack to drain. You can keep the cooked chicken warm in a low oven (around 100°C) while you fry the remaining batch.
- Make the Pan Gravy: Carefully pour off all but about 60g (roughly 4 tablespoons) of the hot oil from the pan, leaving the browned, crispy bits (the fond) behind. Return the pan to a medium heat. Whisk in the 60g of flour to create a paste (a roux). Cook for one minute, stirring constantly.
- Finish the Gravy: Gradually pour in the whole milk while whisking continuously to prevent lumps. Bring the gravy to a simmer and cook for 3-5 minutes, until it has thickened enough to coat the back of a spoon. Season generously with the remaining 1 tsp of black pepper and salt to your taste.
- Serve Immediately: Serve the crispy chicken fried chicken immediately, with a generous ladle of the creamy pepper gravy poured over the top.
Notes
I truly hope you give this Chicken Fried Chicken recipe a try. It’s a meal that brings so much joy and satisfaction, and the process of making it is just as rewarding as eating it. It’s a testament to how simple, good-quality ingredients can be transformed into something utterly magnificent. If you make it, please drop a comment below and let me know how it turned out for you!
Happy cooking,
Ashley