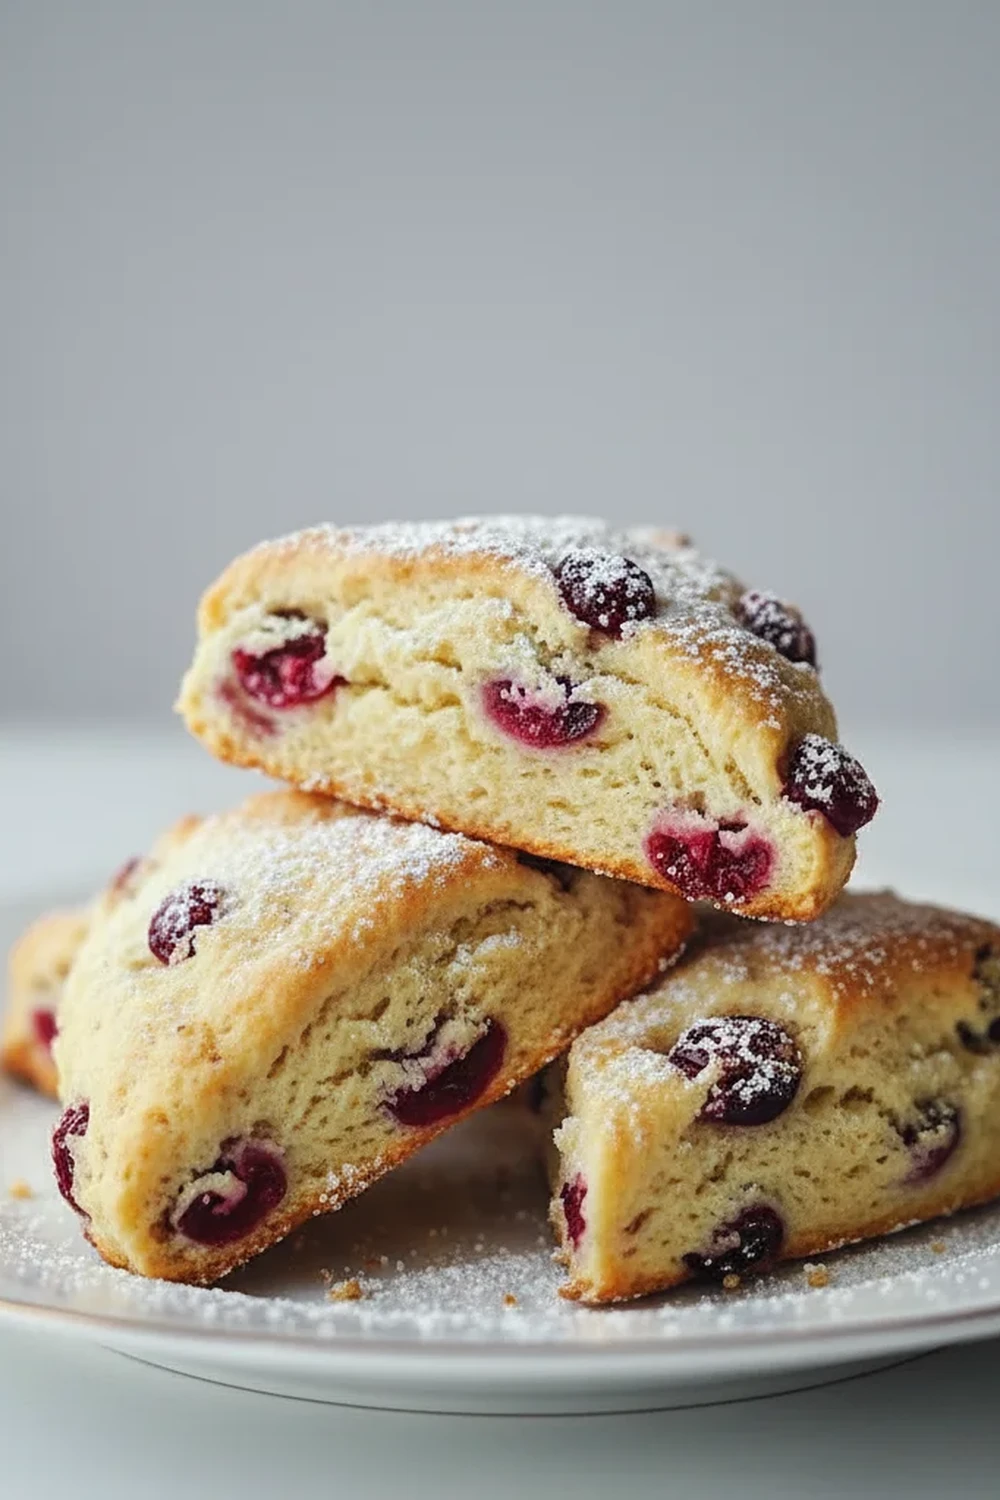
Orange Cranberry Scones Recipe Citrus
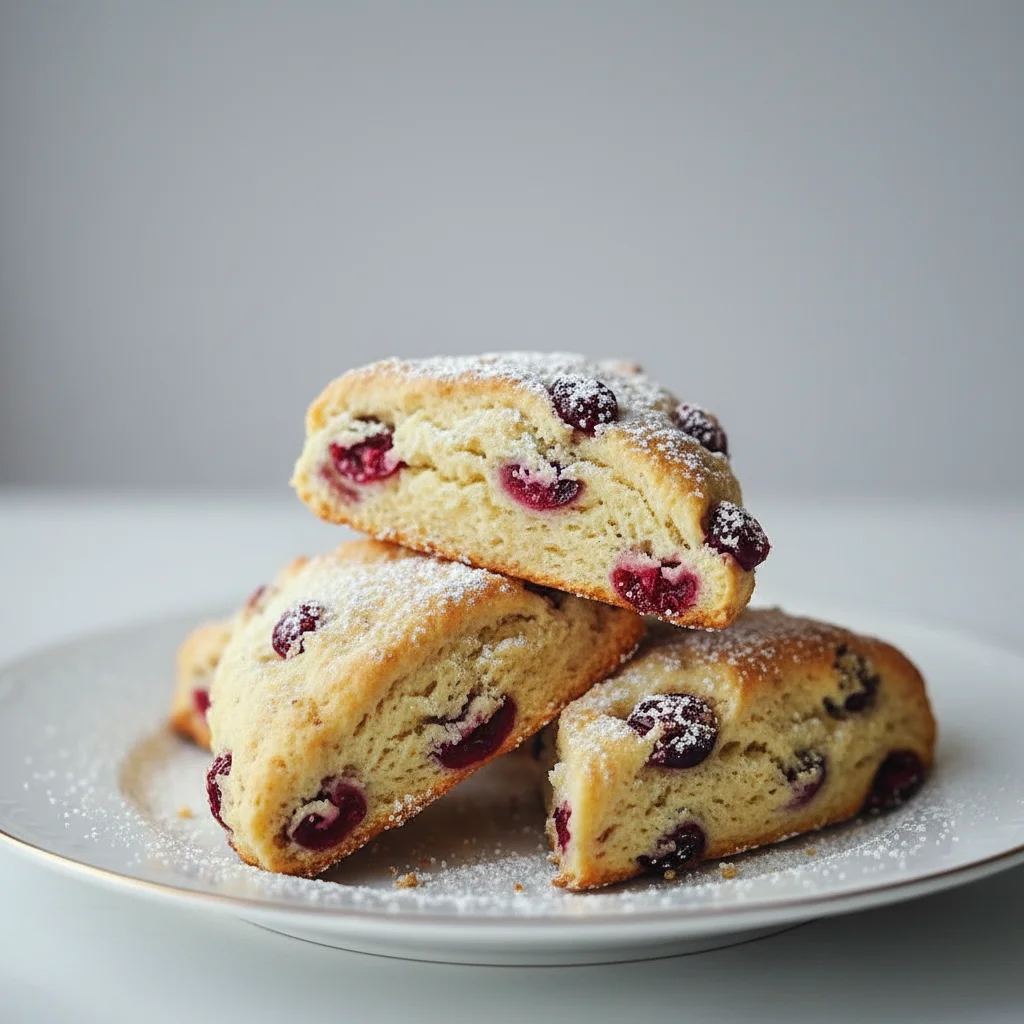
There’s a particular magic that happens when you combine the bright, zesty notes of orange with the sweet-tart burst of cranberries. It’s a pairing that feels both festive and comforting, perfect for brightening up a grey morning or adding a special touch to afternoon tea. I first fell in love with this combination at a tiny bakery in the Cotswolds during a winter trip, and I spent weeks afterwards trying to recreate that perfectly tender, flavourful scone. This Orange Cranberry Scones recipe is the result of that quest, and it’s one I come back to time and time again.
What makes these scones so delightful is the texture. We’re aiming for a scone that is light and fluffy on the inside with a slightly crisp, golden-brown exterior. The key is using very cold butter and a gentle hand, which creates those wonderful flaky layers. The scent that fills your kitchen as they bake—that warm, citrusy aroma—is reason enough to make them. They are substantial enough for a weekend breakfast but elegant enough to serve when you have guests.
This is a wonderful recipe for anyone who enjoys baking but doesn’t want to spend hours in the kitchen. It comes together in about 30 minutes, using straightforward techniques that deliver brilliant results. Whether you’re a seasoned baker or just starting, you’ll find this recipe a joy to make. Serve them warm from the oven with a generous dollop of clotted cream and a cup of tea for a truly lovely treat.
Recipe Overview
This Orange Cranberry Scones recipe yields wonderfully tender, moist scones packed with flavour. The bright citrus from the orange zest cuts through the richness of the butter, while the dried cranberries provide lovely pockets of chewy tartness. They have a classic scone structure – tall and light, not dense or cakey. After testing this a dozen times, I found that using buttermilk gives them an extra soft crumb and a subtle tang that works beautifully with the fruit.
- Prep Time: 15 minutes
- Cook Time: 12-15 minutes
- Total Time: 30 minutes
- Servings: 8-10 scones
- Difficulty: Easy
Why You’ll Love This Orange Cranberry Scones Recipe
- Sublime Flavour and Texture: You get a buttery, tender crumb that practically melts in your mouth, studded with chewy, tart cranberries and infused with the fragrant zest of fresh orange. The optional orange glaze adds a final sweet, citrusy finish.
- Ready in Under 35 Minutes: From gathering your ingredients to pulling a tray of golden scones from the oven, the whole process is delightfully swift. It’s ideal when you want a freshly baked treat without a long wait.
- A Versatile Recipe: Feel free to swap the orange for lemon or lime zest, or exchange the cranberries for dried cherries or chopped apricots. You could even add a handful of white chocolate chips for a more decadent version.
- Works Beautifully for Any Occasion: These are just as at home at a relaxed weekend breakfast as they are on a tiered stand for a classic afternoon tea. They’re also a fantastic addition to a holiday brunch menu.
- Family Tested and Approved: My children adore these, especially when they’re still slightly warm. Friends always ask me for this recipe after trying them, and it has become a staple for our Christmas morning breakfast.
Ingredients You’ll Need
For the best scones, starting with cold, high-quality ingredients is essential. I always use a good block butter, like a British or Irish one, as its higher fat content contributes to a richer flavour and flakier texture. Don’t be tempted by margarine here!
- 450g self-raising flour, plus extra for dusting
- 1 tsp baking powder
- ½ tsp salt
- 75g caster sugar
- 115g unsalted butter, cold and cut into small cubes
- 150g dried cranberries
- Zest of 1 large orange
- 250ml buttermilk, cold (or use whole milk with 1 tbsp lemon juice, let sit for 5 mins)
- 1 large egg, beaten with 1 tbsp milk (for the egg wash)
- For the Optional Orange Glaze:
- 100g icing sugar, sifted
- 2-3 tbsp fresh orange juice
Ashley’s Tip: Pop your butter in the freezer for 10-15 minutes before you start. This ensures it stays truly cold as you work it into the flour, which is the secret to getting that perfect, light scone texture.
How to Make Orange Cranberry Scones
The process for making these scones is very traditional and relies on a light touch. Remember, the less you handle the dough, the more tender your final bake will be. We’re aiming for a slightly shaggy, rustic dough.
- Prepare Your Station: Preheat your oven to 200°C (180°C fan) and line a large baking tray with baking parchment.
- Combine Dry Ingredients: In a large mixing bowl, whisk together the self-raising flour, baking powder, salt, and caster sugar. This aerates the flour and ensures everything is evenly distributed.
- Rub in the Butter: Add the cold, cubed butter to the flour mixture. Using your fingertips, rub the butter into the flour until the mixture resembles coarse breadcrumbs with a few larger, pea-sized pieces of butter remaining. Work quickly to prevent the butter from melting. I find a pastry cutter can be very helpful for this step.
- Add Flavourings: Stir in the dried cranberries and fresh orange zest until they are evenly spread throughout the mixture.
- Bring the Dough Together: Make a well in the centre of the flour mixture and pour in most of the cold buttermilk. Using a palette knife or your hands, gently mix until a soft, slightly sticky dough begins to form. Add the remaining buttermilk only if needed – you don’t want the dough to be too wet.
- Shape the Scones: Tip the dough onto a lightly floured surface. Gently bring it together with your hands and knead it very briefly—no more than 4-5 times—just until it’s smooth. Pat the dough out to a thickness of about 3cm (just over an inch).
- Cut and Arrange: Using a 6cm round cutter, press straight down into the dough to cut out your scones. Avoid twisting the cutter, as this can seal the edges and prevent them from rising evenly. Place the scones on your prepared baking tray, leaving a little space between them. Gently re-form the scraps to cut out more scones.
- Brush and Bake: Brush the tops of the scones (avoiding the sides) with the prepared egg wash. This will give them a lovely golden, glossy finish. Bake for 12-15 minutes, or until well-risen and a deep golden brown.
- Cool and Glaze: Transfer the baked scones to a wire rack to cool slightly. While they cool, whisk the sifted icing sugar and orange juice together in a small bowl to make the glaze. Drizzle it over the warm scones and let it set before serving.
Tips From My Kitchen
- Temperature is Everything: Keep all your wet ingredients—butter, buttermilk, and egg—chilled right until you use them. Cold ingredients create steam in the hot oven, which pushes up the layers of dough to create a light, flaky scone. For more on the science, BBC Good Food has a great guide.
- The Gentle Touch: The most common mistake with scones is overworking the dough. I learned that the moment it comes together, you should stop mixing. Over-kneading develops gluten, which results in tough, chewy scones instead of light, tender ones.
- Make-Ahead Method: You can prepare the dough, cut out the scones, and arrange them on a baking tray. Cover them tightly with cling film and refrigerate for up to 24 hours. You can also freeze the unbaked scones; just bake them from frozen, adding a few extra minutes to the cooking time.
- Storage for Freshness: Scones are at their absolute best on the day they are baked. Store any leftovers in an airtight container at room temperature for up to 2 days. You can refresh them by warming them in the oven at 150°C for 5 minutes.
Common Mistakes to Avoid
- Overworking the Dough: This is the number one issue. As soon as the flour is hydrated, stop mixing. A shaggy, slightly messy dough is exactly what you want. It might feel wrong, but it’s the secret to a tender bake.
- Using Warm Ingredients: If your butter is soft or your milk is at room temperature, the butter will melt into the flour instead of staying in small pieces. This results in flat, greasy scones that don’t rise properly. Always use ingredients straight from the fridge.
- Not Chilling the Dough: If your kitchen is warm, or if you’ve handled the dough a bit, it’s a great idea to pop the cut scones in the fridge for 15 minutes before baking. This re-chills the butter, ensuring a better rise and flakier texture.
Delicious Variations to Try
While this cranberry orange scone recipe is a favourite, it’s also a fantastic base for experimentation. Here are a few ideas to get you started:
- Festive Spices: Add ½ teaspoon of mixed spice or ground cinnamon to the dry ingredients for a warming, festive flavour that pairs beautifully with the orange and cranberry.
- Vegan-Friendly Option: To make these plant-based, use a good quality vegan butter block (the hard kind, not a soft spread) and a plant-based milk like oat or soy milk with a squeeze of lemon juice to mimic buttermilk.
- Try Different Fruits: Swap the dried cranberries for an equal amount of chopped dried apricots, sour cherries, or even crystallised ginger for a completely different profile. White chocolate chips are also a decadent addition!
What to Serve With Orange Cranberry Scones
These scones are truly magnificent on their own, but serving them with the right accompaniments elevates the experience. They are a wonderful part of a larger breakfast spread, perhaps alongside my Creamy Peanut Butter Smoothie Recipe for a balanced start to the day.
- Clotted Cream and Jam: The traditional and, in my opinion, best way to serve them. The thick, rich clotted cream and a good quality strawberry or raspberry jam are the perfect partners.
- Orange or Lemon Curd: Lean into the citrus theme by serving them with a sharp, tangy lemon or orange curd. The brightness is a fantastic contrast to the buttery scone.
- A Pot of Tea: A classic Earl Grey or a simple English Breakfast tea is the ideal beverage pairing. The tannins in the tea cut through the richness beautifully. For a lighter option, a fresh Instant Coffee Iced Coffee also works well on a warm day.
Frequently Asked Questions
Orange Cranberry Scones
Ingredients
Method
- Prepare Your Station: Preheat your oven to 200°C (180°C fan) and line a large baking tray with baking parchment.
- Combine Dry Ingredients: In a large mixing bowl, whisk together the self-raising flour, baking powder, salt, and caster sugar. This aerates the flour and ensures everything is evenly distributed.
- Rub in the Butter: Add the cold, cubed butter to the flour mixture. Using your fingertips, rub the butter into the flour until the mixture resembles coarse breadcrumbs with a few larger, pea-sized pieces of butter remaining. Work quickly to prevent the butter from melting. I find a pastry cutter can be very helpful for this step.
- Add Flavourings: Stir in the dried cranberries and fresh orange zest until they are evenly spread throughout the mixture.
- Bring the Dough Together: Make a well in the centre of the flour mixture and pour in most of the cold buttermilk. Using a palette knife or your hands, gently mix until a soft, slightly sticky dough begins to form. Add the remaining buttermilk only if needed – you don't want the dough to be too wet.
- Shape the Scones: Tip the dough onto a lightly floured surface. Gently bring it together with your hands and knead it very briefly—no more than 4-5 times—just until it's smooth. Pat the dough out to a thickness of about 3cm (just over an inch).
- Cut and Arrange: Using a 6cm round cutter, press straight down into the dough to cut out your scones. Avoid twisting the cutter, as this can seal the edges and prevent them from rising evenly. Place the scones on your prepared baking tray, leaving a little space between them. Gently re-form the scraps to cut out more scones.
- Brush and Bake: Brush the tops of the scones (avoiding the sides) with the prepared egg wash. This will give them a lovely golden, glossy finish. Bake for 12-15 minutes, or until well-risen and a deep golden brown.
- Cool and Glaze: Transfer the baked scones to a wire rack to cool slightly. While they cool, whisk the sifted icing sugar and orange juice together in a small bowl to make the glaze. Drizzle it over the warm scones and let it set before serving.
Notes
I hope you adore this Orange Cranberry Scones recipe as much as my family and I do. There’s something so satisfying about pulling a tray of these golden, fragrant treats from the oven. They represent simple, honest baking at its finest. If you give them a try, please let me know how they turned out in the comments below. Happy baking!