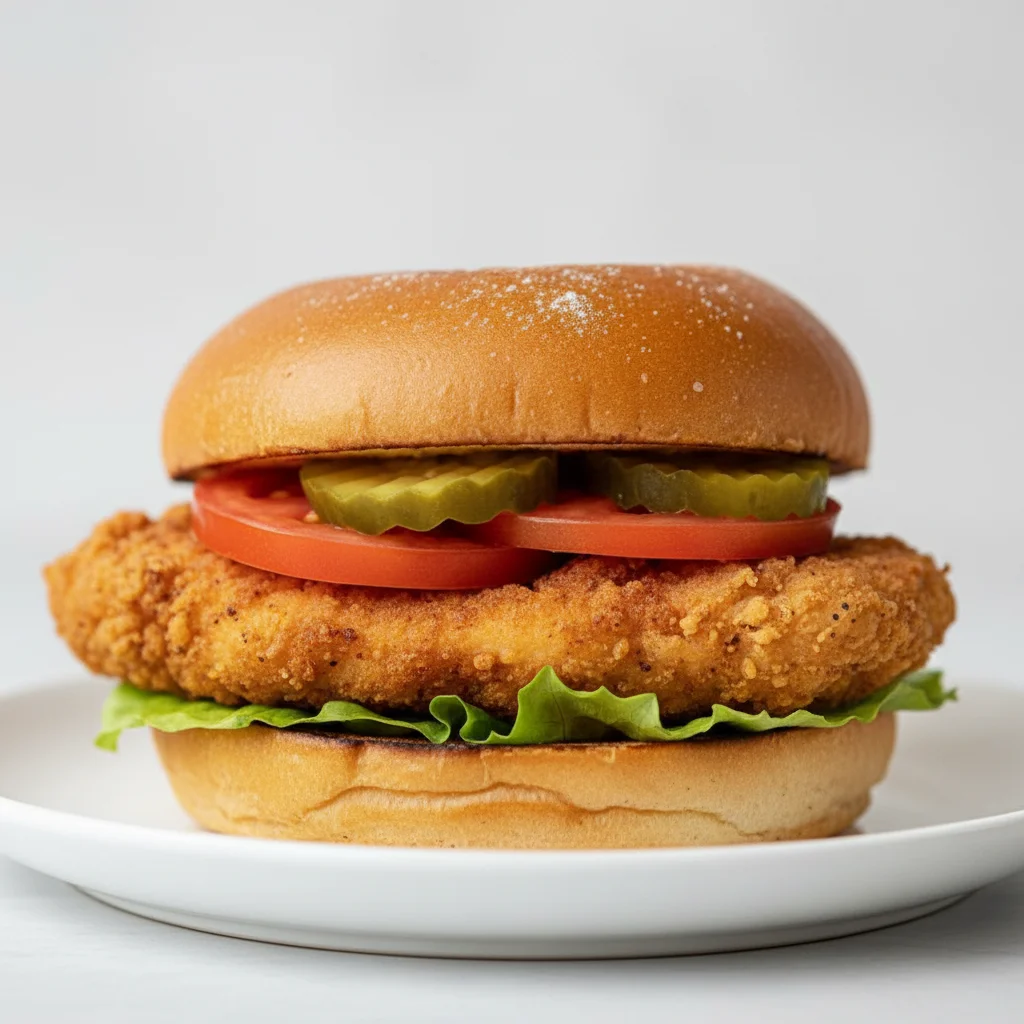
Copycat Chick Sandwich Recipe Fried
There are some takeaway meals that linger in your memory, the ones you find yourself craving on a Tuesday afternoon. For our family, a certain fried chicken sandwich has always been at the top of that list. After countless attempts and a lot of taste-testing (a tough job, I know!), I finally cracked the code to recreate that magic at home. This copycat chick sandwich recipe isn’t just about mimicking a famous fast food item; it’s about elevating it, using quality ingredients to create something truly special right in your own kitchen. This is my go-to recipe when I need something that feels like a treat but is genuinely straightforward to pull together.
What makes this fried chicken sandwich stand out is the texture and flavour we build in every step. We start with a tangy, savoury brine that tenderises the chicken and infuses it with moisture. Then comes the coating – a light but craggy, ultra-crispy crust seasoned with a secret blend of spices that provides a gentle warmth without being overpowering. Tucked into a soft, toasted brioche bun with a couple of crisp gherkin slices and a slick of creamy mayonnaise, it’s a masterclass in balance. It’s the kind of lunch recipe that makes a weekend feel special, but it’s also manageable for a weeknight dinner when you want to impress.
Recipe Overview
This recipe guides you through creating an exceptionally crispy and juicy fried chicken sandwich that rivals your favourite takeaway version. The key is a buttermilk and pickle brine, followed by a double dredge in seasoned flour. The result is a chicken fillet with a shatteringly crisp coating and incredibly tender meat. From my testing, I found that letting the chicken rest after breading is crucial; it helps the coating adhere properly during frying, so don’t be tempted to skip it!
- Prep Time: 20 minutes (plus 1 hour brining)
- Cook Time: 15 minutes
- Total Time: 35 minutes (plus brining)
- Servings: 4 people
- Difficulty: Medium
Why You’ll Love This Copycat Chick Sandwich Recipe
- Genuine Flavour: The combination of the tangy pickle juice brine and the savoury, paprika-spiced coating creates a flavour profile that’s remarkably close to the beloved fast food original, but with a fresher, more vibrant taste.
- Ready in Under 40 Minutes: Excluding the brining time (which is mostly hands-off), you can have these incredible sandwiches on the table in about 35 minutes.
- Flexible Recipe: You can easily adjust the spice level by adding more cayenne pepper to the flour mixture or swap the mayo for a zesty sauce. I sometimes make an Authentic Tzatziki Sauce Recipe Dip for a fresher twist.
- Great for a Weekend Lunch: This recipe works wonderfully for a Saturday lunch with friends or a relaxed family dinner. It feels indulgent and satisfying.
- Family Tested: My kids absolutely devour this every time I make it. Seeing their happy faces is all the proof I need that this fried chicken sandwich recipe is a winner.

Ingredients You’ll Need
We’re using simple, accessible ingredients to build big flavour. For the chicken, I always opt for skinless, boneless chicken breasts that are plump and evenly sized. When it comes to the brine, a good quality dill pickle juice makes all the difference – I find the juice from a jar of Vlasic or a similar brand works beautifully.
- For the Brine:
- 240ml buttermilk
- 120ml dill pickle juice (from a jar)
- 1 teaspoon salt
- 4 medium skinless, boneless chicken breasts (around 150g each)
- For the Coating:
- 200g plain flour
- 50g cornflour
- 2 tablespoons icing sugar
- 2 teaspoons paprika
- 1 teaspoon garlic powder
- 1 teaspoon onion powder
- 1 teaspoon black pepper
- ½ teaspoon cayenne pepper (optional, or to taste)
- 1 teaspoon salt
- For Frying and Assembly:
- Approx. 1 litre vegetable or rapeseed oil, for frying
- 4 brioche buns
- Butter, for toasting the buns
- Mayonnaise
- Sliced dill pickles (gherkins)
Ashley’s Tip: The icing sugar in the flour coating might seem odd, but it helps the crust brown beautifully and adds a very subtle sweetness that balances the savoury spices. Don’t skip it!
How to Make This Copycat Chick Sandwich Recipe
The process is broken down into three main stages: brining, coating, and frying. We’ll work methodically to ensure each chicken fillet is perfectly prepared for its turn in the hot oil, guaranteeing that signature crispy chicken texture.
- Brine the Chicken: In a medium bowl, whisk together the buttermilk, pickle juice, and 1 teaspoon of salt. Place the chicken breasts between two sheets of cling film and gently pound them to an even thickness of about 2cm. This ensures they cook evenly. Add the chicken to the brine, ensuring it’s fully submerged. Cover and refrigerate for at least 1 hour, or up to 4 hours.
- Prepare the Coating: While the chicken brines, prepare your dredging station. In a wide, shallow dish, whisk together the plain flour, cornflour, icing sugar, paprika, garlic powder, onion powder, black pepper, cayenne pepper, and 1 teaspoon of salt. Mix until everything is thoroughly combined.
- Coat the Chicken: Remove one piece of chicken from the brine, allowing any excess to drip off. Dredge it thoroughly in the seasoned flour mixture, pressing down gently to ensure the flour adheres all over. Dip it back into the buttermilk brine for a second, then dredge it once more in the flour. This double-dredge is key for an extra-crispy coating. Set the coated chicken on a wire rack and repeat with the remaining fillets.
- Rest the Chicken: Let the coated chicken rest on the wire rack for 15-20 minutes. I find this step is essential for helping the coating set and stick to the chicken during frying.
- Heat the Oil: Pour the oil into a large, heavy-bottomed pan or Dutch oven to a depth of about 4-5cm. Heat over a medium-high heat until it reaches 175°C (350°F). Use a cooking thermometer for accuracy.
- Fry the Chicken: Carefully place two chicken fillets into the hot oil, ensuring not to overcrowd the pan. Fry for 4-6 minutes on each side, until the coating is a deep golden brown and the chicken is cooked through. The internal temperature should reach 74°C (165°F).
- Drain and Rest: Remove the cooked chicken from the oil and place it back on the wire rack to drain any excess oil. Let it rest for a few minutes while you fry the remaining chicken.
- Assemble the Sandwiches: While the chicken rests, lightly butter the cut sides of your brioche buns and toast them in a dry frying pan until golden. Spread a generous layer of mayonnaise on the top and bottom bun, add the crispy chicken fillet, top with a few slices of dill pickle, and place the top bun on. Serve immediately.
Tips From My Kitchen
- Temperature Control: The oil temperature is paramount for achieving crispy, not greasy, chicken. I always use a digital thermometer to monitor the oil. If it drops too low, the chicken will absorb oil; if it’s too high, the coating will burn before the centre is cooked. For official guidance on cooking chicken safely, the Food Standards Agency provides excellent advice.
- The Secret Step: After the first dredge in flour, I learned that pressing the flour firmly onto the chicken helps create those desirable craggy, crunchy bits. When you do the second dredge, just lightly toss it to keep the texture varied and interesting.
- Make-Ahead: You can brine the chicken for up to 4 hours in advance. The seasoned flour mixture can also be prepared and stored in an airtight container for weeks, making future fried chicken endeavours even quicker.
- Storage: Leftover fried chicken can be stored in an airtight container in the refrigerator for up to 2 days. To reheat and bring back the crispiness, place it on a wire rack on a baking sheet and heat in an oven at 200°C (180°C fan) for 10-15 minutes.
Equipment You’ll Need
- Large heavy-bottomed frying pan or Dutch oven
- Digital cooking thermometer
- Wire rack and baking sheet
- Two shallow dishes (for dredging)
- Tongs
Common Mistakes to Avoid
- Overcrowding the pan: Frying too many pieces at once will cause the oil temperature to drop significantly, resulting in soggy, greasy chicken. Fry in batches of two to maintain a stable temperature.
- Wrong oil temperature: As mentioned, 175°C is the sweet spot. Guessing the temperature is a common mistake that leads to poor results. A thermometer is your best friend here.
- Skipping the rest time: Don’t fry the chicken immediately after coating. Letting it rest for at least 15 minutes helps the coating hydrate and form a solid layer that won’t fall off in the fryer.
Delicious Variations to Try
Once you’ve mastered the basic recipe, it’s fun to experiment. This fried chicken sandwich is a wonderful base for customisation.
- Spicy Version: Add 1-2 teaspoons of hot smoked paprika or extra cayenne pepper to the flour mixture. You can also toss the freshly fried chicken in a sauce made from hot sauce and a little melted butter.
- Vegetarian Option: This recipe works surprisingly well with thick slices of firm tofu or halloumi. Press the tofu well to remove excess water, then follow the same brining and dredging process (a shorter brine is fine for tofu).
- Different Protein: While this is a copycat chick sandwich recipe, the brine and coating are fantastic on boneless, skinless chicken thighs too. They are more forgiving and stay exceptionally juicy. For another great chicken idea, check out this Chicken Fried Chicken Recipe.
What to Serve With This Copycat Chick Sandwich Recipe
A great sandwich deserves equally great companions. We like to keep it classic but with a little extra something to make the meal complete.
- Classic Chips: A pile of salty, crispy French fries or thicker-cut chips is the natural partner here.
- Creamy Coleslaw: A tangy, creamy coleslaw provides a cool, crunchy contrast to the warm, crispy chicken.
- A Crisp Lager: A light, refreshing lager or pilsner cuts through the richness of the fried chicken beautifully. For a non-alcoholic option, a sharp, fizzy lemonade works a treat. For an even more filling meal, pair it with our Hearty Lentil Soup.
Frequently Asked Questions
Copycat Chick Sandwich Recipe
Ingredients
Method
- Brine the Chicken: In a medium bowl, whisk together the buttermilk, pickle juice, and 1 teaspoon of salt. Place the chicken breasts between two sheets of cling film and gently pound them to an even thickness of about 2cm. This ensures they cook evenly. Add the chicken to the brine, ensuring it's fully submerged. Cover and refrigerate for at least 1 hour, or up to 4 hours.
- Prepare the Coating: While the chicken brines, prepare your dredging station. In a wide, shallow dish, whisk together the plain flour, cornflour, icing sugar, paprika, garlic powder, onion powder, black pepper, cayenne pepper, and 1 teaspoon of salt. Mix until everything is thoroughly combined.
- Coat the Chicken: Remove one piece of chicken from the brine, allowing any excess to drip off. Dredge it thoroughly in the seasoned flour mixture, pressing down gently to ensure the flour adheres all over. Dip it back into the buttermilk brine for a second, then dredge it once more in the flour. This double-dredge is key for an extra-crispy coating. Set the coated chicken on a wire rack and repeat with the remaining fillets.
- Rest the Chicken: Let the coated chicken rest on the wire rack for 15-20 minutes. I find this step is essential for helping the coating set and stick to the chicken during frying.
- Heat the Oil: Pour the oil into a large, heavy-bottomed pan or Dutch oven to a depth of about 4-5cm. Heat over a medium-high heat until it reaches 175°C (350°F). Use a cooking thermometer for accuracy.
- Fry the Chicken: Carefully place two chicken fillets into the hot oil, ensuring not to overcrowd the pan. Fry for 4-6 minutes on each side, until the coating is a deep golden brown and the chicken is cooked through. The internal temperature should reach 74°C (165°F).
- Drain and Rest: Remove the cooked chicken from the oil and place it back on the wire rack to drain any excess oil. Let it rest for a few minutes while you fry the remaining chicken.
- Assemble the Sandwiches: While the chicken rests, lightly butter the cut sides of your brioche buns and toast them in a dry frying pan until golden. Spread a generous layer of mayonnaise on the top and bottom bun, add the crispy chicken fillet, top with a few slices of dill pickle, and place the top bun on. Serve immediately.
Notes
I really hope you give this copycat chick sandwich recipe a try. It’s one of those recipes that delivers pure satisfaction and brings a little bit of that takeaway joy right into your home. It always gets compliments in our house, and I’m sure it will in yours too. If you make it, please let me know how it turned out in the comments below! Happy cooking, Ashley.