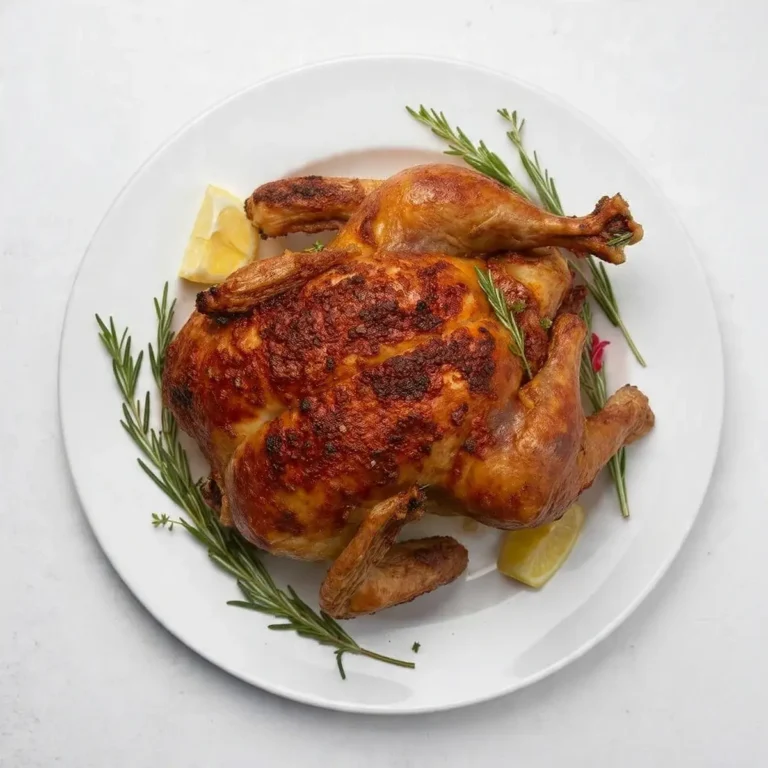
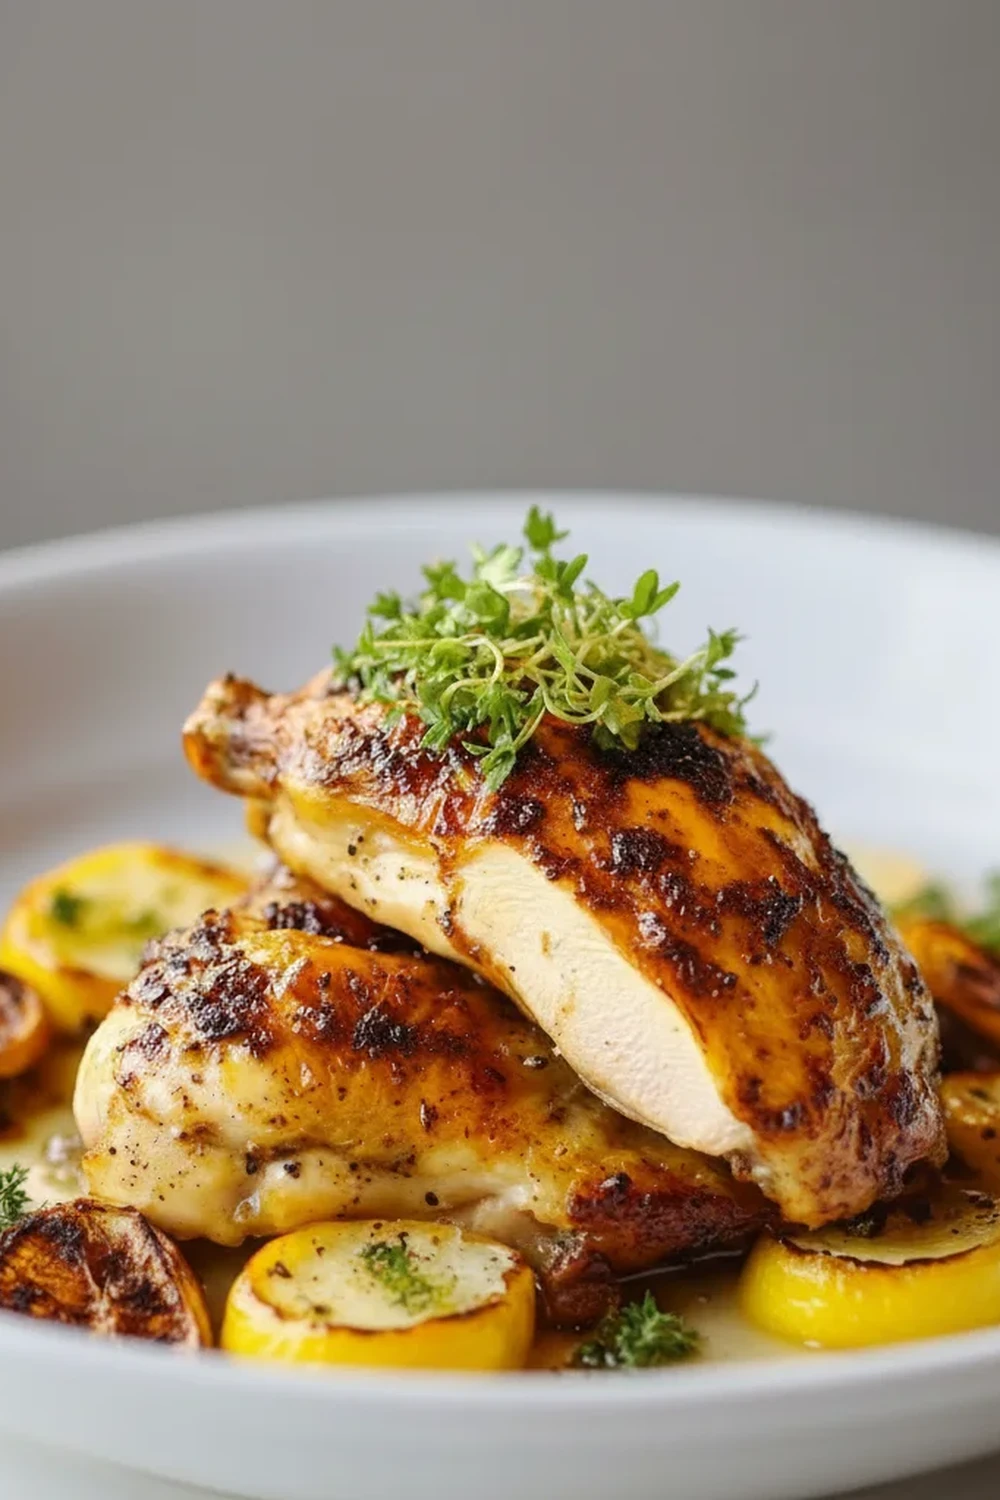
Roasted Chicken Recipe Whole Bird
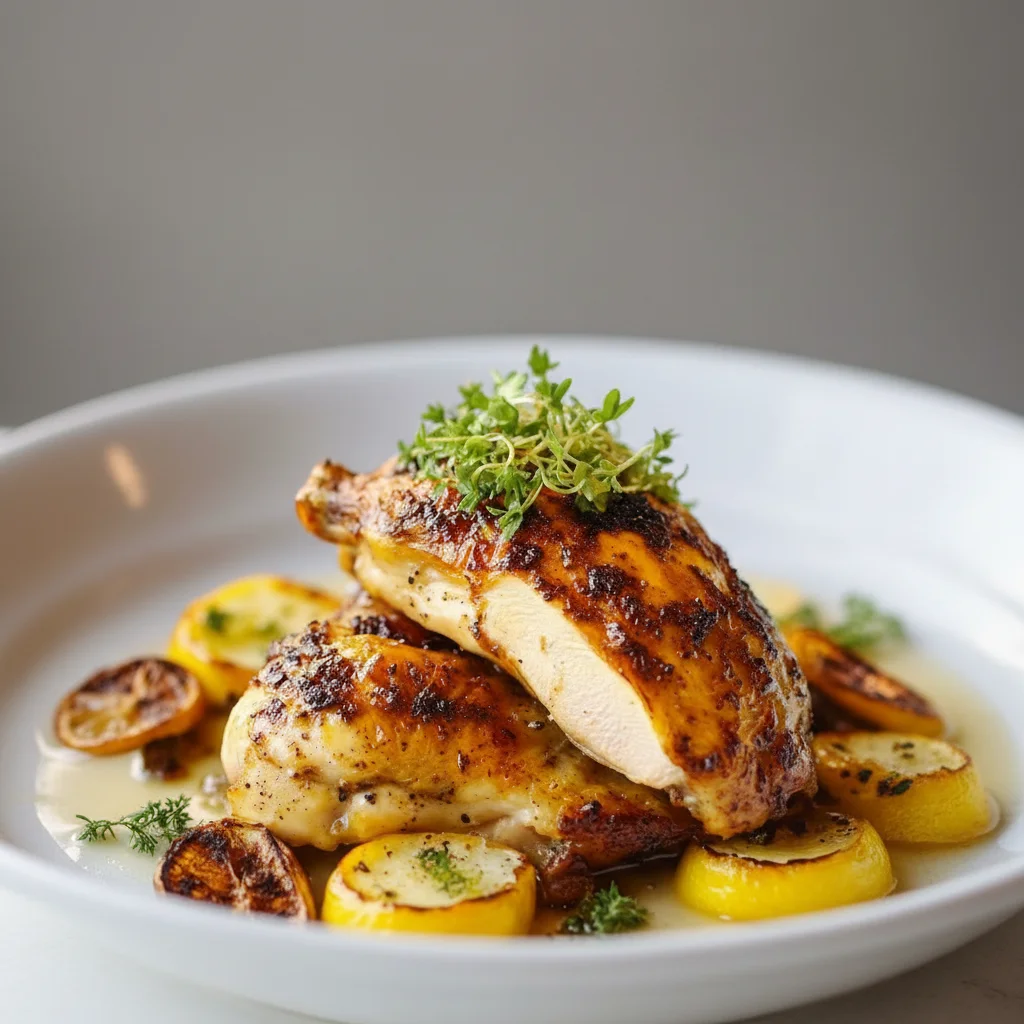
There is something truly special about the aroma of a whole chicken roasting in the oven. It’s a scent that fills the house with warmth and promises a deeply satisfying meal. For me, it signals a pause in the week, a time to gather around the table for a proper Sunday dinner. This roasted chicken recipe is the one I turn to time and time again; it’s a method I’ve refined over years of testing in my own kitchen to guarantee that sought-after combination: incredibly moist, flavourful meat and skin so crispy it crackles when you cut into it. I make this at least once a week – it’s become a family favourite.
What makes this particular recipe stand out is the herb and garlic butter, which we gently slide under the skin. As the chicken roasts, the butter melts and continuously bastes the breast meat, keeping it succulent while infusing it with aromatic flavour from the inside out. A simple lemon and a few cloves of garlic placed in the cavity steam the bird, adding another layer of brightness and depth. This isn’t just about cooking a chicken; it’s about creating a centrepiece that is both impressive and wonderfully straightforward to prepare.
This is the definitive oven roasted chicken for anyone wanting to master a timeless dish. It works beautifully for a weekend family meal, a special dinner for two with plenty of leftovers, or even for meal prepping at the start of the week. The tender meat shreds beautifully for salads, sandwiches, or for adding to a hearty bowl of my Lentil Soup Recipe Hearty Comfort.
Recipe Overview
This recipe focuses on simple, high-quality ingredients to create a truly memorable golden chicken. We use a high-heat roasting method to ensure the skin gets golden and crisp while the inside remains juicy. After testing various methods, I found that letting the chicken sit at room temperature for a short while before it goes in the oven makes a significant difference to how evenly it cooks.
- Prep Time: 20 minutes
- Cook Time: 1 hour 20 minutes
- Total Time: 1 hour 40 minutes
- Servings: 4-6 people
- Difficulty: Medium
Why You’ll Love This Roasted Chicken Recipe
- Sublime Flavour and Texture: The combination of softened butter, fresh thyme, and minced garlic creates a self-basting system under the skin, resulting in exceptionally tender meat, while the high-heat method guarantees that gorgeously crisp, golden-brown skin.
- Ready in Under Two Hours: From fridge to table, this impressive main course is ready in about 1 hour and 40 minutes, with only 20 minutes of active preparation time. The oven does all the hard work.
- Easily Adaptable: You can easily swap the herbs. Rosemary and sage work wonderfully, especially in the autumn months. You can also place the chicken on a bed of root vegetables like carrots and parsnips to cook all at once.
- Ideal for a Sunday Dinner: This is the quintessential centrepiece for a family meal. It fills the home with an inviting aroma and pairs well with all the classic trimmings, from roast potatoes to steamed greens.
- Family Tested: This recipe always gets compliments in my house. My children argue over who gets the drumsticks, and the crispy skin is always the first thing to disappear from the platter!
Ingredients You’ll Need
We’re using classic ingredients that complement the chicken beautifully. I always opt for a good-quality, free-range chicken; the flavour is noticeably better. When it comes to the butter, using unsalted allows us to control the seasoning perfectly, which is key for the final taste.
- 1 whole chicken (approx. 1.6 – 1.8 kg)
- 75g unsalted butter, softened to room temperature
- 4 cloves garlic, minced
- 3 sprigs fresh thyme, leaves picked, plus a few whole sprigs
- 1 whole lemon
- 1 tbsp olive oil
- 1 tsp sea salt flakes (I prefer Maldon for its texture)
- 1/2 tsp freshly ground black pepper
- 1 large onion, peeled and quartered
- 2 medium carrots, roughly chopped
Ashley’s Tip: Make sure your butter is properly softened, not melted. If it’s too liquid, it won’t mix well with the herbs and will slide right off the chicken instead of staying put under the skin.
How to Make Roasted Chicken Recipe
The process is all about layering flavours and paying attention to a few key techniques. Ensuring the chicken is dry is the most critical first step for achieving that crispy skin we all crave. Let’s walk through it together.
- Prepare the Chicken: Preheat your oven to 200°C (180°C fan). Remove the chicken from its packaging and take out any giblets from the cavity. Pat the chicken thoroughly dry all over with kitchen paper. This is non-negotiable for crispy skin! Let it sit at room temperature for about 30 minutes.
- Make the Herb Butter: In a small bowl, combine the softened butter, minced garlic, and picked thyme leaves. Mix well until everything is evenly incorporated.
- Season Under the Skin: Gently slide your fingers between the skin and the breast meat to create a pocket. Be careful not to tear the skin. I find that using the back of a small spoon helps to create space without piercing the skin. Push about two-thirds of the herb butter into this pocket and spread it as evenly as you can over the breast meat.
- Season the Outside: Rub the remaining butter all over the outside of the chicken. Drizzle with olive oil and generously season all over with the sea salt flakes and freshly ground black pepper.
- Prepare the Cavity: Halve the lemon. Prick one half all over with a fork and place it inside the chicken’s cavity along with a few whole sprigs of thyme and 2-3 of the minced garlic cloves if you have any left over.
- Set Up the Roasting Tin: Scatter the quartered onion and chopped carrots on the bottom of a roasting tin. This will create a ‘trivet’ for the chicken to sit on, allowing air to circulate and preventing the bottom from becoming soggy. It also flavours the pan drippings for a fantastic gravy.
- Roast the Chicken: Place the prepared chicken on top of the vegetables in the roasting tin. Roast in the preheated oven for 1 hour and 20 minutes, or until the juices run clear when you pierce the thickest part of the thigh. A good guide is 20 minutes per 450g, plus an extra 20 minutes.
- Check for Doneness: For complete peace of mind, use a meat thermometer. The internal temperature should be at least 74°C in the thickest part of the thigh, avoiding the bone. For detailed guidance, the Food Standards Agency offers excellent advice on cooking chicken safely.
- Rest the Chicken: This is a vital step! Transfer the chicken to a carving board, cover it loosely with foil, and let it rest for 15-20 minutes before carving. This allows the juices to redistribute throughout the meat, ensuring every slice is moist and tender.
Tips From My Kitchen
- Temperature is Key: Roasting at a consistent 200°C (180°C fan) provides the perfect balance, cooking the chicken through while making the skin wonderfully crisp. A reliable oven thermometer can help ensure your oven is at the correct temperature.
- The Secret to Crispy Skin: For the ultimate crispy skin, try a dry brine. The day before, pat the chicken dry and season it generously with salt. Leave it uncovered on a tray in the fridge overnight. I learned that this draws out excess moisture from the skin, guaranteeing a beautifully crisp finish.
- Make-Ahead Prep: You can make the herb butter up to 3 days in advance and store it in the fridge. You can also prep and season the chicken (without stuffing it) up to 24 hours ahead of time. Just remember to take it out of the fridge 30-60 minutes before roasting.
- Storing Leftovers: Allow the leftover chicken to cool completely, then store it in an airtight container in the fridge for up to 4 days. It’s fantastic for adding to other meals, like my flavourful Stuffed Peppers With Rice Recipe Dinner.
Equipment You’ll Need
- A large roasting tin or oven-safe skillet
- Sharp knife and cutting board
- A small mixing bowl
- Kitchen paper
- Meat thermometer (highly recommended)
- Kitchen twine (optional, for trussing the legs)
Common Mistakes to Avoid
- Not Drying the Chicken Skin: Any moisture left on the skin will turn to steam in the oven, preventing it from getting brown and crispy. Be meticulous with the kitchen paper!
- Cooking from Cold: Placing a cold chicken straight from the fridge into a hot oven can lead to uneven cooking. Letting it sit on the counter for 30-60 minutes helps it cook more evenly.
- Skipping the Rest Time: If you carve the chicken immediately, all the delicious juices will run out onto the board, leaving you with dry meat. Resting is essential for a succulent result.
Delicious Variations to Try
Once you’ve mastered this base recipe, it’s fun to experiment with other flavour profiles. Here are a few ideas to get you started:
- Spicy Paprika Version: Add 1 teaspoon of smoked paprika and a pinch of cayenne pepper to the butter mixture for a smoky, spicy kick that gives the skin a gorgeous deep red hue.
- Mediterranean Flavours: Swap the thyme for fresh oregano and rosemary. Stuff the cavity with lemon, garlic, and a handful of black olives for a taste of the Mediterranean.
- One-Pan Dinner: Add 700g of chopped potatoes, parsnips, and butternut squash to the roasting tin during the last 45-50 minutes of cooking. Toss them in the pan juices for a complete meal.
–
What to Serve With This Roasted Chicken Recipe
A beautiful roasted chicken deserves equally delicious accompaniments. These are some of my go-to pairings:
- Classic Roast Potatoes: Fluffy on the inside and crispy on the outside, they are the ideal partner for soaking up the chicken juices.
- Steamed Green Beans with Almonds: A simple, fresh side that adds a bit of green and a lovely crunch to the plate.
- Homemade Gravy: Use the flavourful drippings from the bottom of the roasting tin to make a rich, savoury gravy. Simply skim off the excess fat, stir in a spoonful of flour, and gradually whisk in chicken stock until thickened.
- Wine Pairing: A lightly oaked Chardonnay complements the buttery notes of the chicken, while a light-bodied Pinot Noir is a great red wine option that won’t overpower the dish.
Frequently Asked Questions
Roasted Chicken Recipe
Ingredients
Method
- Prepare the Chicken: Preheat your oven to 200°C (180°C fan). Remove the chicken from its packaging and take out any giblets from the cavity. Pat the chicken thoroughly dry all over with kitchen paper. This is non-negotiable for crispy skin! Let it sit at room temperature for about 30 minutes.
- Make the Herb Butter: In a small bowl, combine the softened butter, minced garlic, and picked thyme leaves. Mix well until everything is evenly incorporated.
- Season Under the Skin: Gently slide your fingers between the skin and the breast meat to create a pocket. Be careful not to tear the skin. I find that using the back of a small spoon helps to create space without piercing the skin. Push about two-thirds of the herb butter into this pocket and spread it as evenly as you can over the breast meat.
- Season the Outside: Rub the remaining butter all over the outside of the chicken. Drizzle with olive oil and generously season all over with the sea salt flakes and freshly ground black pepper.
- Prepare the Cavity: Halve the lemon. Prick one half all over with a fork and place it inside the chicken's cavity along with a few whole sprigs of thyme and 2-3 of the minced garlic cloves if you have any left over.
- Set Up the Roasting Tin: Scatter the quartered onion and chopped carrots on the bottom of a roasting tin. This will create a 'trivet' for the chicken to sit on, allowing air to circulate and preventing the bottom from becoming soggy. It also flavours the pan drippings for a fantastic gravy.
- Roast the Chicken: Place the prepared chicken on top of the vegetables in the roasting tin. Roast in the preheated oven for 1 hour and 20 minutes, or until the juices run clear when you pierce the thickest part of the thigh. A good guide is 20 minutes per 450g, plus an extra 20 minutes.
- Check for Doneness: For complete peace of mind, use a meat thermometer. The internal temperature should be at least 74°C in the thickest part of the thigh, avoiding the bone. For detailed guidance, the Food Standards Agency offers excellent advice on cooking chicken safely.
- Rest the Chicken: This is a vital step! Transfer the chicken to a carving board, cover it loosely with foil, and let it rest for 15-20 minutes before carving. This allows the juices to redistribute throughout the meat, ensuring every slice is moist and tender.
Notes
There you have it—my tried-and-true method for a perfect oven roasted chicken. It’s a recipe that never fails to make an ordinary evening feel a little more special. I hope you and your family enjoy it as much as we do. If you try this recipe, please let me know how it turned out in the comments below. I love hearing from you!
You might also like these recipes
The Ultimate Air Fryer Whole Roasted Chicken Recipe
Oh, the majestic whole roasted chicken! For years, I chased that elusive perfectly crispy skin…
Healthy Greek Chicken Bowls With Feta & Fresh Veggies
Embrace the vibrant flavours of the Mediterranean with our comprehensive guide to healthy Greek chicken…
Garlic Butter Steak Pasta (Easy 30-Minute Meal)
Welcome to my kitchen! Today, we’re diving into a firm favourite that delivers incredible flavour…
Classic Italian Spaghetti & Meatballs In Tomato Sauce
When it comes to truly satisfying home cooking, nothing quite hits the spot like a…
Perfectly Juicy Air Fryer Boneless Skinless Chicken Breasts
Welcome to my kitchen, where today we’re diving into a recipe that’s become an absolute…
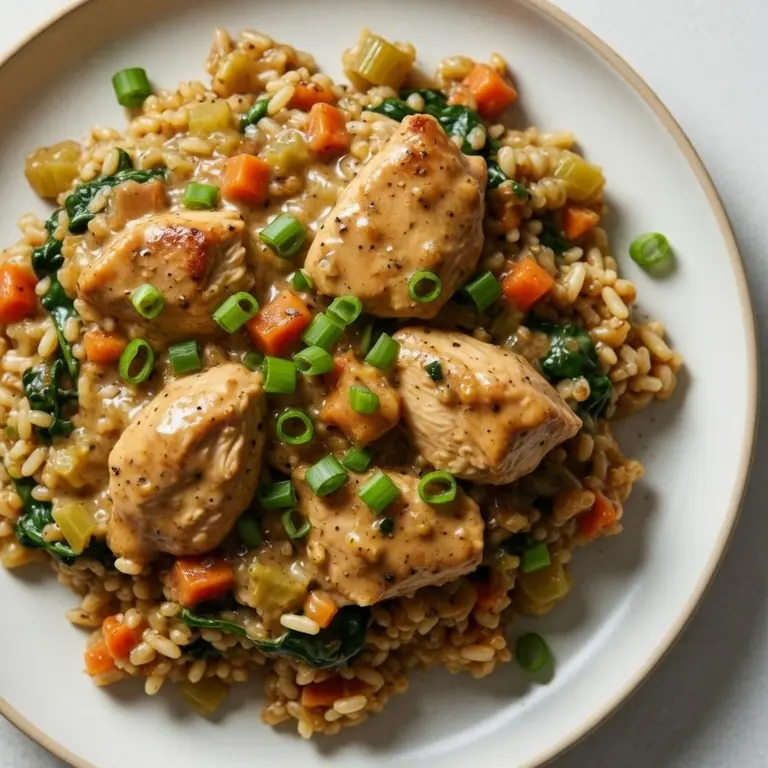
Healthy Smothered Chicken And Rice Casserole
There are some recipes that just become staples in your home, comforting and reliably delicious,…